Preface
It’s been a long time since I started writing I Love Ruby. I first projected this book as a toy programming book, but not anymore, this book is maturing into something serious. Possibly a book to be read by people who are serious about Ruby, hence this book is undergoing a dramatic change. This book is completely written in Asciidoc. It’s been proofread from top to bottom. All its examples are worked for Ruby 2.5, and finally this book is appearing online, epub, pdf and print. I hope you enjoy learning Ruby.
Ruby
Ruby is an easy to learn programming language, it was invented by a guy named Matz [1] in Japan. Ruby is a free [2] software and can be used by anyone for zero cost. Ruby’s popularity was initially confined to Japan, later it slowly trickled out to rest of the world. Things changed with the emergence of Ruby on Rails [3] which is a popular web-development framework written with Ruby.
I was thrilled when I started to program in Ruby. One of my first application was a student ranking software for my mom who was a teacher. I was able to write the console based application in just 32 lines!!! This opened my eyes and made me realize the power of Ruby. The language was simple, easy to learn and nearly perfect. Currently I am a professional Ruby on Rails programmer.
This book is written for GNU/Linux (Debian distro) users, that’s because I think GNU/Linux will conquer desktops of programmers in near future. Almost all who have Debian GNU/Linux based distro should feel at home while trying to learn Ruby using this book. If you are using other operating systems like Solaris, OSX or Windows please contact your Operating System help channels to learn how to install or get started with Ruby. You can also visit http://ruby-lang.org to learn how get started with Ruby.
Copyright
Copyright (c) 2009 - End of Universe, Karthikeyan A K
Permission is granted to copy, distribute and/or modify this document under the terms of the GNU Free Documentation License, Version 1.3 or any later version published by the Free Software Foundation; with no Invariant Sections, no Front-Cover Texts, and no Back-Cover Texts. A copy of the license can be found in http://www.gnu.org/copyleft/fdl.html
All code in this book is released under GPL V3 [4] or later.
Getting this book
You can get this book here https://i-love-ruby.gitlab.io/, and you can get the entire book and source code here https://gitlab.com/i-love-ruby/i-love-ruby.gitlab.io.
Contacting the Author
You can contact me, Karthikeyan A K on mindaslab@protonmail.com or via phone +91 8428050777 or on twitter @karthik_ak. I would love to hear from people who read my book, so do write to me if you feel so.
Prerequisite
This book provides you with enough knowledge to learn Ruby from scratch. But it will be good if you already know or have these things. The first thing is a GNU/Linux computer. I would recommend one to have Ubuntu https://ubuntu.com machine. This OS is becoming the OS of every good programmer. The second thing for you to do is to cultivate knowledge of GNU/Linux, you may read the tutorials on https://linuxjourney.com to get the knowledge. Once you have the knowledge, you will be in a better position to learn Ruby.
1. Installing Ruby
1.1. Installing Ruby on Debian flavor GNU/Linux
You need to install something called RVM (ruby version manager https://rvm.io) which will manage multiple ruby versions. Why? It’s because Ruby’s version changes so fast. Before you had 1.8, now 1.9, 2, and now we have Ruby 3. Apart from just using Ruby alone, you will also use it for other stuff like web development with packages such as Sinatra and Ruby on Rails. You might need to change from one version to other without uninstalling and reinstalling ruby again and again. RVM manages this for you. With simple commands we can switch between Ruby versions easily.
Installing RVM :
OK, to install RVM, you need to have curl (a program that can download things). To get curl, just type
$ sudo apt-get install curlNow install RVM using the following command
$ gpg --keyserver hkp://keys.gnupg.net --recv-keys 409B6B1796C275462A1703113804BB82D39DC0E3 7D2BAF1CF37B13E2069D6956105BD0E739499BDB

$ \curl -sSL https://get.rvm.io | bash -s stable
Once done give these commands into terminal. These will tell Ubuntu GNU/Linux where to find the rvm.
$ echo '[[ -s "$HOME/.rvm/scripts/rvm" ]] && source "$HOME/.rvm/scripts/rvm" # Load RVM into a shell session *as a function*' >> ~/.bashrc

$ source ~/.bashrc
Installing Ruby
Once rvm is installed, you can install Ruby
$ rvm install rubyOnce this is done, you may need to restart your terminal. Open the terminal and type the following:
$ ruby -v
It will spit an output something like this:
ruby 3.0.3p157 (2021-11-24 revision 3fb7d2cadc) [x86_64-linux]
Then all is OK!
1.2. Installing IDE
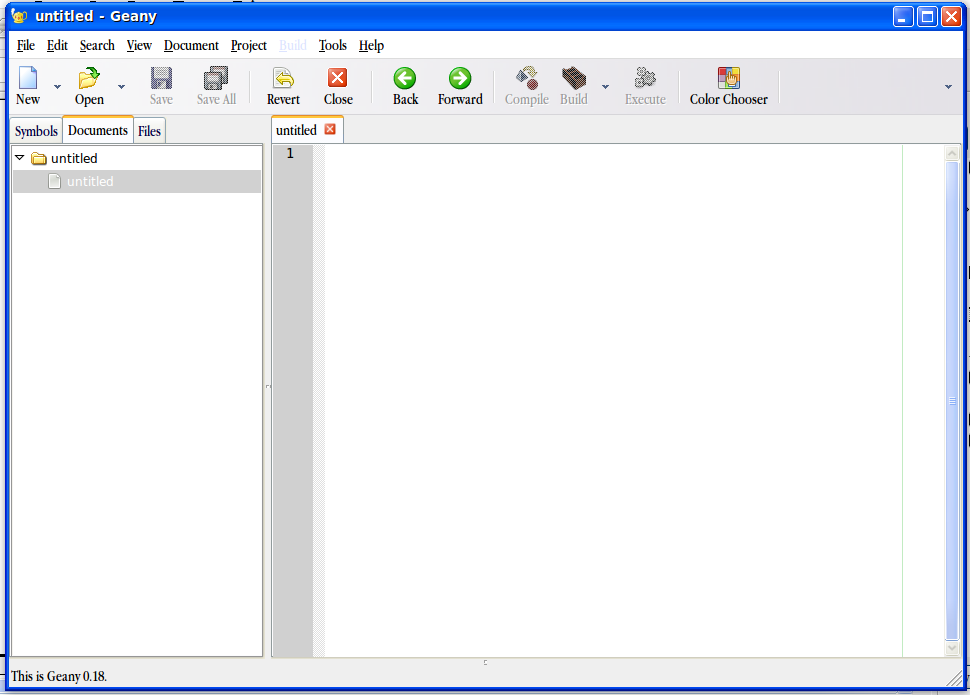
You need a good IDE (Integrated development environment) to get started with Ruby. I recommend simple and lightweight IDE Geany (https://geany.org). To install the IDE on Ubuntu just type (without that $):
$ sudo apt-get install geanyIf the system asks for administrator password, provide it.
2. Online Resources
Ruby has got an excellent online community of hackers who are ready to help almost anyone who has any doubt about Ruby. They love the programming language and want others to love and experience it. Ruby is a great programming language that will put something good in your heart. Once you have learned it and start to interact with fellow hackers, you will naturally tend to help others. So do visit the websites recommended in this section. They might be of great use to you.
2.1. Ruby Website
URL: http://ruby-lang.org
Ruby website is a great place to start with Ruby. It provides you with the installers to install Ruby on your operating system (but I recommend using RVM). It has cool links like 'Try Ruby! in your browser', which lets you try out Ruby right from your web browser and a link called 'Ruby in Twenty Minutes' teaches you the basics of Ruby programming. Ruby is such a simple language that you just need 20 minutes to grasp it! Trust me it’s true!
Also try visiting https://www.ruby-lang.org/en/community/mailing-lists/ and you will see a form like this
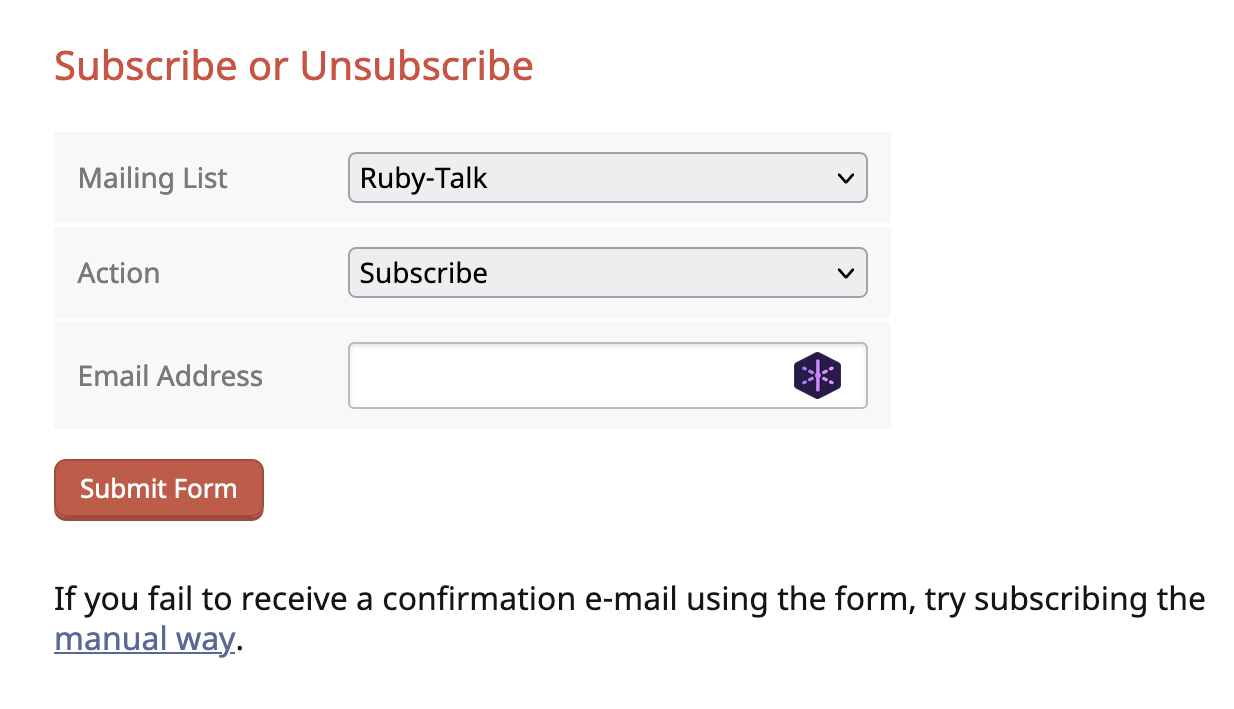
Type in your email and submit the form, you will receive an email to subscribe to Ruby mailing list. Follow the instructions in the email and subscribe. One you have done, congrats! You are part of Ruby community now!!
2.2. Reddit
Reddit has a very active Ruby community. You can find it here https://www.reddit.com/r/ruby/ . The great thing about reddit is the stories are raked by fellow users, and whats the best bubbles up. If you are looking for what’s really trending in Ruby or any other tech topic, I find reddit being the best.
2.3. Ruby Flow
Ruby flow is a website which I use it for casual reading of whats happening in Ruby community. It’s a very clean website where Rubyists can post what they think fellow Rubyists must know about Ruby. You can access it here http://www.rubyflow.com/
2.4. Twitter
URL: http://twitter.com
Twitter is a socializing website. Then why on Earth am I putting it here? Well lots of Ruby programmers use twitter, possibly because it was written with Ruby initially. To get the latest news about “Ruby Programming”, type it in the search bar and press search. You will get latest trending topics about Ruby language. Try searches like “Ruby language” and blah blah….
3. Getting Started
Having installed the needed software, lets gets started.
3.1. Interactive Ruby
Ruby provides us a easy way to interact with it, this feature is called interactive ruby or irb [5]. With irb you can type small bits of ruby code in your console and see it get executed. irb is a great tool to check out small pieces of Ruby code. In your terminal type irb or irb –-simple-prompt , you will be getting prompt as shown
2.4.0 :001 >The above prompt will be got if you had typed irb
>>The above prompt will be got if you had typed irb –-simple-prompt, in examples from now on I will be using the simple prompt. Let’s write our first hello world program, in the prompt type the following (don’t type those >>)
>> puts 'Hello World!'When you press enter, you will get output as follows. In Ruby puts is used for printing something onto the console.
Hello World !
=> nil
Very well, we have completed our hello world program under a minute. Lets check what is 56 to the power of 31 is
>> 56**31
=> 1562531701075863192779448904272185314811647640213651456
OOPS! You never thought it would be such a large number, did you? Any way, the ** is used to find a number raised to the power of another number.
To quit irb and return to normal console or terminal prompt type quit or press Ctrl+c on keyboard.
3.2. Jupyter Lab
Ruby’s REPL that you can invoke by typing irb in your terminal is good, but imagine if you can run a vey interactive REPL in your browser. A tool called Jupyter does just that. One can learn about Jupyter here https://jupyter.org/ , one may install it on your computer. For that you need to have Python installed first.
Once you have done it you can install a gem called iruby by typing
$ gem install irubyin your terminal.
Once done you can launch Jupyter lab by typing:
$ jupyter labYour browser will open up and you will get a screen as shown:

In the above picture one can see that I have integrated Jupyter with various languages, and Ruby is one among them. I need to click the Ruby icon to be presented with a screen as shown:
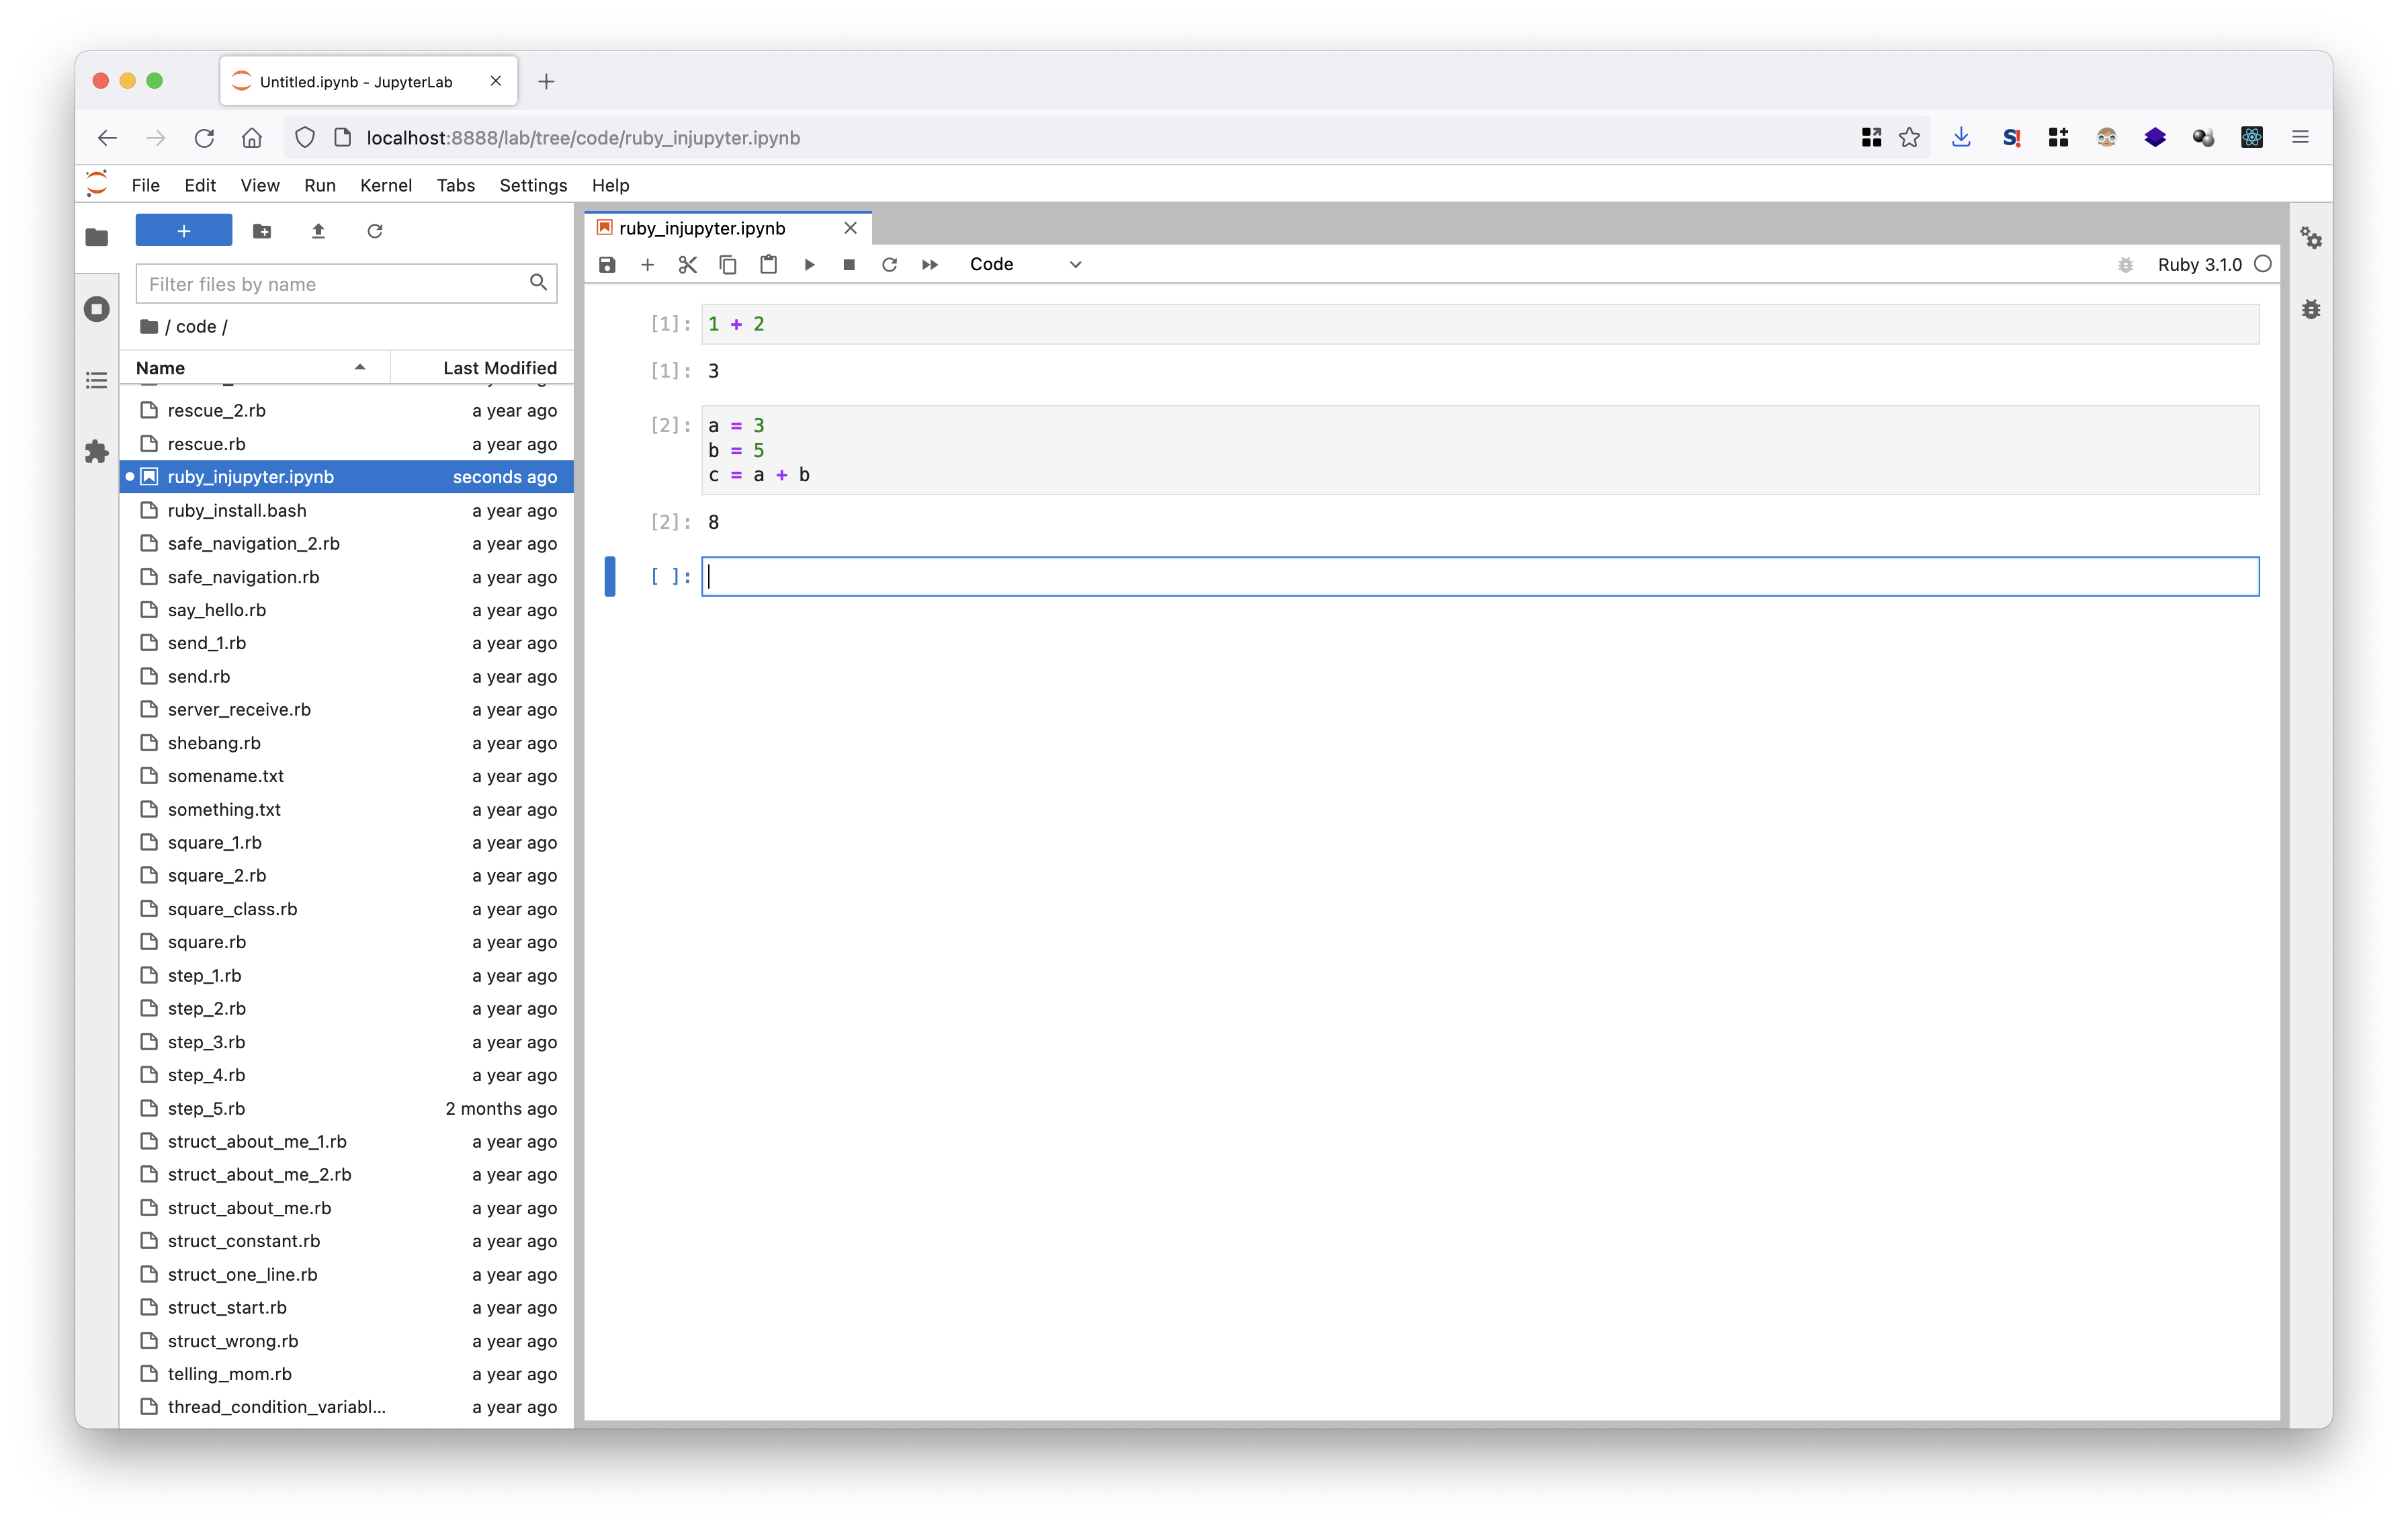
At the left I have file browser where I renamed the file as ruby_injupyter.ipynb, one can get the file here https://i-love-ruby.gitlab.io/code/ruby_injupyter.ipynb
So start typing commands like
1 + 2Press kbd:[Shiift + Enter] to execute it, and now try out
a = 3
b = 5
c = a + b
One may also try to use Jupyter for almost this entire book to learn Ruby.
3.3. Doing some Math
Computer is a device that computes, or does some math. With irb we can do easy math. If you don’t like to work with numbers, ruby can do it for you. So, first, let’s add these numbers : 1, 45, 67, 893, 72, 56 and -128. To do so in your irb prompt just type these numbers separated by a plus '+' sign, and you will get the result
>> 1 +  45 + 67 + 893 + 72 + 56 + -128
=> 1006
Here are some common math operators that you will find useful
Operator |
What they do |
+ |
Adds numbers |
- |
Subtracts a number from another number |
/ |
Divides a number with another number |
* |
Multiplies two numbers |
** |
Finds a number raised to the power of another |
% |
Finds the remainder |
+= |
Adds and assigns a value to a variable |
-= |
Subtracts and assigns a value to a variable |
*= |
Multiply and assigns a value to a variable |
/= |
Divides and assigns a value to a variable |
%= |
Finds the remainder and assigns it to a variable |
Addition Example: Lets say that I want to add 56 and 72 and find its result, I can do it as shown:
>> 56+72
=> 128
Subtraction Example: In this example I am subtracting 64 from 112
>> 112-64
=> 48
Division Example: Lets say I want to divide 117 by 12 and find the quotient, I can do in Ruby like this
>> 117/12
=> 9
Power Example: Lets say I want to find what we will get by cubing five (five raised to the power of three), I can do it in Ruby as shown
>> 5**3
=> 125
Modulus or Remainder Example: I want to know what we will get as remainder when we divide 21 by 4, I can do it as shown
>> 21%4
=> 1
Addition with assignment Example: Lets declare a variable i, set it to 5 and add 37 to it. In ruby you can do it as shown
>> i = 5
=> 5
>> i+=37
=> 42
>> i
=> 42
At the end when we type i and see we get 42. This means i holds the value 42 in it.
Subtraction with assignment Example: Lets declare a variable j , assign it with a value 50 and take away 17 from it
>> j = 50
=> 50
>> j -= 17
=> 33
>> j
=> 33
At the end when we type j and see we get 33. This means j holds the value 33 in it.
Multiplication with assignment Example: Lets declare a variable k, set it to 3 and multiply it by nine
>> k = 3
=> 3
>> k *= 9
=> 27
>> k
=> 27
At the end when we type k and see we get 27. This means k holds the value 27 in it.
Division with assignment Example: Lets declare a variable s, set it to 25 and divide it by 5
>> s = 25
=> 25
>> s /= 5
=> 5
>> s
=> 5
At the end when we type s and see we get 5. This means s holds the value 5 in it.
Try other operators on your own, I’m running out of patience.
3.3.1. Space doesn’t matter
Lets say that I want to add 54 with 62, how can I command irb to do it. Should it be 54+62 or can I leave spaces so that code could be neatly written like 54 + 62. Well, fortunately in Ruby leaving spaces doesn’t really matter you can give it in any number of ways as shown below and still get the same result.
>> 54+62
=> 116
>> 54 +62
=> 116
>> 54+ 62
=> 116
>> 54 + 62
=> 116
>> 54          +      62
=> 116
Notice that the plus whether it sticks with 54 or 62 or has space between them, no matter how long the space is, it prints out the right result.
3.3.2. Decimals
When you divide 5 by 3 in ruby you get result as follows
>> 5/3
=> 1
In other words it gives the quotient. In reality 5 divided by 3 is almost 1.666666666666666667, so how to get this answer? The truth is 5 and 3 are integers, or numbers that don’t have decimal part. If you want a fairly accurate answer you can rephrase your command to Ruby as follows
>> 5.0/3
=> 1.66666666666667
In the above way, we are specifying 5.0 instead of 5, in other words we are forcing Ruby to make a floating point or decimal calculation instead of integer calculation. This makes Ruby to give a fairly accurate answer.
3.4. Variables
Variables are something that stores value in it. You can imagine them as a box which can hold pebbles. If a box named a holds five pebbles then its value is 5, if another box b holds three pebbles, then its value is 3. Let say you got a new box c and you want its value to be the sum of box a and box b, then you simply add number of pebbles in a and b, it totals to 8, you put 8 pebbles in c to make c = a + b. I hope you have got a hint what a variable is. Let’s program it in Ruby
>> a = 5
=> 5
>> b = 3
=> 3
>> c = a + b
=> 8
Let’s try another problem, I buy 50 mangoes from a farmer at ₹ 10/- and bring it to the market and sell it at ₹ 15/- each, what is my profit?
Answer:
OK first I have 50 mangoes so in irb I type as shown:
>> mangoes = 50
=> 50
So I have assigned the value of 50 to a variable called mangoes. Next I declare and assign a value of 10 to a variable buy_price as shown:
>> buy_price = 10
=> 10
Similarly, I assign 15 to a variable named sell_price
>> sell_price = 15
=> 15
Now profit per mango is the difference between sell and buy price, hence I can calculate it as shown
>> profit = sell_price - buy_price
=> 5
By selling a mango I get a profit of Rs 5/-, what will I get by selling 50 mangoes? It’s a multiple of profit with mangoes and we get it as shown
>> total_profit = profit * mangoes
=> 250
So by selling 50 mangoes we can earn a profit of ₹ 250/-. Lets say that we have bought 72 mangoes, now we want to know what profit would be, this can be easily done by changing or varying the value of mangoes from 50 to 72 and recalculating the total_profit as shown below
>> mangoes = 72
>> total_profit = profit * mangoes
=> 360
Now you may know why we call these things are variables, a variable is a box that can contain any value it wants. Just like you can add or take away pebbles from a box, you can do the same to math operation to variables.
3.4.1. Naming Convention
In the mango example, you would have noticed that I have given the names of variables as buy_price, sell_price, total_profit and not as buy price, sell price, total profit, why so? It turns out that one must follow a certain naming convention or rules when naming a variable. The rules of naming a variable are as follows:
-
There must be no space in between variable names
-
There must be no special character except underscore ` _` in a variable name
-
A variable name can have numbers
-
A variable name must not start with a number
-
-
A variable must either start with a character or an underscore
-
Capital character should not appear at the start of variable
-
Below given are examples of valid variable names
mango
total_price
mango_
_mango
buyPrice
boeing747
boeing_747
iam23yrsold
Below are given examples of invalid variable names
34signals
Mango
total cost
3.4.2. The underscore - a special variable
Suppose we want to find whats 87 raised to the power 12, we can do as follows
>> 87 ** 12
=> 188031682201497672618081
Now we want to multiply the result with 5 and see the answer, now the above result is a whoppy 24[6] digit number and we must type all of it and put a star five to get an answer, that’s a lot of work! If you are a programmer, laziness should flow in your veins otherwise find another profession. One way is to assign this value to a variable and multiply it by 5 as shown below
>> a = 87 ** 12
=> 188031682201497672618081
>> a*5
=> 940158411007488363090405
However there is another easy way as shown below
>> 87 ** 12
=> 188031682201497672618081
>> _ * 5
=> 940158411007488363090405
I did find out 87 raised to the power of 12, and after that I multiplied underscore with five! But how come? Underscore is a special kind of variable, in it the result of last execution gets stored automatically. If you want to use the last obtained output you can do so by using underscore as a variable [7].
3.5. Constants
Unlike variables, some values must be constant, for example the radius of the Earth is constant, the speed of light is constant. In problems that deal with these kind of issues, or in situations where you are absolutely certain that some values won’t change, you can use constants.
A constant can be thought as a variable whose value doesn’t change. Constants in Ruby starts with a capital letter, it could then be followed by alphabets, numbers or underscore. Let’s now have a constant called Pi who value will be equal to mathematical \$pi\$, to do so just type the following in irb prompt
>> Pi = 3.1428
=> 3.1428
Having assigned the value of \$pi\$ to a constant named Pi, we will now try to find area a circle whose radius is 7 units, so lets use our faithful calculator the irb. We know that area of a circle is \$pi r^2\$, where \$r\$ is the circle’s radius. In your irb prompt we can do the calculation as follows
>> r =  7
=> 7
>> Pi * r ** 2
=> 153.9972
So we find area of circle is roughly 153.9972 square units, which is very near to the exact value of 154 square units.
One can ask whether can we change value of constant? I don’t say it’s impossible, but if we change ruby gives us warning that we are changing the value of a constant, after the warning the constant gets changed anyway.
>> Pi=5
(irb):35: warning: already initialized constant Pi
=> 5
In the above example I have re-assigned the value of Pi to 5, as you can see in the second line, Ruby interpreter does throw out a warning that Pi is already initialized constant, but any way the value of Pi gets changed to 5. It is strongly discouraged not to change values of constants in professional programming.
3.6. Strings
Till now, we have seen about numbers, now let’s see something about text. In computers text are called as string [8]. OK lets see about strings in Ruby. Let’s start with a hello world. In your irb type hello world as shown
>> "hello world"
=> "hello world"
As a response you get an “hello world”. In short, string is any stuff that’s surrounded by " or by '
Now let’s try the above example by surrounding the above hello world with single quotes
>> 'hello world'
=> "hello world"
Well you do get the same response. So what’s the difference between single and double quotes? Take a look at the following example
>> time_now = Time.new # Get the current time into a variable
=> Fri Jan 15 16:43:31 +0530 2010
>> "Hello world, the time is now #{time_now}"
=> "Hello world, the time is now Fri Jan 15 16:43:31 +0530 2010"
>> 'Hello world, the time is now #{time_now}'
=> "Hello world, the time is now \#{time_now}"
At first, we declare a variable called time_now and store the current time into it. The current time in Ruby is got by Time.new command. Now we have a variable, and we can embed it into a string by putting it like #{put_your_variable_here}. So we want to tell the world the time now is something, so we give a command as shown
>> "Hello world, the time is now #{time_now}"
=> "Hello world, the time is now Fri Jan 15 16:43:31 +0530 2010"
and we get a proper result. Note that you have enclosed the string with a double quotes. Now let’s try the same thing with single quotes
>> 'Hello world, the time is now #{time_now}'
=> "Hello world, the time is now \#{time_now}"
We see that in this case the world is not able to see what time it is, rather it’s able to see a ugly string as shown
"Hello world, the time is now \#{time_now}"What ever that’s put between single quotes gets printed as it is. You might ask why # is printed as \#, well we will see it in escape sequence soon.
3.6.1. String Functions
There are certain cool things you can do with a string with the built-in functions and routines packed into Ruby. For example if I want to find the length of a string I can use the length function as shown:
>> "my name is billa".length
=> 16
There are many functions, some of which are given in the table shown. I must warn you that this table is not comprehensive, you must check the Ruby documentation [9] for a comprehensive coverage.
Input |
Output |
Notes |
|
16 |
The length function finds the length of a string |
|
allib si eman ym |
The reverse function reverses a string |
|
My name is billa |
Capitalizes the given string |
|
MY NAME IS BILLA |
Converts lower case characters to uppercase |
|
my name is billa |
Converts uppercase characters to lower case |
|
my name is billb |
This is quite illogical function that prints the next logical String |
|
false |
Returns true if string is empty, else returns false |
|
true |
Returns true if string is empty, else returns false |
OK, so we have seen some functions, let’s now see what operations can be performed on string. The first one is concatenation in which two or more strings can be joined together, take a look at example below
>> "Hello" + " " + "World!"
=> "Hello World!"
In the code above, I have joined three strings "Hello' a (space) " " and “World!” using a plus sign, the same operation can be done with string variables too as shown below
>> string_1 = "Hello"
=> "Hello"
>> string_2 = "World!"
=> "World!"
>> string_1 + " " + string_2
=> "Hello World!"
OK now, we have studied a lot, a bit of meditation will help, let’s chant OM [10] to cleanse and reset our mind. You know, Ruby can meditate for you! In your irb type the following
>> "OM " * 10For heaven sake don’t type >> ! And here is your result
=> "OM OM OM OM OM OM OM OM OM OM "The multiplication operator followed by a number prints a string N number of times, where N is the number given after *.
3.6.2. Escape sequence
Whenever you type a statement like puts “Hello World!” the Ruby interpreter prints Hello World!. That is every thing between “ and “ gets printed. Well not always. There are some things that you can put between “ and “ that will escape the normal printing sequence. Launch your irb and type the example given below:
>> puts "Hello \r World!"
 World!
=> nil
Surprise, you see only World! getting printed. What happened to the Hello? Well the \r character stands for carriage return, which means the Hello does get printed. Then the carriage / cursor returns to the beginning of the line and World! gets overwritten on it. Like \r stands for carriage return, \n stands for newline. Type the example below in irb
>> puts "Hello \n World!"
Hello
 World!
=> nil
As you can see Hello gets printed in first line and World! gets printed on the next. This is because we have placed a new line character \n in between them.
Well now let’s take a scenario, we now know that \r, \n and possibly others are non printing characters. Now how to print \n or \r in our output. As it turns out that putting a double backward slash would print a backward slash in output as demonstrated by example below.
>> puts "Hello \\n World! => Hello \n World!"
Hello \n World! => Hello
 World!
=> nil
In a similar fashion \t puts tab spaces, where ever they are placed. Try the example below
>> puts "Tabs \t leave\tlong spaces"
Tabs          leave        long spaces
=> nil
I hope you have understood something about Strings, lets move on……
3.7. Using Text Editor
Till now, you have keyed in small programs into your irb, when you are developing large software you can’t expect the end user or your clients to keep keying in into the console the statements you have developed for him / her, instead you will be handing over a typed Ruby program which they can run it to accomplish certain task. Let’s see how to use a text editor to write programs. Earlier in Installing IDE section I have typed about how to install a simple Integrated Development Environment (IDE) called Geany (https://geany.org). If you are using Ubuntu, press super key, type in Geany, click on the Geany icon, and you will get it.
You can use other IDE’s too, if you want other IDE, refer to their documentation for installation instructions. In the IDE type the following program
puts "Hello World!"
puts "This time I used text editor"
Now save the file as hello_world.rb in a directory, note that Ruby files ends with .rb (dot rb) extension. Launch your terminal / console, migrate to the directory where program is stored and type the following in it
$ ruby hello_world.rband here’s how you will get the output.
Hello World!
This time I used text editor
Wonderful! You have learned to program with a text editor, you are getting professional aye!
3.8. Printing Something
Study the code hello_world.rb, we have used a Ruby command called puts, this commands puts something to the output, in this case your terminal window.
puts "Hello World!"
puts "This time I used text editor"
The first line prints Hello World! And the second one prints This time I used a text editor. What if you want to print two things in the very same line? For it Use the print command, let’s type a new program hello_world_1.rb for it, in your text editor type the following code:
print "Hello World! "
print "Once again I used a text editor"
This gives the output:
Hello World! Once again I used a text editor
So you have learned to print something!
3.9. Getting Input
A program is more useful when it interacts with the user, let’s write a program that asks us our name and says hello to us. Type the following code (I saved it as say_hello.rb)
puts "Hello I am Zigor, a automated Robot that says Hello"
print "Please enter your name:"
name = gets()
puts "Hello #{name}"
Now run it, this is how the output will look like
Hello I am Zigor, a automated Robot that says Hello
Please enter your name:Karthik
Hello Karthik
Lets walkthru the program
The first line
puts "Hello I am Zigor, a automated Robot that says Hello"Prints that the program name is Zigor and it’s a automated robot that wishes you Hello. Then it prints a line feed, hence the content that’s printed then on goes to the next line
The second line
print "Please enter your name:"prints out "Please enter your name:", note that we have used print here, not puts because we want to get the user’s name right after name:, I feel it will be awkward if we let them type name in the next line, so to avoid the line feed I am using print instead of puts.
When the user enters name and presses enter, it is caught by the gets() function and the thing you typed is stored in the variable called name because of this piece of code
name = gets()Now all our Zigor needs to do is to wish hello, for which we use this code
puts "Hello #{name}"Notice how we are embedding the variable name into string by putting it between #{ and }. The same effect can be achieved by using code like this
puts "Hello "+nameBut doesn’t the former piece of code look better? It’s all your choice. Ruby lets you do the same thing in many ways. You can choose anything that you feel comfortable.
Any way in this topic the line you must be looking at is the one that has gets() method or function, it waits for a keyboard input, when you give an input and press enter, it takes your input and assigns the value to variable, in this case the variable is name.
3.10. Comments
Comments are small pieces of notes you can put into a program so that you or someone else when going through the program 7,658 years from now will remember or come to know what its doing. You may be smart today, but tomorrow you may not be as smart as you are now, your boss or client who has paid you will yell upon you at that moment to fix a priority bug or to update a software. Open your text editor and type this code:
puts "Hello I am Zigor, a automated Robot that says Hello"
print "Please enter your name:"
name = gets()
puts "Hello #{name}"
You might be able to understand it now, but after 7,658 years [11]? At that time you might have forgotten Ruby altogether! So start commenting. See the same program comment.rb below, how it looks like?
# The client is an idiot
# he wants me to update a software after 7,658 years.
# The hell with him
puts "Hello I am Zigor, a automated Robot that says Hello" # zigor is some stupid robot
print "Please enter your name:" # Tells the user to enter his name
name = gets() # gets the user name and assigns it to a variable named name
puts "Hello #{name}" # Embeds name into the string that gets printed
Look at the code above, you have told something about client in the first three lines. These lines start with a # (hash or check sign). The thing that follows after a check sign is a comment, comments don’t interfere with programs execution, but it can be used to provide visual hints to humans of what’s going on in the program.
Now lets look at this line
puts "Hello #{name}" # Embeds name into the string that gets printedHere you have #{name} enclosed within double quotes, hence it’s treated as an embedded ruby code in a string rather than a comment, whereas # Embeds name into the string that gets printed is treated as comment.
So I hope you understand that comment can one day help. Professionals always comment when they write code. They will take pains so that almost any Ruby coder who reads their program will be able to understand how it works.
3.10.1. Multiline Comments
If you want to put a lot of comment about the size of a paragraph, then you can put that piece of text between =begin and =end as shown in the program comments_multiline.rb below
=begin
 The client is an idiot
 he wants me to update a software after 7,658 years.
 The hell with him
=end
puts "Hello I am Zigor, a automated Robot that says Hello" # zigor is some stupid robot
print "Please enter your name:" # Tells the user to enter his name
name = gets() # gets the user name and assigns it to a variable named name
puts "Hello #{name}" # Embeds name into the string that gets printed
In the code above note how we put these text:
 The client is an idiot
 he wants me to update a software after 7,658 years.
 The hell with him
Between =begin and =end, when you execute the program, those between the =begin and =end will be ignored. So don’t hesitate to write a lot of comment, as now you know there is a way to do it, and it will benefit you and your fellow programmers greatly.
There is one small thing you must know about =begin and =end, that is they must start from the first column, there should not be any spaces before the = sign, if there is, ruby will think there it’s a programming mistake and will signal an error.
4. Comparison and Logic
4.1. Logical Operators
Logical operators lets you determine whether something is true or not. For example one is one, that’s what humans think, let’s see what computers think about it. Fire your irb and type one equals to one as shown
>> 1 == 1
=> true
Well, what’s that double equal to sign? A single equal to sign means assignment, for example a = 5, puts value 5 into a. A double equal to sign is comparison. So above we have checked if 1 is equal to 1 and the answer is true. Computers are intelligent, aren’t they?
OK, now let’s check if 1 equals to 2, so we type 1==2 and….
>> 1 == 2
=> false
the computer (Ruby interpreter in this case) tells its false.
Fine, if 1 is not equal to 2 to a computer when we type it, it must put out true, so type it in your console
>> 1 != 2
=> true
The != stands for not equal to. The ! Stands for not
Now we check if 1 is not equal to 1 and the computer as expected gives false as output.
>> 1 != 1
=> false
We now check if 2 is greater than 3, for greater than, we use > sign
>> 2 > 3
=> false
We will now check if 2 is less than 3, for less than we use < sign
>> 2 < 3
=> true
Cool! We found that if 2 is not greater than 3, then it’s less than 3. Well we are going to get a Nobel Prize for Math :)
The >= stands for greater than or equal to
>> 5 >= 3
=> true
Since 5 is greater than 3, it returns true
See the expression below, it still returns true because 5 is equal to 5
>> 5 >= 5
=> true
5 is not greater than 5 so it returns false below
>> 5 > 5
=> false
3 is less than 5 hence the less than or equal to operator ⇐ returns true
>> 3 <= 5
=> true
3 is equal to 3 hence the less than or equal to operator still returns true
>> 3 <= 3
=> true
3 is not less than 3, its equal to 3, hence the less than operator returns false
>> 3 < 3
=> false
You can also try these with numbers
Operator |
Meaning |
!< |
Not less than |
!> |
Not greater than |
And do they work? ;)
4.2. true != “true”
In the logic operator section you might see that irb gives true or false as output. You mustn’t confuse with “true” and “false”. The true and false are logical values whereas “true” and “false” are String.
4.3. Triple Equals
The === operator is used to check if a particular instance [12] belongs to a class (i.e. type). For example “abc” is a String type object, 1 is a Integer, so lets apply === on them and check
>> String === "abc"
=> true
>> Integer === 1
=> true
As you can see from the above examples, we have the class name on the left and the instance on the right. The first two examples are true since “abc” is String and 1 is an Integer.
>> String === 7
=> false
In the above example, it clearly returns false since 7 is no way a String, well that’s what you might think ;)
But there is something strange, look at the example below
>> "abc" === String
=> false
So always have the class left side and instance on the right.
4.4. if
The if keyword is used to execute a statement if a condition is satisfied. Take a look at the program below. Execute it.
# if.rb

puts "Whats your name?"
name = gets.chop
puts "#{name} is genius" if name == "Zigor"
puts "#{name} is idiot" if name != "Zigor"
This is how the result would be if you give a name other than Zigor
Whats your name?
Karthik
Karthik is idiot
Take a look at the program. Take a look at the following line
puts "#{name} is genius" if name == "Zigor"The program gets your name in variable called name. Now it checks if the name is Zigor in the code above (that is on the right side of the keyword if), if yes it executes the statement associated with it (that is the statement on the left side of keyword if), in this case it prints out that the particular name is genius. It then comes down to next statement
puts "#{name} is idiot" if name != "Zigor"In this statement it checks if name is not Zigor, if yes it prints the name is idiot.
4.5. if else
Lets write the who’s genius program in another form, here we use if else condition instead of if. Take a look at the code below named if_else.rb
# Zigor says if the person is intelligent or not
print "Enter your name: "
name = gets.chop
if name == "Zigor"
  puts "#{name} is intelligent"
else
  puts "#{name} is idiot"
end
The program when executed gives the same output as previous if.rb , what’s different is how the logic is represented inside the program. We see a thing called if name == "Zigor", then what has to be executed if the code is true comes after that as shown
if name == "Zigor"
  puts "#{name} is intelligent"
Now we can put any number of statements after that if and all will be executed if the condition given is satisfied. Fine till now, but how will Ruby know where the if statement gets over? To say that things end here we put an end keyword as shown below.
if name == "Zigor"
  puts "#{name} is intelligent"
end
Lets say that that condition(s) given in the if is not satisfied, and we need to do something if condition is invalid, then we put those statements that gets executed when conditions fails under the else keyword as shown
if name == "Zigor"
  puts "#{name} is intelligent"
else
  puts "#{name} is idiot"
end
Note that the else and statements that needs to be executed when condition fails comes before the end statement. The end marks the end of if else block. It’s not always necessary to have else, instead we could have a code as shown
if <condition>
  # many lines of code goes here
end
In the above you can put many lines of code that needs to be executed inside a if … end block.
4.6. elsif
When we use if and else, the code under if gets executed if the condition is satisfied, else the code under else section gets executed. Let’s have a new scenario where the code under if is not satisfied, then the program immediately jumps to the else section, now the logic demands that we need to check another condition at the else level too, what should we do? To deal with such a scenario we can use the elsif command. Take a look at the code below
# elsif.rb
# finds the greatest of three numbers

a,b,c = 3,7,5

if a >= b and a >= c
  puts "a = #{a} is greatest"
elsif b >= c and b >= a
  puts "b = #{b} is greatest"
else puts "c = #{c} is greatest"
end
When executed it produces the following result
b = 7 is greatest
Lets walkthru the code step by step. Let’s look at the line
a,b,c = 3,7,5In this line we assign values 3, 7 and 5 to variables a,b and c. Let’s now come to the if statement
if a > b and a > cIn this statement we check if a is greater than b and if a is greater than c. Note the keyword and. The if condition is satisfied only if both conditions are true. a is less than b hence this condition fails so program skips the if statement and comes to the elsif statement
elsif b > c and b > aelsif is else plus if, here we check on another two conditions that’s separated by and, we check if b `is greater than `a and if b is greater than c, both are true and hence the statement under elsif
puts "b = #{b} is greatest"gets executed and we get the result. Since the elsif is satisfied other else and the code that comes under it is ignored.
4.7. if then else
There is another conditional construct with if, called the if then else, it’s not much different from if else, an example is shown below for theoretical purpose, personally it has not served any practical purpose for me, but for the sake of theory I am putting an example below, execute it and see for yourself.
#if_then_else.rb

number = 42

if number % 2 == 0
  then
  puts "Even"
  else
    puts "Odd"
end
4.8. unless
Unless is another way to check a condition. Let say that one is a minor unless he or she is greater than 18 years old. So how to code it in Ruby? Consider the program below, type it in a text editor and execute it.
# unless.rb
print "Enter your age:"
age = gets.to_i
p "You are a minor" unless age >= 18
When executed this is what we get
Enter your age:16
"You are a minor"
The program asks your age, it says you are minor if age is not greater than 18. That is it says you are a minor if unless your age is greater than or equal to 18 as shown in this condition unless age >= 18. The p is a kind of short form for puts [13]. If you write puts “something”, the ruby interpreter prints something. If you use p ”something”, the ruby interpreter prints ”something” (that is with those quotes).
If we want to put more than a line of code under an unless block we can use unless …. end block as shown below
unless <condition>
  # many lines of code goes here
end
The code in the block gets executed if the <condition> fails. unless can be thought as opposite of if. A if block gets executed if the condition in it is true, a unless block gets executed if the condition in it is false.
4.9. unless else
Just like if with else, we can have else in unless statement. Type in the program below and execute it
# unless_1.rb
print "Enter your age:"
age = gets.to_i
unless age >= 18
  p "You are a minor"
  else p "You are a grown up"
end
This is what you get when you execute it
Enter your age:37
"You are a grown up"
OK, here is how it works, you get your age, convert it into integer in age = gets.to_i and store it in a variable called age. Concentrate on this piece of code:
unless age >= 18
  p "You are a minor"
  else p "You are a grown up"
end
unless the age is less than 18 “You are a minor” doesn’t get printed out. If the age is greater than or equal to 18 it gets routed to the else statement and “You are a grown up” gets printed. Note that if we use else with unless we must terminate the unless block with an end command.
Let’s now look at another program that uses unless else. We want to hire people for armed forces, the person should be between 18 and 35 years of age, our program asks the details from a person who wishes to enroll, it checks his age and tells the result. Type the program below and execute it
# unless_2.rb
print "Enter your age:"
age = gets.to_i
unless age < 18 or age > 35
  p "You can enter Armed forces"
  else p "You cannot enter Army. You are either too young or too old"
end
When executed this will be the result
Enter your age:23
"You can enter Armed forces"
I think you can explain this program on your own. If else contact me, I will write an explanation unless I am lazy.
4.10. case when
Suppose you want to write a program that has a determined output for determined input, you can use the case when. Let’s say that we want to write a program that spells from 1 to 5, we can do it as shown in code/case_when.rb[case_when.rb], type the program in text editor and execute it.
# case_when.rb
# This program spells from one to five

print "Enter a number (1-5):"
a = gets.to_i
spell = String.new

case a
  when 1
    spell = "one"
  when 2
    spell = "two"
  when 3
    spell = "three"
  when 4
    spell = "four"
  when 5
    spell = "five"
  else
    spell = nil
end

puts "The number you entered is "+spell if spell
Output
Enter a number (1-5):4
The number you entered is four
Let’s see how the above program works. First the user is prompted to enter a number, when he does enter a number, it gets converted from String to Integer in the following statement
a = gets.to_iThe variable a now contains the value of number we have entered, we have the case statement as shown
case a
  …......
end
In the above empty case statement we are going to write code that gets executed depending on the value of a. When a is 1 we need to spell out as “one” so we add the following code
case a
  when 1
  spell = "one"
end
Similarly, we add code till the case is 5 as shown
case a
  when 1
  spell = "one"
  when 2
  spell = "two"
  when 3
  spell = "three"
  when 4
  spell = "four"
  when 5
  spell = "five"
end
There could be a case when the human who runs this program could give a wrong input, so we need to deal with those cases too. For that we add a special statement called else, if all the when case fail, the code under else is executed, it must however be noted that it’s not mandatory to have an else between case … end block. So now the program changes as shown
case a
  when 1
  spell = "one"
  when 2
  spell = "two"
  when 3
  spell = "three"
  when 4
  spell = "four"
  when 5
  spell = "five"
  else
  spell = nil
end
Next all we must do is to print out spell which we do it in the following statements
puts "The number you entered is "+spell if spellNote that we print out only if spell contains a value, else if spell is nil nothing is printed. It is taken care by the if condition in statement above.
Sometimes it might be necessary that we need to execute same set of statements for many conditions. Let’s take a sample application in which the program determines a number from 1 to 10 (both inclusive) is odd or even. Type the code below (code/case_odd_even.rb[case_odd_even.rb]) and execute it
# case_odd_even.rb

num = 7 # put any number from 1 to 10

case num
  when 1, 3, 5, 7, 9
    puts "#{num} is odd"
  when 2, 4, 6, 8, 10
    puts "#{num} is even"
end
Output
7 is odd
Notice that in above program we assign a value 7 to a variable num, next we put the num in a case statement. When the number is 1, 3, 5, 7 and 9 we need to print its odd so all we do is to group the cases. When its satisfied it must print as odd, for that it’s just enough if you put it as shown in code below
case num
  when 1, 3, 5, 7, 9
  puts "#{num} is odd"
end
Next all we need to print the number is even if its 2, 4, 6, 8 and 10, to do this task all we need to do is to add code that highlighted below
case num
  when 1, 3, 5, 7, 9
  puts "#{num} is odd"
  when 2, 4, 6, 8, 10
  puts "#{num} is even"
end
That’s it. The code will work fine for all numbers from 1 to 10. The moral of the story is we can easily group cases and execute a common code under it.
4.11. case when, checking the class type
In Ruby everything is an object. Lets try out some example in irb to prove it
>> 1.class
=> Integer
>> "Zigor".class
=> String
In the first statement, we have inquired about the class / object type of 1 and it says it’s of type Integer. When asked about class of “Zigor” it says String. In Ruby, you can use this function to know the type variables that you are using. It’s a pretty powerful feature.
Now take a look at the program below
# case_when_checking_class_type.rb
a = "Zigor"
case a
when String
  puts "Its a string"
when Fixnum
  puts "Its a number"
end
Output
Its a string
See the lines in the above program, we have two statements that like when String and when Integer, this checks the type of the variable a in case a statement. If the variable type is String it executes the statements under the when String thing, when it’s a Integer the other statement gets executed. Since this a is of type String we get a print-out Its a String.
4.12. case when and ranges
Please check Ranges used in case .. when .
4.13. case when and regular expressions
Case statements can match regular expressions too. Read Regular Expressions section to understand the example below.
# case_when_regexp.rb

string = "I Love Ruby"
# string = "I Love Python"

case string
when /Ruby/
  puts "string contains Ruby"
else
  puts "string does not contain Ruby"
end
Output
string contains Ruby
In the example above check the statement when /Ruby/, it checks whether the expression /Ruby/ appears in string. In above example it does appear. So it prints out string contains Ruby.
4.14. case when and lambdas
In case_odd_even.rb, when we tried to check if a number is odd or even, we gave a verbose program whose scope was limited from numbers from 1 to 10. We can write the same program as shown
# case_odd_even_lambda.rb

num = 76

case num
when -> (n) { n % 2 == 0 }
  puts "#{num} is even"
else
  puts "#{num} is odd"
end
Output
76 is even
To understand the above example you must read Proc, Lambdas and Blocks first. Watch the code when → (n) { n % 2 == 0 }, in it, you are passing a lambda to the when, which when called would return true for n of value 76 or any even number, false if n is odd. Thus unlike previous odd and even program, this would work everywhere for all natural numbers from zero to infinite.
4.15. case when and matcher classes
To understand the program below, you need to read === and case when, checking the class type. Type the program below and execute it
# case_when_matcher_classes.rb

class Zigor
  def self.===(string)
    string.downcase == "zigor"
  end
end

name = "Zigor"

case name
when Zigor
  puts "Nice to meet you Zigor!!!"
else
  puts "Who are you?"
end
Output
Nice to meet you Zigor!!!
Consider this section
case name
when Zigor
  puts "Nice to meet you Zigor!!!"
else
  puts "Who are you?"
end
The case statement checks name and sees if its instance of class type Zigor. Well isn’t that surprising? How could that be? How can one instance that belongs to String class become that of Zigor class? Well, what the case when does is this, it invokes === method in class Zigor, its definition could be seen below [14].
def self.===(string)
  string.downcase == "zigor"
end
Here we define self.=== , where we take in an argument string , here the name passed to case gets copied to string, and it checks if the downcase of string is equal to “zigor” in string.downcase == "zigor" , if yes, it returns true, else false. If true the code in the when Zigor block gets executed and we get the output Nice to meet you Zigor!!! . Change name to other values and see what happens.
Don’t worry if you do not understand this section now. After completing this book revisit it, you might be in a better state to understand it.
4.16. ? :
The ? : is called ternary operator. It can be used as a simple if. Take the program shown below. Concentrate on max = a > b ? a : b
# max_of_nums.rb

a,b = 3,5
max = a > b  ? a : b
p "max = "+max.to_s
When executed the program gives the following output
"max = 5"
Well the ?: works as follows. Its syntax is like this
<evaluate something > ? <if true take this thing> : <if false take this thing>
You give an expression before the question mark. This expression must either return true or false. If the expression returns true it returns the stuff between ? and : , if false it returns the stuff after :
In the expression
max = a > b ? a : b
We can substitute the values of a and b as follows
max = 3 > 5 ? 3 : 5
3 is not greater than 5, hence its false. Hence, the value after : is assigned to max. Hence, max becomes 5.
4.17. Assigning logic statement to variables
Wonder whether you noticed or not, in previous example max_of_nums.rb we have used a statement like this
max = a > b ? a : bHere a > b is logic, if its true it would return a which gets assigned to max or it returns b which gets assigned to max.
Now the same program can be written as follows
# max_of_nums_with_if.rb

a, b = 3, 5
max = if a > b
  a
else
  b
end
p "max = " + max.to_s
Output
"max = 5"
Here the variable max is assigned to an if condition. So if a is greater than b it will put a into max else it will put b in max. As simple as that.
Now there is another stuff. What if there are more statements under if or else ? Since in this code block
max = if a > b
  a
else
  b
end
There is only one statement under if block that is a, and under else block we just have b, so it’s straight forward. Now let’s try out the example given below
# max_of_nums_with_if_many_statements.rb

a,b = 3,5
max = if a > b
  a + b
  a
else
  a - b
  b
end
p "max = "+max.to_s
Run the above program and this is what you get
"max = 5"
So what to infer? The rule is this, if you give many statements in a block and assign it to a variable, the output of the last statement will get returned and will be put into the variable [15] (max in this case).
Here is another program, a fork of case_when.rb, I guess you know how it works now
# case_when_2.rb
# This program spells from one to five

print "Enter a number (1-5):"
a = gets.to_i
spell = String.new

spell = case a
  when 1
    "one"
  when 2
    "two"
  when 3
    "three"
  when 4
    "four"
  when 5
    "five"
  else
    nil
end

puts "The number you entered is " + spell if spell
Run it and see it for yourself.
4.18. &&, and, ||, or
You can logically combine conditions using operators called && which is pronounced as and, and || which is pronounced as or. Let’s see few examples and hope you will get it.
Take a look at the program below. Type it and execute it.
# double_and.rb

age = 21

if age >= 18 && age <= 30
  puts "You can join the Army"
else
  puts "You cannot join the Army"
end
Output
You can join the Army
Now in the above program look at the line if age >= 18 && age ⇐ 30, you see the && operator. This && returns true, only if conditions on the both side of it is true. So in the above program the age is 21. So age >= 18 is true and age ⇐ 30, so true && true is true, so we get the output You can join the Army printed out.
Now instead of &&, we can also use and, and get the same output as shown below:
# and.rb

age = 21

if age >= 18 and age <= 30
  puts "You can join the Army"
else
  puts "You cannot join the Army"
end
Output
You can join the Army
But it’s said that && is more efficient than and. Right now it’s out of scope of this section to explain why. May be in future versions of this book I would try to explain it.
Similarly, if we want one of two conditions to be true, then we can use || operator which is pronounced as or. So in the program below, we are checking if the name is Zigor or R2D2. If it’s any one of them, then we conclude the name belongs to a robot, or we say it may not be a robot.
# double_pipe.rb

name = "Zigor"

if name == "Zigor" || name == "R2D2"
  puts "#{name} is a Robot"
else
  puts "#{name} may not be a robot"
end
Output
Zigor is a Robot
Once again we can substitute || with or and get the same result as shown below, but it’s said that || is more efficient than or. May be in the future versions of this book it will be explained why.
# or.rb

name = "Zigor"

if name == "Zigor" or name == "R2D2"
  puts "#{name} is a Robot"
else
  puts "#{name} may not be a robot"
end
Output
Zigor is a Robot
5. Loops
At times you might need to do some repetitive task lets say that I want to write a rocket countdown program, I want to create a automated robot that count down for rockets, when the count is finished it says “Blast Off”, let’s write one and see
# count_down.rb

# Zigor tells about itself
puts "Hello, I am Zigor...."
puts "I count down for rockets"
# Count down starts
puts 10
p 9 # p is a short form for puts
p 8
p 7
p 6
p 5
p 4
p 3
p 2
p 1
p "Blast Off!"
Well I hope you understand the program above. There is one thing I would like to explain, p is a short kind of form of puts, rather than writing puts one can use p and get the same result [16]. The above program when run prints the following:
Hello, I am Zigor....
I count down for rockets
10
9
8
7
6
5
4
3
2
1
"Blast Off!"
So a perfect execution, but we can make this more efficient to code, we will soon see how
5.1. downto
In your text editor type the following program
# count_down_1.rb

# Zigor tells about itself
puts "Hello, I am Zigor...."
puts "I count down for rockets"
# Count down starts
10.downto 1 do |num|
  p num
end
p "Blast Off!"
Run it and see. Well your program uses now a lot less code and yet it produces the same result!
Notice the thing 10.downto 1, this statement make Zigor count down from 10 to 1, while it count-downs you can do som thing with the countdown value, you can put some code in the loop block. The loop starts with a do and ends when it encounters a end command. Any code you put should be between the do and end block [17] as shown below
10.downto 1 do
  # do some thing! Anything!!
end
So between the do and end (technically it’s called a block) you can put the code to print the count-down number. First how to get the number? we will get it in a variable called num, so we rewrite the code as shown
10.downto 1 do |num|
  # put the printing stuff here
end
Notice above that num is surrounded by | and |. All we need to do now is to print it, so we just print it as shown below
10.downto 1 do |num|
  p num
end
5.2. times
times is a very simple loop, if you want to get a code executed N number of times you put the code in it. Now let’s see what Zigor knows
# times.rb

puts "Hi, I am Zigor"
puts "I am going to tell what I know"
7.times{
  puts "I know something"
}
Well, when executed the program prints the following
Hi, I am Zigor
I am going to tell what I know
I know something
I know something
I know something
I know something
I know something
I know something
I know something
Zigor tells that it knows something seven times.
OK we have made changes in the program, we are printing the count variable this time, type the program below and execute
# times_1.rb

puts "Hi, I am Zigor"
puts "I am going to tell what I know"
7.times{ |a|
  puts "#{a}. I know something"
}
Here is what you get the result
Hi, I am Zigor
I am going to tell what I know
0. I know something
1. I know something
2. I know something
3. I know something
4. I know something
5. I know something
6. I know something
Why it’s counting from zero to six rather than one to seven? Well, if all happens as you want, there will be no need of programmers like you and me, so don’t bother. Notice that in these programs we use { and } rather than do and end. Well, Ruby encourages different styles of programming.
5.3. upto
upto counts some number upto some other number. Its like downto in reverse. Type in the program below and execute it
# upto.rb

# upto is downto in reverse
17.upto 23 do |i|
  print "#{i}, "
end
And here is how the output looks like
17, 18, 19, 20, 21, 22, 23,
5.4. step
step loop can be thought as combination of upto and downto all packed in one, execute the code shown below
# step_1.rb
# explains step function
1.step 10 do |i|
  print "#{i}, "
end
and here is the result. This is very similar to upto! Don’t you see!!
1, 2, 3, 4, 5, 6, 7, 8, 9, 10,
Now let’s modify the program as shown below and save it in another name
# step_2.rb
# explains step function
10.step 1 do |i|
  print "#{i}, "
end
When executed this program produces no output. What have we done wrong? Modify the program as shown below and run it
# step_3.rb
# explains step function
# this time its stepping down
10.step 1, -1 do |i|
  print "#{i}, "
end
Well here is the output of the program
10, 9, 8, 7, 6, 5, 4, 3, 2, 1,
What goes on in step? step receives three inputs, consider the code shown below
10.step 1, -1
The first one is the number that calls step is taken as the initial number, in the above case it is 10. Next is the ending number in this case it is 1, that is this function counts from 10 to 1, we must descend in this case, so the count must be in steps of -1.
I can modify the same program to print even numbers in 10 to 1 as shown
# step_4.rb
# explains step function
# this time its stepping down
p "Even numbers between 10 and 1:"
10.step 1, -2 do |i|
  print "#{i}, "
end
This program prints the following output
“Even numbers between 10 and 1:”
10, 8, 6, 4, 2,
Lets now try a program that will print even numbers from 1 to 10, this time in ascending order
# step_5.rb
# explains step function
# this time its stepping upby two counts each loop
p "Even numbers between 1 and 10:"
2.step 10, 2 do |i|
  print "#{i}, "
end
Output
“Even numbers between 1 and 10:”
2, 4, 6, 8, 10,
In the above code, have started from 2, we will end at 10, and we jump each loop by steps of 2. Inside the loop we simply print the iterating value which is captured in variable i.
5.5. while
While [18] loop is a loop that does something till a condition is satisfied. Read the code below
# while.rb
i=1
while i<=10 do
  print "#{i}, "
  i+=1
end
when executed, it produces the following output.
1, 2, 3, 4, 5, 6, 7, 8, 9, 10,
Let’s now see how a while loop works. A while loop normally has four important parts
-
Initialization
-
Condition check
-
Loop body
-
Updation
Initialization
See the statement i=1, here we initialize a variable named i and set it to value 1.
Condition check
See the statement while i⇐10, in this statement we specify that we are starting a while loop, this while loop on every iteration checks the value of i, if it’s less than or equal to 10, the loops body gets blindly executed.
Loop body
Notice the do and end in the program, the do symbolizes the start of loop code block, the end symbolizes the end of loop code block. Between it, we have some statements about which we will discuss soon. One of the statement is to print the value of i, which is accomplished by print "#{i}, "
Updation
Let’s say that we forgot to include i+=1 in the loop body, at the end of each iteration the value of i will always remain 1 and i will always remain less than 10 hence, the loop will be executed infinite number of times and will print infinite 1’s. In practical terms your program will crash with possible undesirable consequence. To avoid this we must include an update statement. Here we have put i+=1 which increments i by value one every time an iteration continues, this ensures that i⇐10 to become false at some stage and hence the loops stops execution [19].
Hence we see that for a loop to work in an desirable manner we need to get these four parts into symphony.
5.6. until
while loop keeps going until a condition becomes false, until loop keeps going until a condition becomes true. Read the code below, type it in a text editor and execute it.
# until.rb
i=1
until i>10 do
  print "#{i}, "
  i+=1
end
This is what you will get as result
1, 2, 3, 4, 5, 6, 7, 8, 9, 10,
So how this loop works? At first we do set i=1, then we use the until command and say that until i is greater than 10 keep doing something in this line until i>10 do. What should be done is said between the do and end keywords. So till the condition fails, the code in loops body will be executed, so we get 1 to 10 printed as output.
5.7. break
Suppose you want to break away from loop, that is to stop executing it, you can use the break command. An example is given below. In the example we will break if the iterating variable i becomes 6. So numbers ranging only from 1 to 5 gets printed. When i becomes 6 the loop breaks or terminates
#break.rb

1.upto 10 do |i|
  break if i == 6
  print "#{i}, "
end
When executed, the above program produces the following output
1, 2, 3, 4, 5,
5.8. next
break, breaks out of loop and terminates it. next is somewhat different from break, instead of breaking from the loop, it’s a signal to continue the loop without executing statements that occurs after next. Here is an example for you to understand it:
# next.rb

# This loop won't print 6
10.times do |num|
  next if num == 6
  puts num
end
Output
0
1
2
3
4
5
7
8
9
If you notice the output, you see that numbers from 0 to 9 are printed, but there is no 6. Notice the line next if num == 6 in next.rb here if num is 6, next is executed, in other words all lines after that in the do end block is skipped. Unlike brake, the loop is not terminated, but just the lines after next are skipped, and the loop continues on.
5.9. redo
There is another thing called redo. next skips any execution further and the iterating variable is incremented / decremented to next possible value [20], redo on other hands skips further execution of code in the loop block, but the iterating variable is not incremented, instead the loop is rerun. Type the code below and execute it
# redo.rb

5.times do |num|
  puts "num = #{num}"
  puts "Do you want to redo? (y/n): "
  option = gets.chop
  redo if option == 'y'
end
Run it and hopefully you can explain it by yourself ;-)
5.10. loop
So we have seen many types of loops till now, but I have left out a basic loop which is we call loop. Why I have left it out Because it’s dangerous to use [21]. Okay lets see an example. Type the program below and execute it. Note that you need to press Ctrl+C to stop it executing. So be cautious
# loop.rb

loop do
  puts "I Love Ruby"
end
Output I Love Ruby I Love Ruby I Love Ruby I Love Ruby I Love Ruby I Love Ruby I Love Ruby I Love Ruby I Love Ruby I Love Ruby I Love Ruby ......
The output will keep on printing I Love Ruby until u press Ctrl and C keys together to break. The basic is this: Anything put between loop do and end will keep on going.
So now lets say that we don’t want this loop to be continuously running forever. Let’s see how to tame it. Let’s print a program that prints from 1 to 10. Type the program below and run it.
# break_at_10.rb

i = 1
loop do
  puts i
  break if i == 10
  i = i+1
end
Output
1
2
3
4
5
6
7
8
9
10
So the program prints from 1 to 10 as we wished. Let’s walk through it and see how it works. The first line i = 1, stores the value 1 in variable named i. Next we have this loop do line where anything put between this and end will run continuously.
In the next line puts i, we print the value of i and hence 1 gets printed, now in break if i == 10, it checks if i is 10, here the condition is false as i is not 10, hence the loop will continue to the next statement i = i + 1, we are adding 1 to i in i + 1 and hence its becomes 2 so by saying i = i + 1 we mean i = 1 + 1 hence i will become 2 and it (the program) meets the end statement, it does not mean end it just means iteration of loop ends so return to top (that is to loop do) once again.
So in loop do, now i is 2, so the thing goes on and on till i is 10 and in that case, in break if i == 10, i == 10 becomes true and the loop breaks.
Exercise: Try modifying the break_at_10.rb, when we have finished printing 10, the program must print "Mom I have finished printing 10"
Answer: telling_mom.rb
Exercise: These western guys don’t like 13, so write a program to print from 1 10 20, but omit 13. Answer: no_13.rb
Exercise: Explain if no_13_a.rb will work. If ya, how? If nay, why not? [22]
5.11. Flip Flop
Let’s now look at an operator called flip flop. Let’s say that you are inside a loop that goes from 1 to 10, and you are capturing the number in a variable named i and printing it like this:
1.upto 10 do |i|
  puts i
end
Now say that you want to start printing from 5 and end printing at 8. That is a mythical switch should flip and says let’s print when i reaches 5, and it must flop when i reaches 8. So you code for it like this:
# flip_flop.rb

1.upto 10 do |i|
  if (i == 5) .. (i == 8)
    puts i
  end
end
Let’s execute the code:
Output
5
6
7
8
So let’s look at the statement if (i == 5) .. (i == 8), here the .. is called the flip flop operator. What it does is, it watches the left side condition that is if (i == 5), if yes it means that it flips to true and puts i gets executed, at the same time the flip flop watched for the richt side condition (i == 8), if that becomes true, it flops and becomes false, so even though the loops runs to 1 = 9 and eventually i = 10, the condition in if (i == 5) .. (i == 8) and hence puts i is unreachable, so nothing gets printed.
Now if we want to write a similar logic without flip flop it would be like this:
# without_flip_flop.rb

print_it = nil

1.upto 10 do |i|
  print_it = true if i >= 5
  print_it = false if i > 8

  if print_it
    puts i
  end
end
which is verbose.
Or if we use conditions, it would be bit confusing like this:
# condition_instead_of_flip_flop.rb

1.upto 10 do |i|
  if i >= 5 && i <= 8
    puts i
  end
end
So flip flop is a great syntactic sugar which reduces the amount of code you write.
6. Arrays
Arrays can be considered as a rack. You can keep any thing1 in a rack, similarly you can keep anything in an array. A rack contains many shelf or compartments. If you can count them, you can put numbers on each compartment, the rack can be considered an array of space to store something. Each compartment can be identified by a number and hence it becomes easy to identify it. An array is a rack that’s available to a programmer. Let’s see an example to learn more. Type the program below and execute it
# array.rb

my_array = []
my_array << "Something"
my_array << 123
my_array << Time.now

my_array.each do |element|
  puts element
end
This is how you will get the output
Something
123
Tue Feb 02 18:10:06 +0530 2010
Let’s walk through the program, take the line my_array = [], in it, we declare an array called my_array, it’s an empty array that has got nothing in it. [] denotes an empty array, and we assign it yo my_array. Having done so, we populate it with some values in the following statements
my_array << "Something"
my_array << 123
my_array << Time.now
We append elements to an array. In the first statement we append a string constant “Something”, in the second statement we append a integer 123 and in the third statement we append the current time. If you have guessed it right, we have used << operator to append values to the array.
Till now, we have created an array called my_array and have put something into it. Now we have to see what we have put in. To do so we use <array_name>.each (array name dot each). This method extracts each element of an array. So for my_array we use my_array.each
OK we have to do something with each element of an array. To do so we add a do … end, within it we can do something, so our code gets transformed as
my_array.each do
end
We have to capture each element of an array into a variable, let’s use a variable named element to do the job, so we capture each element using the following code
my_array.each do |element|

end
Notice how we put our element variable between | and |. We have captured each and every element of an array, what to do now? We will print it using a puts statement. So our array gets printed successfully. The following program too works the same way as previous program, but we use Array.new instead of [] to say that my_array is an array [23]
# array_1.rb

my_array = Array.new
my_array << "Something"
my_array << 123
my_array << Time.now

my_array.each do |element|
  puts element
end
I will write another program that will use the for construct to iterate over each element of an array as shown below
# array_2.rb

my_array = Array.new
my_array << "Something"
my_array << 123
my_array << Time.now

for element in my_array
  puts element
end
Output
Something
123
2012-08-10 19:19:47 +0530
There is a third way of creating an array. Take a close look at the program below. Look at the my_array = [ "Something", 123, Time.now ]. Look at it carefully, we have my_array that’s a variable to which we assign an array, it’s been set to [ "Something", 123, Time.now ]. That is in this case we declare and added array elements or values to my_array in the same statement. Note that we put elements of an array in square brackets, this is another way of declaring and populating an array. So the program array_3.rb works exactly same as array_1.rb and array.rb, but its more concise. Unlike many languages, Ruby lets the programmer choose his own style of coding.
# array_3.rb

my_array = ["Something", 123, Time.now]
puts my_array.join("\n")
Output
Something
123
Wed Feb 03 17:37:36 +0530 2010
Till the last example we were using each to iterate through array elements, now we will use a new kind of loop which is the for loop, so here is a code for that
# array_for.rb

my_array = Array.new
my_array.push("Something")
my_array.push 123
my_array << Time.now

for element in my_array
  puts element
end
Output
Something
123
2014-11-12 10:37:22 +0530
See new construct we have employed above which is this:
for element in my_array
  puts element
end
Notice this particular line for element in my_array. This is just equivalent to my_array.each |element| in previous examples. for loop I personally feel is a bit elegant. So just like each, each element in my_array gets loaded into element and this is available in the loop block for the programmer to make us of it. Here we just print it using puts element.
6.1. Array Operations
This section tells you the basic operations that you can do on an array of elements like search, delete, change and so on.
6.1.1. Appending element into array
Appending or adding elements into an array is a basic thing. So we have an array called countries as shown:
>> countries = []
=> []
Now when we can add an element into it using the double less than << operator as shown. We add "India" to countries:
>> countries << "India"
=> ["India"]
Now we add "Brazil":
>> countries << "Brazil"
=> ["India", "Brazil"]
6.1.2. Size of Array
Number of elements in an Array could be counted with functions size and count as shown in the following examples:
Let’s define an empty array named countries:
>> countries = []
=> []
Now we check its size and count, both returns 0 as shown:
>> countries.size
=> 0
>> countries.count
=> 0
Now lets add a single element "India" to it and check its size and count:
>> countries << "India"
=> ["India"]
>> countries
=> ["India"]
>> countries.size
=> 1
>> countries.count
=> 1
So now the count is 1. In fact size is just another name for the function count.
Let’s add another element into countries and check the count again:
>> countries << "Sri Lanka"
=> ["India", "Sri Lanka"]
>> countries.count
=> 2
>> countries.size
=> 2
6.1.3. Accessing array element
Let’s fire up our irb and create a huge country Array:
>> countries = ["India", "Brazil", "Somalia", "Japan", "China", "Niger", "Uganda", "Ireland"]
=> ["India", "Brazil", "Somalia", "Japan", "China", "Niger", "Uganda", "Ireland"]
Now Array could be thought as a rack with shelf’s, the first shelf in the rack is numbered 0, the second is 1, third is 2 and so on… Why we have a numbering that starts with 0, well that doesn’t matter, but that’s how most computer programming languages work.
So we can access n+1 element of an Array using the operator [n], so to access the 6th element in countries, we do the following:
>> countries[5]
=> "Niger"
Now let’s access the 7th element:
>> countries[6]
=> "Uganda"
Now let’s look at ways to access a bunch of elements of an Array. We create an Array called countries as shown:
>> countries = ["India", "Brazil", "Somalia", "Japan", "China", "Niger", "Uganda", "Ireland"]
=> ["India", "Brazil", "Somalia", "Japan", "China", "Niger", "Uganda", "Ireland"]
Now let’s access the fifth to tenth element of it:
>> countries[4..9]
=> ["China", "Niger", "Uganda", "Ireland"]
If you see countries[9] would return nil, yet when you do an operation like countries[4..9], Ruby is smart enough not to return an Array with nil in it.
Now let’s access 5th to 7th elements:
>> countries[4..6]
=> ["China", "Niger", "Uganda"]
6.1.4. Inserting elements
<< adds elements at the last, let’s say we have a countries array as shown:
>> countries = ["India", "Brazil"]We want to add element to index 1, we do it as shown:
>> countries.insert(1, "Somalia")
=> ["India", "Somalia", "Brazil"]
Always remember the indexing of Array in Ruby starts with 0, so countries.insert(1, "Somalia"), inserts "Somalia" into countries in second position.
6.1.5. Checking if an element exists
We can use a method called include? to check if an element is present in an Array. We define an Array and assign it to a variable called countries:
>> countries = ["India", "Brazil", "Somalia"]
=> ["India", "Brazil", "Somalia"]
Then we check if "Somalia" is present in it:
>> countries.include? "Somalia"
=> true
and its there!
Next we check if "Japan" is present:
>> countries.include? "Japan"
=> false
and it’s not.
We add "Japan" to it:
>> countries << "Japan"
=> ["India", "Brazil", "Somalia", "Japan"]
and we check if "Japan" is present:
>> countries.include? "Japan"
=> true
and it is!
6.1.6. Changing an element
Let’s define an Array, and assign it to a variable called countries:
>> countries = ["India", "Brazil", "Somalia", "Japan", "China", "Niger", "Uganda", "Ireland"]
=> ["India", "Brazil", "Somalia", "Japan", "China", "Niger", "Uganda", "Ireland"]
Now we make the 4th index to "South Africa"
>> countries[4] = "South Africa"
=> "South Africa"
Now when we check it:
>> countries
=> ["India", "Brazil", "Somalia", "Japan", "South Africa", "Niger", "Uganda", "Ireland"]
The 4th index has changed from "China" to "South Africa".
6.1.7. Deleting element
Let’s create a big countries Array:
>> countries = ["India", "Brazil", "Somalia", "Japan", "China", "Niger", "USA", "Uganda", "Ireland"]
=> ["India", "Brazil", "Somalia", "Japan", "China", "Niger", "USA", "Uganda", "Ireland"]
Now let’s delete "USA" from it:
>> countries.delete "USA"
=> "USA"
When we check countries again "USA" is gone.
>> countries
=> ["India", "Brazil", "Somalia", "Japan", "China", "Niger", "Uganda", "Ireland"]
Now in the above Array, "China" is at index 4 and let’s delete it using a method called delete_at which deletes an element at the given index as shown:
>> countries.delete_at 4
=> "China"
When we check it "China" is gone.
>> countries
=> ["India", "Brazil", "Somalia", "Japan", "Niger", "Uganda", "Ireland"]
Now using pop method on array, pop’s out the last element in it:
>> countries.pop
=> "Ireland"
when we check it after pop, the last element which was "Ireland" is gone as shown:
>> countries
=> ["India", "Brazil", "Somalia", "Japan", "Niger", "Uganda"]
6.2. More on Array
Lets now see some array functions. For this we will be using our favorite irb rather than a text editor
>> array = Array.new
=> []
OK in the above statement we see that we create an Array named array using Array.new. Array.new creates an empty array.
There is another way to create an array. We can create it by directly specifying the values that are contained in an array as shown
>> array = ["Something", 123, Time.now]
=> ["Something", 123, Tue Feb 02 20:30:41 +0530 2010]
In the above statement, we create an array with three objects in it. The value that must be in an array is given between square brackets [ and ]. Each object in array is separated by a comma. By providing no values between [ and ] we can even create an empty array as shown
>> array = []
=> []
In the above example the empty [] does the same job as Array.new .
Lets create array with parameters in Array.new as shown
>> array = Array.new(["Something", 123, Time.now])
ArgumentError: wrong number of arguments (3 for 2)
        from (irb):3:in `initialize'
        from (irb):3:in `new'
        from (irb):3
        from :0
As you see above it fails! Don’t use it that way.
OK, let’s now try something on the array, first to get how many elements are in the array we can use the length function as shown below:
>> array.length
=> 3
The join function joins many array elements together and returns it. So when elements in our array are joined this is what we get as result:
>> array.join(', ')
=> "Something, 123, Tue Feb 02 20:30:41 +0530 2010"
Note that we pass a string ', ' to the join when the array elements are joined as a string. The string we passed gets inserted into them in between.
We have created an array and we have something in it, what if we want to add something motr to it? To do so we use the push method. In the example below, we push a number 5 into the array and as we see the array gets expanded and 5 is appended to the array at the last.
>> array.push(5)
=> ["Something", 123, Tue Feb 02 20:30:41 +0530 2010, 5]
The pop method does the opposite of push, it pops out or removes the last element of array. See the example below, we pop an element and the last element which is 5 gets popped out.
>> array.pop
=> 5
After popping it out lets see what’s in the array
>> array
=> ["Something", 123, Tue Feb 02 20:30:41 +0530 2010]
We see that the array size has reduced by one and last element 5 is missing.
It’s not that you must only give a fixed value in push, you can give variables and Ruby expressions and any object to the push as argument. You can see below that we are pushing 2 raised to the power of 10 to the array and 1024 gets added to the array at the last.
>> array.push 2 ** 10
=> ["Something", 123, Tue Feb 02 20:30:41 +0530 2010, 1024]
Array elements are indexed. The first element of an array has an index number 0 and its goes on (theoretically till infinity). If one wants to access element at an index, all he needs to do is to put the index number in between square brackets. In the example below we access the third element of the array named array so we type it as follows
>> array[2]
=> Tue Feb 02 20:30:41 +0530 2010
The pop method accepts a Integer as an argument which it uses to pop n last elements of the array.
>> array.pop(2)
=> [Tue Feb 02 20:30:41 +0530 2010, 1024]
>> array
=> ["Something", 123]
As you see the third element gets popped out, so popping at random is possible.
We can push many elements into an array at once. Consider the code snippet below
>> array.push 5, "Who am I?", 23.465*24
=> ["Something", 123, 5, "Who am I?", 563.16]We first push 3 new elements into the array, and so we get a bigger one.
Now we pop last 3 elements
>> array.pop 3
=> [5, "Who am I?", 563.16]As you can see the array size is reduced and it now only has two elements.
>> array
=> ["Something", 123]There is another way to append elements in an array, its by using the double less than operator <<, let’s push some elements into the array with it as shown:
>> array << "a new element"
=> ["Something", 123, "a new element"]
>> array << 64
=> ["Something", 123, "a new element", 64]as you see above we have appended a String constant “a new element” and 64 to the array using << operator.
You can find maximum and minimum values in an array using the max and min function as shown:
>> nums = [1, 2, 64, -17, 5 ,81]
=> [1, 2, 64, -17, 5, 81]
>> nums.max
=> 81
>> nums.min
=> -17As you see in the above example we create an array called nums having some numbers, nums.max returns the maximum value in that array and nums.min returns the minimum value in that array.
6.3. Array dig
Take a look at a simple snippet executed in irb, we have a nested array, let’s say that we want to access the string element “Treasure”, you can use the dig method as shown:
>> array = [1, 5, [7, 9, 11, ["Treasure"], "Sigma"]]
=> [1, 5, [7, 9, 11, ["Treasure"], "Sigma"]]
>> array.dig(2, 3, 0)
=> "Treasure"6.4. Set operations
For those who know set theory you must know about intersections, unions. I read about set theory when in school and now have forgotten about it. You can treat array as set and do many operations on it. Here are a few examples which I tried out on irb.
Let’s take a college volleyball team, in it are some people names Ashok, Chavan, Karthik, Jesus and Budha. If you take a list of cricket team there are Budha, Karthik, Ragu and Ram. Lets now code it in ruby. To have a collection of people who play in volleyball team we create an array as shown:
>> volleyball = ["Ashok", "Chavan", "Karthik", "Jesus", "Budha"]
=> ["Ashok", "Chavan", "Karthik", "Jesus", "Budha"]Similarly, we create another array that contains names of those who play in cricket team as shown:
>> cricket = ["Budha", "Karthik", "Ragu", "Ram"]
=> ["Budha", "Karthik", "Ragu", "Ram"]So we have two sets of people. Now to find out who are in volley ball and cricket, all we need to do is to AND (or take intersection of) both arrays using the & operator as shown:
>> volleyball & cricket
=> ["Karthik", "Budha"]As you see from above code snippet, the & (and) operator sniffs out those elements that are there in both arrays. In mathematics this stuff is called intersection.
Lets say in another situation we would like to find out all those who are both in volleyball and cricket team. To do so we use the or operator |. Let’s now apply it
>> volleyball | cricket
=> ["Ashok", "Chavan", "Karthik", "Jesus", "Budha", "Ragu", "Ram"]As you see we get names of those who are in volleyball and cricket team. The | (or) operator is different from the + (plus) operator. Let’s add volleyball and cricket teams
>> volleyball + cricket
=> ["Ashok", "Chavan", "Karthik", "Jesus", "Budha", "Budha", "Karthik", "Ragu", "Ram"]As you can see from above code snippet the names Karthik and Budha are duplicated. This does not happen when we use the | (OR) operator.
Let’s now find that which players play only for the volleyball team. For this we will minus the players of cricket from the volleyball team using the – (minus) operator as shown
>> volleyball - cricket
=> ["Ashok", "Chavan", "Jesus"]So we see three players are exclusively in volleyball team. So if you are a mathematician you will feel somewhat comfortable with Ruby.
6.5. Empty array is true
There is another stuff that must be known by a Ruby dev. It’s regarding conditions and empty array. Fire up your irb and type these
>> puts "A" if []
A
=> nilIf you see, the statement prints A even if the array passed to the if statement is empty. This is kinda against theory of least
surprise, but not to get surprised imagine this. There is a book rack, and there are books in it so if you give a statement like this
>> puts "Books Present" if ["treasure island", "I Love Ruby"]
Books Present
=> nilIt does print Books Present as expected. But in this thing
>> puts "Books Present" if []
Books Present
=> nilIt still prints Books Present. Thats because even though the book rack is empty, there is a rack which is still an object. So there is some thing thats not nil. So its true. To make sure this is how it works take a look at the code below
>> nil.class
=> NilClass
>> [].class
=> ArrayWhen we query what’s the class of nil, it says it’s NilClass which is actually an empty thing. But when we query the class of an empty array it’s still an Array, which is not nil or false and hence its true. To check for empty array that must do as shown:
>> puts "A" unless [].empty?
=> nil
>> puts "A" if [].first
=> nilIn the first one [].empty? returns true, but since it’s in unless it would fail to execute the statement dependent on it.
If you see the second one we use [].first, this returns nil. Try it in irb
>> [].first
=> nilSo this could also be used to check emptiness of an array. Or is it so….. ?
>> a = [ nil, 1, 2, nil]
=> [nil, 1, 2, nil]
>> puts "a is empty" unless a.first
=> a is empty
>> puts "a is not empty" if a.first
=> nil
>> puts "a is not empty" unless a.empty?
a is not empty
=> nilNow think about whether to use first to check emptiness?
6.6. Compacting Arrays
Sometimes an array would contain nil values, and you want to remove it, in that case you can call compact upon that array. Let’s try out an example. Start your irb or pry and type the following
First lets initialize the array
>> a = [1, nil, 2, nil, 3, nil]
=> [1, nil, 2, nil, 3, nil]So in the above statement we have initialized the array with three nil values in it. Now let’s remove the nil values by compacting it as shown below
>> a.compact
=> [1, 2, 3]Cool! So ruby has removed nil values like magic. Now let’s' see how a looks
>> a
=> [1, nil, 2, nil, 3, nil]To our dismay a still retains the nil values, what really happened? Well, when you called compact on a, a new compacted array was created, and it was returned to our REPL [24], and out REPL printed it. So what to do to make a really change? Simple call compact with a bang or compact! on a as shown below ;)
>> a.compact!
=> [1, 2, 3]
>> a
=> [1, 2, 3]6.7. Transforming array values
Ruby comes with very powerful array operations, we would see how we can transform arrays in easy to use commands.
6.7.1. Collect
Fire up your pry or irb and type the following
>> array = [1, 2, 3]
=> [1, 2, 3]
>> array.collect{ |element| element * element }
=> [1, 4, 9]In the above code we have declared a variable array of type Array, in the next statement we are calling a method called collect on it, and we pass this block of code { |element| element * element }. Now let’s see what it does.
When collect is called, first, a return array is created. In the block we see a thing called |element|, now the collect algorithm works like this. First this array has values 1, 2 and 3, so this block runs three times. During the first run, 1 gets loaded into element, now in the block we have specified element * element, so 1 * 1 is 1, and it gets pushed into the return array. Now the return array is [1].
Now it takes the second value, that is 2 and the same process occur, and now the return array is [1, 4], similarly the return array finally becomes [1, 4, 9] and is returned out.
collect does not modify the object upon which its called, so if you look what array is, it will still be the same as shown below
>> array
=> [1, 2, 3]You can check it in irb. If you want collect to modify the object that it’s been called upon, use it with a bang as shown below:
>> array.collect!{ |element| element * element }
=> [1, 4, 9]
>> array
=> [1, 4, 9]6.7.2. keep_if
Let’s say that we want to have elements in an array that match certain condition and want to take out others, we can use keep_if function as shown below:
>> array = [1, 2, 3, 4, 5, 6, 7, 8, 9, 10]
=> [1, 2, 3, 4, 5, 6, 7, 8, 9, 10]
>> array.keep_if{ |element| element % 2 == 0}
=> [2, 4, 6, 8, 10]We have an array of ten elements above and say we want to keep elements that are even or divisible by 2, so we write as statement as shown:
array.keep_if{ |element| element % 2 == 0}To the keep_if we pass a block. In it, each and every value in the array is captured in |element| and there is condition written element % 2 == 0, if the condition is true, the element is kept in the array, or it’s thrown out. The keep_if modifies the array upon which its called, unlike collect which returns the new array. So if you check array after running keep_if on it, its content would have changed.
6.7.3. delete_if
As apposed to keep_if, delete_if does the exact opposite, below is shown what happens if you run delete_if on an Array object.
>> array = [1, 2, 3, 4, 5, 6, 7, 8, 9, 10]
=> [1, 2, 3, 4, 5, 6, 7, 8, 9, 10]
>> array.delete_if{ |element| element % 2 == 0}
=> [1, 3, 5, 7, 9]
>> array
=> [1, 3, 5, 7, 9]6.8. Read the ruby doc
Definitely this book isn’t comprehensive enough to cover all of Ruby Array library. To know more read the Ruby docs here https://ruby-doc.org/core-3.0.3/Array.html
7. Hashes and Symbols
Hashes are arrays with index defined by the program or user and not by the Ruby interpreter. Let’s see a program to find out how hashes work. Type the following program (hash.rb) into your text editor and execute it.
#!/usr/bin/ruby
# hash.rb
mark = Hash.new
mark['English'] = 50
mark['Math'] = 70
mark['Science'] = 75
print "Enter subject name:"
sub = gets.chop
puts "Mark in #{sub} is #{mark[sub]}"Output 1
Enter subject name:Math Mark in Math is 70
Output 2
Enter subject name:French Mark in French is
Take a look at output 1. The program asks the user to enter subject name. When the user enters Math, the program gives the math mark. Let’s walk through the code. At the very beginning we have the line mark = Hash.new, in this line we declare a variable called mark of the type hash. Take a look at the following lines
mark['English'] = 50
mark['Math'] = 70
mark['Science'] = 75Unlike an array, hash can have a object as index. In this case we have used simple string as index. We put the marks obtained in English, Math and Science in mark['English'], mark['Math'], mark['Science']. The next two statements
print "Enter subject name:"
sub = gets.chopprompts the user to enter mark, when he does it, it gets stored into the variable called sub. In the final line puts "Mark in #{sub} is #{mark[sub]}" we simply access the hash value using sub as the key and print it out.
Take a look at output 2, in this case I have entered French and the program gives out no result. In the following program we will learn how to deal with it.
7.1. Default values in Hash
When we pass the index to an hash and if its value does exist, then the hash will faithfully return that value. What if the index has no value defined. In the previous example we saw the program returns nothing. In this program we hope to fix it. Look at this code mark = Hash.new 0. In it instead of just giving mark = Hash.new as in the previous one, we have given mark = Hash.new 0, here the zero is the default value. Now let’s run the program and see what happens.
#!/usr/bin/ruby
# hash_default_value.rb
mark = Hash.new 0 # We specify default value of mark is zero
mark['English'] = 50
mark['Math'] = 70
mark['Science'] = 75
print "Enter subject name:"
sub = gets.chop
puts "Mark in #{sub} is #{mark[sub]}"Output
Enter subject name:Chemistry Mark in Chemistry is 0
Look at the output, we haven’t defined a value for mark['Chemistry'], yet when the subject name is specified as Chemistry we get 0 as result. This is so because we have set zero as the default value. So by setting default value we will have a value for those indexes we haven’t defined yet.
7.2. Looping hashes
Looping in arrays is quite easy, we normally use each function in array to iterate objects in array. In similar fashion we can loop in hashes. Type the following code hash_looping.rb into a text editor and execute it.
#!/usr/bin/ruby
# hash_looping.rb
mark = Hash.new 0 # We specify default value of mark is zero
mark['English'] = 50
mark['Math'] = 70
mark['Science'] = 75
total = 0
mark.each { |key,value|
total += value
}
puts "Total marks = "+total.to_sOutput
Total marks = 195
In the program above we have calculated the total of all marks stored in the Hash mark. Note how we use the each loop. Note that we get the key value pair by using |key,value| in the loop body. The key holds the index of the hash and value holds the value stored at that particular index[25]. Each time the loop is executed, we add value to total, so at the end the variable total has got the total of the values stored in the hash. At last, we print out the total.
Below is another program where we store student marks in a hash, we use the each loop to print the key and value corresponding to the key. Hope you have understood enough to explain the code below all by your self.
#!/usr/bin/ruby
# hash_looping_1.rb
mark = Hash.new 0 # We specify default value of mark is zero
mark['English'] = 50
mark['Math'] = 70
mark['Science'] = 75
puts "Key => Value"
mark.each { |a,b|
puts "#{a} => #{b}"
}Output
Key => Value Science => 75 English => 50 Math => 70
7.3. More way of hash creation
There is another way to create hashes, lets look at it. See below, the explanation of the program is same like the of previous program hash_looping_1.rb, except for the highlighted line in the program below. I hope you can explain the programs working by yourself.
#!/usr/bin/ruby
# hash_creation_1.rb
marks = { 'English' => 50, 'Math' => 70, 'Science' => 75 }
puts "Key => Value"
marks.each { |a,b|
puts "#{a} => #{b}"
}Output
Key => Value Science => 75 English => 50 Math => 70
7.4. Using symbols
Usually in a hash we use Symbols as keys instead of String. This is because Symbol occupies far less amount of space compared to String. The difference in speed and space requirement may not be evident to you now, but if you are writing a program that creates thousands of hashes it may take a toll. So try to use Symbols instead of String.
So what is symbol? Let’s fire up our irb by typing irb --simple-prompt in terminal. In it type the following
>> :x.class
=> SymbolNotice that we have placed a colon before x thus making it :x. Symbols have a colon at their start. When we ask what class is :x, it says it’s a Symbol. A symbol is a thing or object that can be used as a key in a hash [26]. In similar way we declare another symbol called :name and see what class it belongs.
>> :name
=> :name
>> :name.class
=> SymbolA variable can hold a symbol in it. Notice below that we have assigned a variable a with value :apple which is nothing but a symbol. When we ask what class it is a by using a.class , it says it’s a symbol.
>> a = :apple
=> :apple
>> a.class
=> SymbolSymbols can be converted to string using the to_s method. Look at the irb example below where we convert symbol to string.
>> :orange.to_s
=> "orange"To convert a String to Symbol use .to_sym method as shown
>> "hello".to_sym
=> :helloLet us write a program in which hashes don’t use String but Symbols as key. Type in the program (below) hash_symbol.rb into text editor and execute it.
# hash_symbol_2.rb
mark = Hash.new 0 # We specify default value of mark is zero
mark[:English] = 50
mark[:Math] = 70
mark[:Science] = 75
print "Enter subject name:"
sub = gets.chop.to_sym
puts "Mark in #{sub} is #{mark[sub]}"Output
Enter subject name:Math Mark in Math is 70
When the program is run, it prompts for subject name, when its entered it shows corresponding mark. Lets walk through the code and see how it works. Notice that we use Symbols and not Strings as keys in mark Hash as shown
mark[:English] = 50
mark[:Math] = 70
mark[:Science] = 75Next we prompt the user to enter marks by using print "Enter subject name:" , the user enters the subject name. Now look at the next line, first we get the subject name into variable sub using gets.chop. The chop removes the enter character \n you typed while pressing the enter key in your keyboard. The to_sym converts what ever input you have entered to a symbol, all this is finally stored in sub.
sub = gets.chop.to_symAll we do next is to access the hash value which has the key sub and print it using the following statement
puts "Mark in #{sub} is #{mark[sub]}"So you have seen this program hash_creation_1.rb , we have now knowledge of symbols, so we can write it as follows in
#!/usr/bin/ruby
# hash_creation_1_a.rb
marks = { :English => 50, :Math => 70, :Science => 75 }
puts "Key => Value"
marks.each { |a,b|
puts "#{a} => #{b}"
}Output
Key => Value English => 50 Math => 70 Science => 75
See the line marks = { :English ⇒ 50, :Math ⇒ 70, :Science ⇒ 75 } we here use symbols instead of strings as a key to hash. Hash has some advantages compared to string as they occupy less memory compared to string (during the runtime of a program).
In ruby 1.9 and beyond there is a better way to write hash_creation_1_a.rb, you can see it in hash_creation_2.rb mentioned below. Just look at this marks = { English: 50, Math: 70, Science: 75 } line in program below
#!/usr/bin/ruby
# hash_creation_2.rb
marks = { English: 50, Math: 70, Science: 75 }
puts "Key => Value"
marks.each { |a,b|
puts "#{a} => #{b}"
}This program works exactly as the previous one, but the line marks = { English: 50, Math: 70, Science: 75 } gets translated (assume that its been translated) to the following code marks = { :English ⇒ 50, :Math ⇒ 70, :Science ⇒ 75 } so it’s the new short form way to declare hash with symbols as key, newly introduced in ruby 1.9
7.5. String, frozen string & symbol, their memory foot print
Strings occupy a lot of memory lets see an example, fire up your irb and type the following code:
>> c = "able was i ere i saw elba"
=> "able was i ere i saw elba"
>> d = "able was i ere i saw elba"
=> "able was i ere i saw elba"
>> c.object_id
=> 21472860
>> d.object_id
=> 21441620In the above example we see two variables c and d, both are assigned to the same string "able was i ere i saw elba", but if I see the object id’s by calling on c.object_id and d.object_id, both are different. This means that the two "able was i ere i saw elba" are stored in different location’s. They are duplicated and copied.
This means that lets say you have the same string declared many locations in your program, and all will occupy new memory, so that would cause lot of load on your computer RAM (for large programs).
Now let’s see what will happen if we use a new kind of thing called frozen string. Type the code below in irb:
>> a = "able was i ere i saw elba".freeze
=> "able was i ere i saw elba"
>> b = "able was i ere i saw elba".freeze
=> "able was i ere i saw elba"
>> a.object_id
=> 21633340
>> b.object_id
=> 21633340Now in the above example we call a method called freeze upon the string. Now when I check a and `b’s object id, both are the same. That means they both point to the same string. They just occupy one space. This is like this. In the previous example new stuff was created every time, but when we assign a variable with a frozen string, it checks whether the string has already been (frozen) declared, if yes, it simply points to the same location.
Now let’s see about how symbols occupy space, whether they duplicate themselves again and again or not.
>> e = :some_symbol
=> :some_symbol
>> f = :some_symbol
=> :some_symbol
>> e.object_id
=> 1097628
>> f.object_id
=> 1097628So in the example above we assign e and f to symbols :some_symbol and when we check for their object id they both are the same, or they both point to the same location. This means if we declare symbols again and again, they won’t occupy extra space. Frozen strings and symbols are good for memory. Ordinary strings are bad.
So why am I saying this in hash section? Let’s say you see this snippet of code:
>> person = {"name" => "frank"}
=> {"name"=>"frank"}
>> person2 = {"name" => "bob"}
=> {"name"=>"bob"}
and you have this one
>> person = {"name".freeze => "frank"}
=> {"name"=>"frank"}
>> person2 = {"name".freeze => "bob"}
=> {"name"=>"bob"}Just imagine which will occupy the lowest amount of memory? Now think about large programs that uses the same structure of hash in tens of lines of code….
7.6. Compacting Hashes
Just like Arrays can be compacted, this new feature is introduced to Hashes from Ruby 2.4.0 lets the programmer compact it. Let’s look at an example in irb or pry:
>> hash = {a: 1, b: nil, c: 2, d: nil, e: 3, f:nil}
=> {:a=>1, :b=>nil, :c=>2, :d=>nil, :e=>3, :f=>nil}
>> hash.compact
=> {:a=>1, :c=>2, :e=>3}
>> hash
=> {:a=>1, :b=>nil, :c=>2, :d=>nil, :e=>3, :f=>nil}
>> hash.compact!
=> {:a=>1, :c=>2, :e=>3}
>> hash
=> {:a=>1, :c=>2, :e=>3}The explanation is very similar to that explained for Array compaction. Please refer it.
7.7. Transforming hash values
Let’s say that you have a Hash object and you want to transform its values. Say you have a hash who values are numbers, and you want to convert it into their squares, then use the transform_values function on that instance of Hash. Let’s take code and see how it works. Fire up your irb or pry
Let’s first define a hash as shown below
>> hash = {a: 1, b: 2, c: 3}
=> {:a=>1, :b=>2, :c=>3}Now we went to transform the values, so we call the transform_values on the hash as shown:
>> hash.transform_values{ |value| value * value }
=> {:a=>1, :b=>4, :c=>9}If you notice, it functions very similar to collect in Array, but it applies to values in a Hash.
Now let’s see if hash has changed:
>> hash
=> {:a=>1, :b=>2, :c=>3}The answer is no as you can see from the code snippet above. If you want the Hash instance upon which the transform_values is called to be changed, then call it with a bang as shown below. It will change the Hash object that’s calling it.
>> hash.transform_values!{ |value| value * value }
=> {:a=>1, :b=>4, :c=>9}
>> hash
=> {:a=>1, :b=>4, :c=>9}7.8. Create Hash from a bunch of variables
It’s possible to create hash from a bunch of variables in Ruby as shown:
>> a = 1
=> 1
>> b = 2
=> 2
>> c = { a:, b: }
=> {:a=>1, :b=>2}In the above example we are not doing something like this:
c = { a: a, b : b}Instead we are specifying it as a short form like this:
c = { a:, b: }In both cases we get an array were c is {:a⇒1, :b⇒2}. Reduction in typing means reduction in errors and increased productivity.
7.9. Read the rubydoc
Once again, this book can’t explain everything that’s in hash. To know more refer rubydocs for hashes here https://ruby-doc.org/core-3.1.1/Hash.html
8. Ranges
Sometimes we need to have a range of values, for example in a grading system. If a student scores from 60 to 100 marks, his grade is A, from 50 to 59 his grade is B and so on. When ever we need to deal with a range of values we can use ranges in Ruby. Type irb --simple-prompt in your terminal and type these into it:
>> (1..5).each {|a| print "#{a}, " }Output
1, 2, 3, 4, 5, => 1..5
OK what’s that (1..5) in the above statement, this is called Range. Range is a object that has got an upper value and a lower value and all values in between. Note that like array, each and every value in a range can be got out using a each method as shown above.
Range does not work only on numbers it can work on strings too as shown below
>> ("bad".."bag").each {|a| print "#{a}, " }Output
bad, bae, baf, bag, => "bad".."bag"
Let’s try out another few examples in our irb that will tell more about Ranges. So fire up your irb and type the following:
>> a = -4..10Output
=> -4..10
In the above code snippet we create a range that ranges from value -4 to 10. To check what type a belongs let’s find out what class it is:
>> a.classOutput
=> Range
As we can see a` belongs to Range class.
To get the maximum value in a range use the max method as shown
>> a.maxOutput
=> 10
To get the minimum in a range use the min method as shown
>> a.minOutput
=> -4
It’s possible to convert range to an array by using to_a method as shown
>> a.to_aOutput
=> [-4, -3, -2, -1, 0, 1, 2, 3, 4, 5, 6, 7, 8, 9, 10]
8.1. Ranges used in case .. when
Look at the program below (ranges_case_when.rb), we are building a student grading system in which when a mark is entered the program puts out the grade of the student, study the code, type it and execute it, we will soon see how it works.
#!/usr/bin/ruby
# ranges_case_when_19.rb
puts "Student grading system"
print "Enter student mark: "
mark = gets.chop.to_i
grade = case mark
when 80..100
'A'
when 60..79
'B'
when 40..59
'C'
when 0..39
'D'
else
"Unable to determine grade. Try again."
end
puts "Your grade is #{grade}"Output
Enter student mark: 72 Your grade is B
At first the program prints that the software is student grading system and asks the user to enter the student mark. When the mark is entered it’s got using gets statement, the trailing newline character is chopped using the chop method, and it’s converted to integer using the to_i method and the mark is stored in the variable mark. All of it is done using this mark = gets.chop.to_i statement.
Once we have the mark, we need to compare it with a range of values to determine the grade which is done using the following statements:
grade = case mark
when 80..100 : 'A'
when 60..79 : 'B'
when 40..59 : 'C'
when 0..39 : 'D'
else "Unable to determine grade. Try again."
endHere we see that mark is passed to the case statement. In the when we don’t have a number or string to compare the mark, in fact we have ranges. When the mark lies from 80 to 100 (both inclusive) the grade is set to A, when its lies in 60 to 79 its set to B, C for 40 to 59 and D for 0 to 39. If the user enters something wrong, grade will be set to "Unable to determine grade. Try again.".
So as we can see ranges come very handy when they are used with case when statement. It makes programming relatively simple when compared to other languages.
8.2. Checking Intervals
Another use of Ranges is to check if anything is located in a particular interval. Consider the program (ranges_cap_or_small.rb) below
#!/usr/bin/ruby
# ranges_cap_or_small.rb
print "Enter any letter: "
letter = gets.chop
puts "You have entered a lower case letter" if ('a'..'z') === letter
puts "You have entered a upper case letter" if ('A'..'Z') === letterOutput
Enter any letter: R You have entered a upper case letter
Read it carefully and execute it. In the above case I have entered capital R and hence the program says I have entered a upper case letter. If I had entered a lower case letter, the program would have said I had entered a lower case letter. Lets see how the program works. The following lines:
print "Enter any letter: "
letter = gets.chopprompts the user to enter a letter, when the user enters a letter the gets method gets it, chop chops off the new line character thats added due to the enter key we press. In the next line look at the if ('a'..'z') === letter , here we check if the value in variable letter lies with 'a' and 'z' (both inclusive) , if it does, we print that user has entered small letter. Note that we don’t use double equal to == `but we use triple equal to `===`[27] to check if its in range. In a similar way `('A'..'Z') === letter returns true if letter has capital letter in it and the program prints the user has entered a capital letter.
8.3. Using triple dots …
Another thing in Range I would like to add is using triple dots instead of using double dots. Just try these out on your irb.
>> (1..5).to_a
=> [1, 2, 3, 4, 5]
>> (1...5).to_a
=> [1, 2, 3, 4]See from above code snippet when I type (1..5).to_a we get an array output as [1, 2, 3, 4, 5] , but for (1…5).to_a we get output as [1, 2, 3, 4] . The triple dots ignores the last value in range.
8.4. Begin and Endless Ranges
Ruby has endless ranges, that is you can write programs like this
# ranges_endless.rb
print "Enter your age: "
age = gets.to_i
case age
when 0..18
puts "You are a kid"
when (19..)
puts "You are grownup"
endRunning the program produces the following output
Enter your age: 32 You are grownup
In the above execution I have given my age as 32, and hence it comes to this part of the code
when (19..)
puts "You are grownup"In it look at the (19..), here it means 19 and any value above it. Note that we aren’t specifying when 19.. as this would confuse the Ruby interpreter and would throw out an error.
Now let’s see about ranges that are beginless, for it fire your irb. Say if you want to check if a number is less than 10, you can do it as follows:
>> 4 in (..10)
=> trueJust notice how we check a number that is 4 in the above case is in range ..10, where the range has no beginning.
Now let’s try it for 11 and we see 11 is not in ..10:
>> 11 in (..10)
=> falseWe can also see that 11 is in an endless range that starts with 10 as shown:
>> 11 in (10..)
=> trueIn the below example we are seeing if minus 5 is in begin less range that ends in 10, and it’s true.
>> -5 in (..10)
=> trueTry out the program below so that you can understand about beginless and endless ranges:
age = 27
if age in ..17
then puts "You are a child"
end
if age in 18..
then puts "You are an adult"
end
if age in 21..30
then puts "You can join the Army"
end
if age in 31..
then puts "You can't join the Army"
end
if age in ..59
then puts "You are still young"
end
if age in 60..
then puts "You are old"
end9. Functions
When you are using same piece of code many times, you can group them into a thing called function, you can call that grouped code anywhere in your program to do that particular task. Let’s take a real world example, you go to the hotel and a waiter comes up to you, you order a fish fry, and you get it. You are not bothered what happens after you order.
Once you have ordered the fry, there are lots of procedures that take place. The waiter notes down your order, he goes up to the kitchen and places the order chit to the chef, the chef tells him that it would take so much time for the dish to get cooked. The waiter thinks how he could keep you from getting bored, he arrives at your table, recommends a starter and/or an appetizer, serves you a drink that would go well before you eat the dish, he pools the kitchen to see if the dish is ready. If the dish is ready and if you have finished your starter he serves it. If you haven’t finished your starter, he tells the kitchen to keep the dish warm and waits for you to finish. Once he gets the dish to your table, he lays the plate containing the dish and cutlery.
All you have done is to order a fish fry and have blissfully ignored what is being functioned at the background. You gave some order (input) to a waiter and got a dish (output). What to do and not to is preprogrammed or trained into the waiters mind, according to his training, the waiter functions.
Let’s get started with functions in Ruby. We will be looking at a program in which we will be writing a function called print_line, which prints a line. Type the following program into your text editor and run it.
# function.rb
def print_line
puts '_' * 20
end
print_line
puts "This program prints lines"
print_lineOutput
____________________ This program prints lines ____________________
Lets analyze the program. Consider the following piece of code:
def print_line
puts '_'*20
endThe def tells that you are defining a function. A function must have a name, the name follows immediately after def key word. In this case the name of the function is print_line. In it, you can write what ever code you want. In this case we are creating a line with twenty underscore characters.
So we have created a function and have added code into it. All we need to do now is to call the function from our program. It’s done by just typing the name of the function in the program as in code below
print_line
puts "This program prints lines"
print_lineAs seen in the output, a line made up of twenty underscore characters gets printed above and below the string “This program prints lines”.
9.1. Argument Passing
Lets get more control on the functions in this section. Sometimes you don’t go to a hotel and order a single dish, you can order how much ever or how less you want. If you go with friends you can order more servings, if you are alone, you will order less. Why can’t we do the same thing with print_line function? Why can’t we vary its length, doing so will be a wonderful thing, we can print lines of length what ever we choose.
Take a look at code below, we have typed a thing called length after the function name, its called as argument. Like a function, an argument has a name, in this case we have named it length. We can pass any values to it to vary the length of the line printed. Type the code below and execute it
# function_1.rb
def print_line length
puts '_' * length
end
10.step(50,10) do |x|
print_line x
end
40.step(10,-10) do |x|
print_line x
endYou will get a design pattern as shown below
__________ ____________________ ______________________________ ________________________________________ __________________________________________________ ________________________________________ ______________________________ ____________________ __________
Take a look at the following code
10.step(50,10) do |x|
print_line x
end
40.step(10,-10) do |x|
print_line x
endWe have used step loop to increment or decrement the value which we capture it into a variable called x which is inside the loop, we pass x to the print_line function by placing it after its call as highlighted above. So each time a line of varying length (determined by x) gets printed. The program is constructed in a way so that a pattern is generated.
9.2. Default Argument
In function_1.rb you have seen how to pass an argument to a function. What if suppose you fail to pass an argument? If you do so, an error will be generated which a good programmer will not desire that to happen. To prevent this and to make programming a bit easy it’s better to provide a default argument to a function. Note the code given below in function_default_argument.rb
# function_default_argument.rb
def print_line length = 20
puts '_'*length
end
print_line
print_line 40Execute the program and observe the result
____________________ ________________________________________
You can see in the program, in function print_line by giving length = 20 we have indicated that if no argument is passed the function must assume that value of length is 20. If passed this value will be overridden with what ever value you pass. As you can see in the first function call, we simply call the function just by its name print_line, we don’t bother to pass value for length to it, yet we see a line of length 20 units gets printed in the output.
9.3. Passing array to a function
Usually when you pass a variable to a function, a copy of the variable is made. And if you make changes to the variable, the one that’s outside the function is unaffected. So lets see what happens when we pass array to function. Type in the program below and run it.
# array_passed_to_function.rb
def array_changer array
array << 6
end
some_array = [1, 2, 3, 4, 5]
p some_array
array_changer some_array
p some_arrayOutput
[1, 2, 3, 4, 5] [1, 2, 3, 4, 5, 6]
If you are newcomer to programming, this might not be surprising, but when a variable is passed to a function, its value is not supposed to change. But in case of array, inside the function array_changer, we are adding an element to it, and it changes. Well this is a peculiar behavior of an array getting passed to a function.
To avoid such behavior try the program below
# array_copy.rb
def array_changer array
array << 6
end
some_array = [1, 2, 3, 4, 5]
p some_array
array_changer Marshal.load(Marshal.dump(some_array))
p some_arrayOutput
[1, 2, 3, 4, 5] [1, 2, 3, 4, 5]
Here the array does not get changed, look at the line array_changer Marshal.load(Marshal.dump(some_array)), this piece of code copies some_array to the function argument so that even when its changed inside the function, it does not get changed outside the function.
9.4. Returning Values
We have till now seen function taking in arguments, we will now see that the function can return values which can be used for some purpose. Let’s now see the program function_return.rb, study the code, type it and execute it.
#! /usr/bin/ruby
# function_return.rb
def addition x, y
sum = x + y
return sum
end
a, b = 3, 5
puts addition a, bOutput
8
The output you get out after executing is 8. Note the method named addition in the above program. It accepts two arguments x and y, inside the method we declare a variable called sum which is assigned to the addition of x with y. The next statement is the hero here, see that we have used a keyword return, this returns the value out of the function. In the above program we return out the sum and hence when we get the answer out.
It’s not that we must use return statement to return a value. The last statement that gets executed in a Ruby function gets returned by default. Consider the program function_last_gets_returned.rb that’s shown below. In it, we have a method called square_it which accepts a single argument called x. It has a single statement x**2 which happens to be the last statement as well.
#!/usr/bin/ruby
# function_last_gets_returned.rb
def square_it x
x**2
end
puts square_it 5Type the program and execute it.
25
As you see we have called square_it 5 and we get 25 as the result. It’s possible because in Ruby the result of last executed statement gets returned by default.
9.5. Keyword arguments
To understand Keyword argument, type the program below and execute it:
# keyword_argument.rb
def say_hello name: "Martin", age: 33
puts "Hello #{name} your age is #{age}"
end
say_hello name: "Joseph", age: 7
say_hello age: 21, name: "Vignesh"
say_helloOutput
Hello Joseph your age is 7 Hello Vignesh your age is 21 Hello Martin your age is 33
So, to see how this feature work, let’s analyze the code. Look at the function definition of say_hello, it’s as shown below
def say_hello name: "Martin", age: 33
puts "Hello #{name} your age is #{age}"
endLook at the highlighted part def say_hello name: "Martin", age: 33. Here we don’t specify arguments as def say_hello name= "Martin", age= 33 rather we use special name: “Martin”, we have taken out the equal to sign and replaced with colon. So what’s the use? Now take at look at the part where the function is called
say_hello name: "Joseph", age: 7
say_hello age: 21, name: "Vignesh"
say_helloThe first line is straight forward say_hello name: "Joseph", age: 7, here the first argument is name and second argument is age. But look at the code say_hello age: 21, name: "Vignesh", here the first argument is age and second one is name. But since the argument is hinted by the keyword, its position is irrelevant and the method prints a string as we expect.
The third line say_hello is just to show what happens if arguments are missed, since we have specified default values, it takes the default ones.
Is it possible to use keyword arguments with default values? Absolutely yes. Try the program below and see for yourself
# keyword_argument_no_defaults.rb
def say_hello name:, age:
puts "Hello #{name} your age is #{age}"
end
say_hello name: "Joseph", age: 7
say_hello age: 21, name: "Vignesh"
# say_hello # uncomment it and try it out
# say_hello "Karthik", 32 # uncomment it and try it out9.6. Recursive function
Let’s see another math thing. You might be wondering why am I doing all math? Certain programmers do write books that keeps out as much math as possible, I am not a professional mathematician, but I admire math. Computers are based on math. All computers use a thing called Boolean algebra to do all tasks. I wouldn’t say that you must be a mathematician to be a programmer, but knowing math does help.
OK what is a factorial? Take a number, let’s take 3, now what will be 3 X 2 X 1, that will be six! Simple, isn’t it? 6 is factorial of 3. Well we will take 4 now, so 4 X 3 X 2 X 1 will be 24, in similar way factorial of 2 will be 2 X 1 which is 2. Having equipped with this knowledge we will now construct a program that will give us factorial of a number.
Study the program given below. Concentrate on the function named factorial
# factorial.rb
def factorial num
fact = 1
1.upto(num) { |a|
fact = fact * a
}
fact
end
number = 17
puts "Factorial of #{number} = #{factorial number}"Execute the code above and this is what you get as output
Factorial of 17 = 355687428096000
In the above example (in the function factorial) we have taken all number from one to the particular number, multiplied it and got factorial. Now study the code factorial_1.rb shown below
# factorial_1.rb
def factorial num
return 1 if num == 1
return num * factorial(num-1)
end
number = 17
puts "Factorial of #{number} = #{factorial number}"Execute the code above and this is what you get as output
Factorial of 17 = 355687428096000
The output is same as the previous program factorial.rb. Take a very close look at the function named factorial in above program. Let me list it out for you to see
def factorial num
return 1 if num == 1
return num * factorial(num-1)
endThis function is confusing, isn’t it? When I was crazy and did want to learn about programming I studied C. The concept of recursive functions was explained using factorial, and I never did understand it for a long time. To avoid the pain let me explain in detail.
Take the number 1. Factorial of it is 1. So if 1 is encountered 1 is returned as shown in code below
def factorial num
return 1 if num == 1
return num * factorial(num-1)
endNow take the number 2. Factorial of it 2 X 1 , which is 2 multiplied factorial of 1. In other words we can write it as 2 multiplied by factorial of 2-1. So if number two is encountered in the function factorial, it skips the first if statement and the second statement return num * factorial(num-1) below gets executed
def factorial num
return 1 if num == 1
return num * factorial(num-1)
endIn this an interesting thing happens. Here factorial (2-1) is called, that is factorial function calls itself. So when factorial of 2-1 , i.e factorial of 1 is called, it returns 1, this 1 is multiplied by 2 and is returned, so in this case 2 is returned ultimately.
Now take the number 3. Its factorial is 3 X 2 X 1. This can be written as 3 multiplied by factorial 2. Factorial 2 gets translated as 2 multiplied by factorial 1. Hence, the result is got out finally. For any number larger than 1, the factorial function calls itself repeatedly. The process of function calling itself is called recursion.
9.7. Variable number of arguments
Lets say that you do not know how many arguments are passed to a function, let’s say that you are writing a function to add N numbers, the value of N is not known, so how could you get variable number of arguments. Well type the program function_variable_arguments.rb that’s given below and execute it.
# function_variable_arguments.rb
def some_function a, *others
puts a
puts "Others are:"
for x in others
puts x
end
end
some_function 1,2,3,4,5Output
1 Others are: 2 3 4 5
So the output of the program is shown above. As you see we pass 1,2,3,4,5 as arguments, then a is just a single variable and hence it takes the value 1, the other variables are absorbed by the variable others (note the star before variable name) which is a special kind of argument, it takes all the rest of the arguments that are not absorbed by previous argument variables and stores it in variable name others (as an array). Now in the following piece of code
for x in others
puts x
endWell that’s it. Now try writing a function to find maximum of n-numbers and write another function to find minimum of n-numbers and write a program to find maximum and minimum of a bunch of numbers.
9.8. Hashes as function arguments
Another way to sneak in multiple arguments into a function is to pass them as hashes. Look at the program below, we have a function named some_function which gets in two arguments, the first one named first_arg and second one named others_as_hash, we call this function in the following line some_function "Yoda", {jedi: 100, sword: 100, seeing_future: 100}, execute it and note the output
# hashes_to_functions.rb
def some_function first_arg, others_as_hash
puts "Your first argument is: #{first_arg}"
puts "Other arguments are:"
p others_as_hash
end
some_function "Yoda", {jedi: 100, sword: 100, seeing_future: 100}Output
Your first argument is: Yoda
Other arguments are:
{:jedi=>100, :sword=>100, :seeing_future=>100}
As we have expected the program prints the first argument and the hash passed to others_as_hash, well this one is no surprise, but take a look at the program hashes_to_function_1.rb below, execute it, its output will be the same as program above
# hashes_to_functions_1.rb
def some_function first_arg, others_as_hash
puts "Your first argument is: #{first_arg}"
puts "Other arguments are:"
p others_as_hash
end
some_function "Yoda", jedi: 100, sword: 100, seeing_future: 100Note this part, we have called some_function as shown
some_function "Yoda", jedi: 100, sword: 100, seeing_future: 100In the function we pass the second argument as a hash, but it’s given as shown above, note that we have conveniently avoided the curly braces, and it still works. That’s the point.
9.9. Argument Forwarding
Let’s say that you have a function that receives certain set of arguments, and you want to forward it to another function, you can do it as shown:
def print_something(string)
puts string
end
def decorate(...)
puts "#" * 50
print_something(...)
puts "#" * 50
end
decorate("Hello World!")Output
##################################################
Hello World!
##################################################In the above code, we see a function called decorate, we see that it’s been called like decorate("Hello World!"), but in its definition it’s like this:
def decorate(...)
puts "#" * 50
print_something(...)
puts "#" * 50
endYou would have noted the epsilon … in decorate(…), this means get what ever arguments you want. And in the function you would have seen print_something been called like this:
print_something(...)This means all the arguments that are being sent to decorate(…) is just been forwarded to print_something(…), that’s the meaning of the epsilon … in print_something(…). Isn’t it a nice syntatic sugar?
Now try out the examples shown below, what can you learn from them?
def print_something(string)
puts string
end
def decorate(..., function)
puts "#" * 50
function(...)
puts "#" * 50
end
decorate("Hello World!", print_something) # does not work
# $ ruby argument_forwarding_2.rb
# argument_forwarding_2.rb:5: syntax error, unexpected ',', expecting ')'
# def decorate(..., function)# argument_forwarding_3.rb
def rest_of_arguments *args
puts "In rest_of_arguments"
puts args
end
def first_argument_and_forward_others(a, ...)
puts "In first_argument_and_forward_others"
puts a
rest_of_arguments(...)
end
first_argument_and_forward_others(1, 2, 3, 4, 5)# argument_forwarding_4.rb
def rest_of_arguments *args
puts "In rest_of_arguments"
puts args
end
def last_argument_and_forward_others(..., a)
puts "In last_argument_and_forward_others"
puts a
rest_of_arguments(...)
end
last_argument_and_forward_others(1, 2, 3, 4, 5)9.10. Endless Functions
If you are coding a very small function, like say take a look at the code below:
# endless_function.rb
def double(num) = num * 2
puts double(5)Output
10The function double has a def but no end. It has a def followed by function name which is double here. As argument, it takes in a variable called num, and notice the equal to sign =, left of it is the function declaration def double(num) and to the right of it is the function definition num * 2. That’s it. This is very handy if you want to give a name to very small snippet of code. So all it does it returns num * 2.
So naturally puts double(5) prints out 10 as shown above. Since there is no end keyword here, it’s called endless function.
10. Variable Scope
We have seen about functions in the last section, and we have seen about variables before. I think the time is right to type about variable scope. In this chapter we examine how long or how far a variable is valuable when it’s declared in a particular section of a program. Let’s start with a example. Fire up your text editor, type the code below (variable_scope.rb) and execute it.
#!/usr/bin/ruby
# variable_scope_.rb
x = 5
def print_x
puts x
end
print_xOutput
variable_scope.rb:7:in `print_x': undefined local variable or method `x' for main:Object (NameError) from variable_scope.rb:10
Well you get an error. See that you have declared a variable by typing x = 5. In the function print_x you tell the ruby program to print out the variable x, but it throws a error. Look at the output, it says undefined local variable or method `x' for main:Object (NameError) from variable_scope.rb:10, well, we have defined x and have assigned it to value 5 at the beginning, then how come Ruby throws the error? Well, we have defined x outside the function print_x hence x has no scope inside it, so we get an error.
A good programmer is the one who exploits the advantages provided by a programming language and who is smart enough to play by rules and limitations it imposes. It might look as a real handicap for a newbie that we are not able to access a variable we have assigned outside a function, but as your program, and you become mature programmer you will realize its blessing in disguise.
To learn more type the program below (variable_scope_1.rb) in your text editor and execute it.
#!/usr/bin/ruby
# variable_scope_1.rb
x = 5
def print_x
x = 3
puts x
end
print_x
puts xOutput
3 5
Take a careful look at the output. First in the program we declare a variable x = 5, then in function print_x we declare a variable x = 3. Note that the variable declared in function print_x is not the same one as that’s been declared outside the function. Next we call upon the function print_x which prints the output as 3 which is expected since inside print_x we have written puts x after x = 3. Next statement is the hero here, (outside the function) we have written puts x after print_x, if you expected to print 3 then you are wrong. Here x is the x that we have declared it outside the function, here it will get printed as 5. This means that a variable declared inside the function has no scope outside it.
To know more and to convince ourself that variable declared inside a function has no scope outside it, we will try out another program. Type in the program variable_scope_2.rb into your text editor and execute it.
#!/usr/bin/ruby
# variable_scope_2.rb
def print_variable
y = 3
puts y
end
print_variable
puts yOutput
3 variable_scope_2.rb:10: undefined local variable or method `y' for main:Object (NameError)
Here is how the program works or should I say here is how the program doesn’t works as it throws an error. Take a look at the function print_variable, in it we have declared a variable called y using statement y = 3 and told the ruby interpreter to print its value using statement puts y. So in the program when we call print_variable the y is declared and its value 3 is printed without a glitch. Next we say puts y outside the function print_variable, since y is only declared within the function, outside it the variable y doesn’t exist and in technical terms it has no scope, so the Ruby interpreter throws an error. So we get the error message as follows:
variable_scope_2.rb:10: undefined local variable or method `y' for main:Object (NameError)
Looks like Matz (the creator of Ruby) hasn’t seen the movie 'Back to the future'. Lets see another program that proves that time travel isn’t built into Ruby, type the program below (variable_scope_3.rb) into your text editor and execute it.
#!/usr/bin/ruby
# variable_scope_3.rb
puts a # you can't access a variable that will be created in future
a = 10Output
variable_scope_3.rb:4: undefined local variable or method `a' for main:Object (NameError)
If you have anticipated right, the program throws out an error. We have given puts a before a has been declared. Ruby interpreter does not consider whats declared in future, so when puts a is encountered it, at that point of time a is undeclared, and hence an error is thrown. In other words scope of a variable starts only after it has been declared.
10.1. Global Variables
If you are a one who don’t like the idea that variables declared outside a function cant be accessed from it, then Ruby provides a way to do it. There are special variables called global variables that can be accessed from any where. Global variables are preceded by a dollar ($) sign. To know about global variables let’s see an example. Type the program below (global_variables.rb) and execute it.
#!/usr/bin/ruby
# global_variables.rb
$x = 5
def print_x
$x = 3
puts $x
end
print_x
puts $xOutput
3 3
Having run it successfully lets see how it works. First we declare a global variable $x and assign it to the value 5 in the statement $x = 5. Next we define a function print_x in which we change the value of $x to 3 using statement $x = 3, then we print the value of $x using puts $x. So obviously we call print_x we get the output as 3. Next outside the function after calling print_x, we print the value of $x using puts $x. If you think it would print 5, then you are mistaken. Since $x can be accessed from any where, and we have called print_x, and in print_x we have changed the value of $x to 3, no matter what, even outside the scope of the function the value of $x will be changed.
Lets see another example to understand global variables better. Look at the example below (global_variables_1.rb), type it in your text editor and execute it
#!/usr/bin/ruby
# global_variables_1.rb
$x = 5
def print_x
puts $x
end
print_x
$x = 7
print_x
$x = 3
print_xhere is how the output of the program looks like
5 7 3
Lets see how the program works. At first we declare a global variable $x and assign it to value five using $x = 5, then we define a function called print_x in which we just print out the value of $x using puts $x statement. While we call the first print_x statement, the value of $x is 5 and hence 5 gets printed. Next we change the value of $x to 7 in statement $x = 7 and when we call print_x, the value of $x which is now 7 gets printed. Finally we set $x to 3 using $x = 3, when we call print_x for the final time 3 gets printed out.
This program proves that global variables can be manipulated from any where and these manipulated values can be accessed from any where.
Next arises a question whether global variable and local variable can have the same name. The answer is yes. It’s because global variables start with a $ sign and local variables start with a letter or underscore character, so ruby can clearly tell the difference between them. Let’s see a program that proves this, read, learn type and execute the program given below (global_variables_2.rb). Once you are done with it, we will see how it works.
#!/usr/bin/ruby
# global_variables_1.rb
$x = 5
x = 5
def print_x
$x = 3
x = 3
puts "In print_x"
puts "$x = "+$x.to_s
puts "x = "+x.to_s
end
print_x
puts "Outside print_x"
puts "$x = "+$x.to_s
puts "x = "+x.to_sOutput
In print_x $x = 3 x = 3 Outside print_x $x = 3 x = 5
In the above program we declare two variables one global $x and assign it to value 5 and another local x and assign it to value 3 in the following lines
$x = 5
x = 5Next we create a function print_x in which we change the value of $x to 3, since $x is global, the change is affected every where in the program, next we have statement x = 3, this variable x is local one and is different from x = 5 which we defined outside the function. Next we will tell the program to print the values of $x and local x using he following statements
puts "In print_x"
puts "$x = "+$x.to_s
puts "x = "+x.to_sOK, when the program encounters the print_x call, we get the following output
In print_x $x = 3 x = 3
Note that $x is now 3 and local x is also 3. Now outside the function we print the values of $x and x using the following statements (last 3 lines of the program)
puts "Outside print_x"
puts "$x = "+$x.to_s
puts "x = "+x.to_sWhen these statements are executed, we get the following output
Outside print_x $x = 3 x = 5
Here as $x had been assigned to 3, 3 is printed as it’s value. x over here remains 5 as here x refers to not the x thats defined inside print_x, but the one thats defined out of it.
11. map, reduce, and filter
11.1. map
Let’s say that we have an array of numbers, and we want to square it, one would think of loops or something, but ruby offers a thing called map. Take a look at the code example below:
>> [1, 2, 3, 4, 5, 6, 7].map { |x| x ** 2 }
=> [1, 4, 9, 16, 25, 36, 49]In the above example we are calling map method on array, and to it, we feed this block:
{ |x| x ** 2 }This block takes each element of an array as variable x, the squares it x ** 2, packs the squared values into an array and returns it. So you get output as [1, 4, 9, 16, 25, 36, 49].
In the example below, we are using our own function square to return the mapped values:
# map_square_it.rb
def suqare num
num ** 2
end
squared_array = [1, 2, 3, 4, 5].map { |x| suqare x }
p squared_arrayOutput
[1, 4, 9, 16, 25]It’s not necessary, and it’s not customary to write lengthy code in map block.
Now let’s define an array:
>> array = [1, 2, 3, 4, 5, 6, 7, 8, 9]
=> [1, 2, 3, 4, 5, 6, 7, 8, 9]Now we call map on it and map it to it’s squares:
>> array.map { |x| x ** 2 }
=> [1, 4, 9, 16, 25, 36, 49, 64, 81]Now if we query the content of the array, we see that it hasn’t changed:
>> array
=> [1, 2, 3, 4, 5, 6, 7, 8, 9]One way to capture the output of the map is to assign it to a variable as shown:
>> squared_numbers = array.map { |x| x ** 2 }
=> [1, 4, 9, 16, 25, 36, 49, 64, 81]Now if we query squared_numbers we will get the result of map operation:
>> squared_numbers
=> [1, 4, 9, 16, 25, 36, 49, 64, 81]Let’s say we map the elements of variable array to its squares, and then when we query what’s in array, we still get the original set of numbers as shown:
>> array = [1, 2, 3, 4, 5, 6, 7, 8, 9]
=> [1, 2, 3, 4, 5, 6, 7, 8, 9]
>> array.map { |x| x ** 2 }
=> [1, 4, 9, 16, 25, 36, 49, 64, 81]
>> array
=> [1, 2, 3, 4, 5, 6, 7, 8, 9]Now say if we want the map to modify the elements of array, we can call map! (map with a bang !) on it as shown:
>> array = [1, 2, 3, 4, 5, 6, 7, 8, 9]
=> [1, 2, 3, 4, 5, 6, 7, 8, 9]
>> array.map! { |x| x ** 2 }
=> [1, 4, 9, 16, 25, 36, 49, 64, 81]
>> array
=> [1, 4, 9, 16, 25, 36, 49, 64, 81]In the above example we see that map! has modified array.
11.2. reduce
Let’s say you want to add all elements of an array, one thing is you can write a loop, or you could use reduce as shown:
>> [1, 2, 3, 4, 5, 6, 7].reduce(:+)
=> 28The :+ is nothing but a function call to +, yes + is a function in Ruby.
It’s not that you are restricted to few operations Ruby provides, you can use your own function as shown with reduce:
# reduce.rb
def add a, b
a + b
end
puts [1, 2, 3 , 4, 5].reduce{ |x, y| add x, y }Output
15As tou see in the above code, we provide our own add function to reduce. That is we have an array:
[1, 2, 3 , 4, 5]We call reduce on it:
[1, 2, 3 , 4, 5].reduceTo the reduce block we capture two numbers of the array as x and y as shown:
puts [1, 2, 3 , 4, 5].reduce{ |x, y| }We pas those numbers x and y to the add function:
[1, 2, 3 , 4, 5].reduce{ |x, y| add x, y }11.3. filter
filter is used to select elements of an array that satisfy a condition:
>> [1, 2, 3, 4, 5, 6, 7].filter { |x| x if x.odd? }
=> [1, 3, 5, 7]In the code above we see filter is being applied on an array, in the filter’s block we grab each and every element of array into a variable name `x and we return x only if x is odd, that is x.odd?.
So as you can see above only the odd numbers gets returned.
The code below shows doing the same as above, but in a concise manner.
>> [1, 2, 3, 4, 5, 6, 7].filter(&:odd?)
=> [1, 3, 5, 7]You can also define your own filter function. If you look at the code below, we have defined a function called greater_than_7 which takes a variable num, it returns true if num is greater than 7. We can use this function to filter out numbers that are greater than 7.
# filter.rb
def greater_than_7 num
num > 7
end
p (1..10).filter { |x| greater_than_7 x }Output
[8, 9, 10]There is also a function called select which does the same thing as filter:
>> [1, 2, 3, 4, 5, 6, 7].select { |x| x.odd? }
=> [1, 3, 5, 7]I haven’t seen if there are any difference, but it seems to do the same job.
11.4. filter_map
There is a function called filter_map, which does the combined job of filter and map.
>> [1, 2, 3, 4, 5, 6, 7].filter_map { |x| x.odd? ? x.to_s : nil }
=> ["1", "3", "5", "7"]If you see the above code snippet, if you look at the block of filter map, we are capturing each number of the array into a variable named x, then we check if x is odd using x.odd? (the filter part), if yes we are converting x to string using x.to_s else we are returning nil (map part).
12. Classes & Objects
12.1. Creating a Square
Classes can be thought as variables and functions bundled under one name. To illustrate about classes lets look at a humble object called square. Square is a very simple geometric shape that has four sides of equal length, how to represent this square in a Ruby program? We now write an empty class called square as shown:
#square.rb
class Square
endWe have written an empty class. The word class tells that we are writing a definition of a class. What follows the class keyword is the name of the class, in this case its Square. One must note that name of a class in Ruby must start with a capital letter [28].
A square has got four sides, all have the same length. We now put an variable into square called side_length.
#square.rb
class Square
attr_accessor :side_length
endYou might ask what attr_accessor is? It stands for attribute accessor, which enables you to get and set the side_length easily. Let’s use this square class and see how it works. Modify the code above as shown below:
#square.rb
class Square
attr_accessor :side_length
end
s1 = Square.new # creates a new square
s1.side_length = 5 # sets its side length
puts "Side length of s1 = #{s1.side_length}" # prints the side lengthWhen you execute the above code, this is what you will get as result
Side length of s1 = 5
Let’s walk through the newly added code, take the line
s1 = Square.newIn the above statement we create a new square and store its parameters into a variable called s1. A new class instance can be created by using <class name>.new. Having created a new square, we can now access its side_length using the dot operator '.'. So we first set the side_length to five units using the following statement
s1.side_length = 5Now having assigned the side_length, we can use it for any purpose. Now we just simply print the side_length of square using the following statement:
puts "Side length of s1 = #{s1.side_length}"12.2. Functions in Class
We have a class called Square which has a attribute named side_length. With the side_length we can find the squares area, its perimeter and its diagonal length. In this example I am going to find the area and perimeter. So let’s add two functions to find area and perimeter. Modify the code as shown (I am saving the modified code in a file called square_1.rb)
#square_1.rb
class Square
attr_accessor :side_length
def area
@side_length * @side_length
end
def perimeter
4 * @side_length
end
endIn the code above you see that I have added two functions, one named area and another named perimeter which computes and returns the area and perimeter of the square respectively. These functions are very similar to any other function we have created before, only now it’s placed inside a class. Let’s write some additional code to exploit the new features we have added, just modify the program, so it looks like the code below
#square_1.rb
class Square
attr_accessor :side_length
def area
@side_length * @side_length
end
def perimeter
4 * @side_length
end
end
a = Square.new
a.side_length = 5
puts "Area: #{a.area}"
puts "Perimeter: #{a.perimeter}"Run the example and here is what you will get as output
Area: 25 Perimeter: 20
The explanation is pretty straight forward. In the following lines
a = Square.new
a.side_length = 5We have declared a new Square and have assigned side_length as 5 units. In lines below we simply print out the values of a.area and a.perimeter
puts "Area: #{a.area}"
puts "Perimeter: #{a.perimeter}"See how we have embedded the values of `a’s area and perimeter (in the code above). One thing that must be new for you if you are reading this book is shown below:
def area
@side_length * @side_length
endWe know that square has an attribute called side_length which is defined by the statement attr_accessor :side_length, well as shown in highlighted code above we have used @side_length instead of side_length, that’s because inside the class, class-variables are prefixed with @ (at) symbol. This helps us to identify between class variables and local variables or functions that share the same name.
12.3. Initializers or Constructors
In previous examples where we dealt with squares, have you ever wondered what happens when you say like s = Square.new ? Well in this case a new Square gets created and its put inside the variables. If one asks a question whether we can do something when a Square initializes? The answer is yes. All you have to do is to put code inside a function called initialize, this function gets called when ever there is a <class name>.new call
Look at the example square2.rb, take a good look at the code below, we define a function called initialize, this function takes in one argument named side_length whose default value is zero. If side_length is specified, it sets the @side_length attribute in the square class to that value else @side_length takes the default value of zero. Type square2.rb into text editor and execute it.
#square_2.rb
class Square
attr_accessor :side_length
def initialize side_length = 0
@side_length = side_length
end
def area
@side_length * @side_length
end
def perimeter
4 * @side_length
end
end
s1 = Square.new 4
s2 = Square.new
s2.side_length = 5
puts "Area of s1 is #{s1.area} squnits"
puts "Perimeter of s2 is #{s2.perimeter} units"Output
Area of s1 is 16 squnits Perimeter of s2 is 20 units
In the program concentrate on the following lines
s1 = Square.new 4
s2 = Square.new
s2.side_length = 5In the first line s1 = Square.new 4 we create a Square named s1 who’s @side_length is 4 units. In the second line s2 = Square.new we create a Square named s2, initially its side length (@side_length) would be set to zero units, only in the third line s2.side_length = 5 its @side_length is set to 5 units.
In rest of the code
puts "Area of s1 is #{s1.area} squnits"
puts "Peimeter of s2 is #{s2.perimeter} units"We print the area of Square s1 and perimeter of Square s2 which produces the desired output.
12.4. Unexposed instance variables
Its not necessary that you need to expose instance variables using attr_accessor, it can be hidden and can be set and called from a function as shown
# unexposed_class_variables.rb
class Human
def set_name name
@name = name
end
def get_name
@name
end
end
a = Human.new
a.set_name "Karthik"
b = Human.new
b.set_name "Chubby"
puts "#{a.get_name} and #{b.get_name} are best friends."Output
Karthik and Chubby are best friends.
In the above example note that the (instance of) class Human does use a variable called @name, but you can set it like a.name = and you can’t fetch it like a.name because it’s not exposed to the external world using attr_accessor. So in a Ruby class you can have any number of hidden variables in a class without the external world knowing about it. Isn’t that beautiful?
12.5. Private Methods
By default, the methods or functions in a class are public (can be accessed outside the classes scope), if you don’t want it to be accessed by programs outside a class you can make it private. Let’s create a class called Human, and put a private method in it, let’s try to access it from outside the class and see what happens to it. Type in the program and execute it.
# private_method.rb
class Human
attr_accessor :name, :age
def tell_about_you
puts "Hello I am #{@name}. I am #{@age} years old"
end
private
def tell_a_secret
puts "I am not a human, I am a computer program. He! Hee!!"
end
end
h = Human.new
h.name = "Zigor"
h.age = 314567
h.tell_about_you
h.tell_a_secret # this wont workThe program above when executed produces the following result
Hello I am Zigor. I am 314567 years old human.rb:20: private method `tell_a_secret' called for #<Human:0xb7538678 @name="Zigor", @age=314567> (NoMethodError)
Look at the function tell_a_secret in the class, its is placed under the keyword private, this makes it not accessible from outside the class. Note the line when we call the method tell_a_secret, it throws an error, in fact it says a no method error (NoMethodError) which means that the called method does not exist in the class. It does not mean the computer is telling a lie, instead it’s safely keeping a secret.
In programming, you only let certain parts of your program visible to others, this helps keep the interface simple and give your users only the resource they really need to write code, this sort of hiding unwanted things un-complicates programming.
One might question, if there is no way to access a private method, then why we need to have it? Well there are ways to access it indirectly as you see in example below. Type it and execute it
# private_method_1.rb
class Human
attr_accessor :name, :age
def tell_about_you
puts "Hello I am #{@name}. I am #{@age} years old"
end
def confess
tell_a_secret
end
private
def tell_a_secret
puts "I am not a human, I am a computer program. He! Hee!!"
end
end
h = Human.new
h.name = "Zigor"
h.age = 314567
h.tell_about_you
h.confessThis is how the result will be
Hello I am Zigor. I am 314567 years old I am not a human, I am a computer program. He! Hee!!
Take a good look at the method confess, in it, we call the private method tell_a_secret, so when we call confess even outside the class ( h.confess ), the confess method which is public calls the private method, since confess is inside the class Human, it can access any private method in Human without a hindrance, so the program executes perfectly.
12.6. Class variables and methods
Till now we have learned to create a class, we know that a class can have certain attributes, for example a human might have attributes like name, age, etc. We know that class can have some functions in it which can be called by variable which is an instance of the class. Now what if we want to call a function or a class without declaring a variable which is the instance of that class? Those functions that can be called without declaring an instance variable that belongs to the class type is called class methods. Those variables that can be accessed without using instance variables of a class are called class variables.
Let’s look at a program that will demonstrate class variables and methods. In the following program class_var_methods.rb, I will create a class named Robot. It will have a class variable named @@robot_count which will keep track of how many Robots were created. Since it’s a class variable we indicate it to the computer by using two @ (at) symbols before it, hence in program we denote it like @@robot_count.
We create a function named robots_created that will return number of Robots that were created. Notice (in program below) that the function robots_created is written as self.robots_created, the self keyword tells the computer that this function can be called without an instance object being declared.
Type the program shown below class_var_method.rb in text editor and execute it.
# class_var_methods.rb
class Robot
def initialize
if defined?(@@robot_count)
@@robot_count += 1
else
@@robot_count = 1
end
end
def self.robots_created
@@robot_count
end
end
r1 = Robot.new
r2 = Robot.new
puts "Created #{Robot.robots_created} robots"
r3, r4, r5 = Robot.new, Robot.new, Robot.new
puts "Created #{Robot.robots_created} robots"When executed the program above will give the following result
Created 2 robots Created 5 robots
Lets see the initialize method and let’s analyze how we keep track of number of Robot’s created. When the first Robot is created in the statement
r1 = Robot.newThe program control goes to the initialize method, since it’s the first time the variable @@robot_count is not defined, so the condition in the following if statement
if defined?(@@robot_count)
@@robot_count += 1
else
@@robot_count = 1
endfails and the code goes to the else part and there @@robot_count = 1 defines the variable @@robot_count and initializes to value 1.
In the second statement where we create robot named r2 using the following command
r2 = Robot.newThe control once again goes to the initialize method, there the if statement passes as @@robot_count has already been defined when we created r1, now the @@robot_count gets incremented by 1, now becomes 2.
Next is the puts statement we call Robot.robots_created which just returns the @@robot_count, hence 2 gets printed. Next in the following statement:
r3, r4, r5 = Robot.new, Robot.new, Robot.newWe create three new robots r3, r4 and r5. Now the `@@robot_count will get incremented to 5. In the next puts statement, the result gets printed. The moral of the story is this, class methods have a self. (self dot) before them, class variables have two @ (@@) before them.
Fine, hope everything went right for the reader. Why now we use attr_reader for robot_count variable so that our program gets simplified as shown below. Type in and execute it.
# attr_for_classvar.rb
# this program dosent work
class Robot
attr_reader :robot_count
def initialize
if defined?(@@robot_count)
@@robot_count += 1
else
@@robot_count = 1
end
end
end
r1 = Robot.new
r2 = Robot.new
puts "Created #{Robot.robot_count} robots"
r3, r4, r5 = Robot.new, Robot.new, Robot.new
puts "Created #{Robot.robot_count} robots"What was the result you got? Can attr_reader be used for class variables?
12.7. Inheritance
We evolved from monkeys. Chimps look like us, we both share many characteristics, we have many attributes similar to chimps, they are so similar us that chimps were sent into space before us to see the impact of zero gravity on a monkeys body. Only when the scientist felt safe did they send humans [29]. When man evolved from monkeys he inherited many things from them, for example we look like monkeys, don’t believe it? Just go and stand in front of a mirror!
OK, in programming world we have a thing called inheritance in which one class can have property of another class with some little (or sometimes extreme) changes. Let me tell you a math truth, 'a square is a rectangle in which all sides are equal', is it not so? All squares are rectangles, but not all rectangles are squares. We will be using this stuff to write our next program inheritance.rb. Write the program in text editor and execute it.
# inheritance.rb
class Rectangle
attr_accessor :length, :width
def initialize length, width
@length = length
@width = width
end
def area
@length * @width
end
def perimeter
2 * (@length + @width)
end
end
class Square < Rectangle
def initialize length
@width = @length = length
end
def side_length
@width
end
def side_length=(length)
@width = @length = length
end
end
s = Square.new 5
puts "Perimeter of the square s is #{s.perimeter}"
r = Rectangle.new 3, 5
puts "Area of rectangle r is #{r.area}"When executed, the program above produces the following result
Perimeter of the square s is 20 Area of rectangle r is 15
Read the program carefully, we have defined a class called Rectangle that has two attributes namely @length and @width. When we initialize it in statement r = Rectangle.new 3, 5, we pass these two parameters. When area is called the product of these two attributes is returned, when its perimeter is called using some genius formula the perimeter is calculated and returned. We then define a class called Square that inherits the properties of Rectangle. To say that the class Square inherits Rectangle we use a < (less than) sign as shown:
class Square < RectangleTake a look at the initialize method in Square class, it takes only one argument length which it uses to set the values of attributes @length and @width . Since Square inherits Rectangle class it gets all attributes and methods of Rectangle by default. Having set the @width and @height of the Square we can now call the Square’s area and perimeter functions just like we do that with Rectangle.
12.8. Overriding Methods
We have seen that class can inherit attributes and methods from its base class. Let’s say that we have a class A that is a parent class of B (i.e. B inherits A), now the scenario is there is a method defined in B which has the same name that of method in A. When we create a instance variable of type B and call that method name it will check if the method is present in class B if yes that method will be executed, if that method is not found in B, then the Ruby interpreter checks it in class A, if its found its executed, else NoMethodError [30] is raised.
To make this clear lets see an example, type and execute override_methods.rb
#!/usr/bin/ruby
# override_methods.rb
class A
def belongs_to
puts "I belong to class A"
end
def another_method
puts "Just another method in class A"
end
end
class B < A
def another_method
puts "Just another method in class B"
end
end
a = A.new
b = B.new
a.belongs_to
a.another_method
b.belongs_to # This is not overriden so method in class A is called
b.another_method # This is overridden so method in class B is calledResult
I belong to class A Just another method in class A I belong to class A Just another method in class B
Take a look at the result. When a.belongs_to is called the program prints out I belong to class A as it was defined in class A. When a.another_method is called we see the program prints out Just another method in class A as it was defined in class A. When b.belongs_to is called the program once again prints out I belong to class A as there is no belongs_to method in class B and hence the parent method is called. See the drama when b.another_method is called, the program prints out Just another method in class B and not Just another method in class A as B has another_method in its scope, so there is no need to look for that method in class A.
We will take the concept of overriding a step further, know that everything in Ruby is a object. Ruby is purely an object oriented programming language. Shoot up your irb and type the following
>> "Something".class
=> String
>> 1.class
=> Integer
>> 3.14278.class
=> FloatWhen ever in Ruby, you put an .class after object it returns the class to which the object belongs. So we see that numbers like 1, 2 ,3…….. belong to the Integer class. Let’s override its key method the +. Plus sign is used in Ruby to add two numbers. Try these examples in your irb:
>> 1 + 2
=> 3
>> 478 + 90
=> 568So we see that when there is an Integer, followed by a plus sign and another Integer Ruby interpreter adds these two Integers which is returned as result. Let’s now mess up with the plus sign. Take a look at override_methods_1.rb, type it in your text editor and execute it.
# override_methods_2.rb
class Integer
def + a
416
end
end
puts 3 + 5
puts 7 + 12Result
416 416
Look at the result, aren’t you surprised? When three and five are added the result you get is 416 and when 7 and 12 are added, once again the result is 416. Take a look at the code in the Fixnum class. To make your reading convenient, here is the code:
def + a
416
endIn it we have redefined the method + in Integer class. In it, we have said no matter what ever be the value of a (that is number that is on the right side of + sign in addition) we must return a value of 416, so the Ruby interpreter simply obeys it.
Integer is a core class of Ruby, in many programming languages (for example Java) one does not have the luxury to modify the core class, but Ruby allows it. Many authors and programming gurus who have written books about Ruby have called this Ruby feature as a dangerous one, its dangerous indeed, if you do modify a important class in Ruby and if our code is buried deep in a project, then sometimes it can result in severe logical errors in your program, and sometimes it may cost a lot of resource to be wasted as one needs to bury himself to debug the code. So before overriding methods in a class please think, and then do make a leap if it’s really necessary.
12.9. The super function
See the program below
#!/usr/bin/ruby
# class_super.rb
class Rectangle
def set_dimension length, breadth
@length, @breadth = length, breadth
end
def area
@length * @breadth
end
end
class Square < Rectangle
def set_dimension side_length
super side_length, side_length
end
end
square = Square.new
square.set_dimension 7
puts "Area: #{square.area}"Output
Area: 49
In the program you see a Rectangle class, in it, you see a function called set_dimension as highlighted below. This function receives two arguments length and breadth, which is assigned to class variables @length and @breadth in this line @length, @breadth = length, breadth
class Rectangle
def set_dimension length, breadth
@length, @breadth = length, breadth
end
def area
@length * @breadth
end
endNow see the class Square. Square inherits Rectangle (who’s lengths and breadths are equal), but not the other way around. Now note the piece of code below
class Square < Rectangle
def set_dimension side_length
super side_length, side_length
end
endYou can see that the Square class has its own set_dimension method, now look what it has, it has a new stuff, look at the line that shows super side_length, side_length, here we call a new method called super. super is a special method, if you call it in set_dimension, it will see if the parent class has the method with the same name, if yes it calls the method. Hence, super here will call the set_dimension in Rectangle and will pass side_length to length thus setting it to @length, and side_length to breadth, thus setting it to @breadth respectively.
A rectangle who’s @length and @breadth are equal is a square! Isn’t it not? Think!!!
12.10. Private, public and protected in inheritance
Since we are talking about inheritance, it’s better now that we see the role of public, private and protected methods. To understand them type public_private_protected_in_inheritance.rb and execute it.
# public_private_protected_in_inheritance.rb
class A
def public_method
puts "Class A public method"
end
private
def private_method
puts "Class A private method"
end
protected
def protected_method
puts "Class A protected method"
end
end
class B < A
def get_class_a_protected_method
protected_method # implicit call
end
def get_class_a_private_method
private_method # implicit call
end
end
class C < A
def get_class_a_protected_method
self.protected_method # explicit call
end
def get_class_a_private_method
self.private_method # explicit call
end
end
a = A.new
a.public_method
# a.protected_method
# a.protected_method
b = B.new
b.get_class_a_protected_method
b.get_class_a_private_method
c = C.new
c.get_class_a_protected_method
# c.get_class_a_private_methodOutput
Class A public method Class A protected method Class A private method Class A protected method
You will get an output as shown above. Now let’s analyze the program. There is a class called A, and it has a public method as shown:
class A
def public_method
puts "Class A public method"
end
……….
enda private method as shown
class A
...
private
def private_method
puts "Class A private method"
end
...
endand a protected method
class A
...
protected
def protected_method
puts "Class A protected method"
end
endAs you can see the code from the above examples if you put the key word private, then what ever stuff is typed under it will become private, similarly it’s the same for protected. I could have written the public method as shown:
class A
public
def public_method
puts "Class A public method"
end
……….
endBut by default a method is public if it does not fall under private or protected, so I have included nothing above it. Now lets look at class B:
class B < A
def get_class_a_protected_method
protected_method # implicit call
end
def get_class_a_private_method
private_method # implicit call
end
endLook at the highlighted code. In get_class_a_protected_method and in get_class_a_private_method we are calling protected_method and private_method in implicit way, and when we execute the code below
b = B.new
b.get_class_a_protected_method
b.get_class_a_private_methodThey work flawlessly. Now let’s see class C,
class C < A
def get_class_a_protected_method
self.protected_method # explicit call
end
def get_class_a_private_method
self.private_method # explicit call
end
endAs you can see in the code above, in get_class_a_protected_method and in get_class_a_private_method, the protected_method and private_method are called in a explicit way as shown in the piece of code above, now in this piece of code below
c = C.new
c.get_class_a_protected_method
# c.get_class_a_private_methodc.get_class_a_private_method will throw a NoMethodError (no method error) exception, whereas c.get_class_a_protected_method will run smoothly. So we can see very clearly, in explicit calls, private methods of the Parent class cannot be accessed. I encourage one to uncomment the comment code above and execute it and experience error for oneself.
It is worth to mention that in one case, the private status of method won’t work even during explicit call. Take a look at the code below, type it and execute it.
# private_attribute_writer.rb
class Parent
private
# we have a attribute writer private method
def private_method= some_val
puts some_val
end
end
class Child < Parent
def set_some_val
self.private_method = "I know your secret!"
end
end
Child.new.set_some_valOutput
I know your secret!
Its surprising that when Child.new.set_some_val is executed, it in fact calls private_method in Parent class in an explicit way, yet it gets executed without a fuss. That’s because as shown in the above code private_method in Parent class is attribute writer, that is it ends with an = sign. This is a special case in Ruby.
12.11. Extending class
Ruby lets a programmer extend preexisting classes in (almost) any way you want, it doesn’t matter if the classes are written by you or bundled into the Ruby language itself. In the following example we will be extending Integer class to suit our needs. Type the program into text editor and execute it
# extending_class_1.rb
class Integer
def minute
self * 60
end
def hour
minute * 60
end
def day
hour * 24
end
def week
day * 7
end
end
puts Time.now + 2.weekResult
2018-10-10 10:27:37 +0530
The program puts what would be Time exactly 2 weeks from current second, note that we do it by this statement :
puts Time.now + 2.weekThe Time.now gets the current Time instance, to which we add 2.week. In reality, the native Integer class has no method named week in it but see in the program we have defined a Integer class which has method name week, when it’s called it returns number of seconds in a week which can be added or subtracted to time object to get past and future time.
Similarly, you can extend any class in Ruby, you can override almost any method. Of course some programmers see this as a threat as some accidental changes might introduce a bug in your code, but if you truly love Ruby this shouldn’t matter a lot.
12.12. Reflection
Reflection is a process by which a computer program can analyze itself and modify it on the go. In the following pages we will just be scratching its surface.
We will try out these examples in irb, so in your terminal type irb –-simple-prompt. In irb prompt below I have declared a String variable a and set it to a value “Some string”
>> a = "Some string"
=> "Some string"Now let’s see that what methods are available with variable a that we can use. To do so type a.methods in irb
>> a.methods
=> ["upcase!", "zip", "find_index", "between?", "to_f", "minmax", "lines", "sub", "methods", "send", "replace", "empty?", "group_by", "squeeze", "crypt", "gsub!", "taint", "to_enum", "instance_variable_defined?", "match", "downcase!", "take", "find_all", "min_by", "bytes", "entries", "gsub", "singleton_methods", "instance_eval", "to_str", "first", "chop!", "enum_for", "intern", "nil?", "succ", "capitalize!", "take_while", "select", "max_by", "chars", "tr!", "protected_methods", "instance_exec", "sort", "chop", "tainted?", "dump", "include?", "untaint", "each_slice", "instance_of?", "chomp!", "swapcase!", "drop", "equal?", "reject", "hex", "minmax_by", "sum", "hash", "private_methods", "all?", "tr_s!", "sort_by", "chomp", "upcase", "start_with?", "unpack", "succ!", "enum_slice", "kind_of?", "strip!", "freeze", "drop_while", "eql?", "next", "collect", "oct", "id", "slice", "casecmp", "grep", "strip", "any?", "delete!", "public_methods", "end_with?", "downcase", "%", "is_a?", "scan", "lstrip!", "each_cons", "cycle", "map", "member?", "tap", "type", "*", "split", "insert", "each_with_index", "+", "count", "lstrip", "one?", "squeeze!", "instance_variables", "__id__", "frozen?", "capitalize", "next!", "each_line", "rstrip!", "to_a", "enum_cons", "ljust", "respond_to?", "upto", "display", "each", "inject", "tr", "method", "slice!", "class", "reverse", "length", "enum_with_index", "rpartition", "rstrip", "<=>", "none?", "instance_variable_get", "find", "==", "swapcase", "__send__", "===", "min", "each_byte", "extend", "to_s", "rjust", "index", ">=", "size", "reduce", "tr_s", "<=", "clone", "reverse_each", "to_sym", "bytesize", "=~", "instance_variable_set", "<", "detect", "max", "each_char", ">", "to_i", "center", "inspect", "[]", "reverse!", "rindex", "partition", "delete", "[]=", "concat", "sub!", "dup", "object_id", "<<"]As you can see a.methods returns the methods aka functions that can be used upon a String. Next we will try out and find what class or type a belongs. Of course, we know that it belongs to String type, but for the sake of learning to program type a.class into irb:
>> a.class
=> Stringand it faithfully returns that a is of the type String.
Fine we have seen something about reflection. To understand it better let’s define our own class and see how reflection works upon it. Type the program (below) reflection.rb into a text editor and execute it.
# reflection.rb
class Someclass
attr_accessor :a, :b
private
# A dummy private method
def private_method
end
protected
# A dummy protected method
def protected_method
end
public
# A dummy public method
def public_method
end
end
something = Someclass.new
something.a = 'a'
something.b = 123
puts "something belongs to #{something.class}"
puts
puts "something has the following instance variables:"
puts something.instance_variables.join(', ')
puts
puts "something has the following methods:"
puts something.methods.join(', ')
puts
puts "something has the following public methods:"
puts something.public_methods.join(', ')
puts
puts "something has the following private methods:"
puts something.private_methods.join(', ')
puts
puts "something has the following protected methods:"
puts something.protected_methods.join(', ')Output
something belongs to Someclass something has the following instance variables: @a, @b something has the following methods: inspect, protected_method, tap, clone, public_methods, __send__, object_id, instance_variable_defined?, equal?, freeze, extend, send, methods, public_method, hash, dup, to_enum, instance_variables, eql?, a, instance_eval, id, singleton_methods, a=, taint, enum_for, frozen?, instance_variable_get, instance_of?, display, to_a, method, b, type, instance_exec, protected_methods, ==, b=, ===, instance_variable_set, kind_of?, respond_to?, to_s, class, __id__, tainted?, =~, private_methods, untaint, nil?, is_a? something has the following public methods: inspect, tap, clone, public_methods, __send__, object_id, instance_variable_defined?, equal?, freeze, extend, send, methods, public_method, hash, dup, to_enum, instance_variables, eql?, a, instance_eval, id, singleton_methods, a=, taint, enum_for, frozen?, instance_variable_get, instance_of?, display, to_a, method, b, type, instance_exec, protected_methods, ==, b=, ===, instance_variable_set, kind_of?, respond_to?, to_s, class, __id__, tainted?, =~, private_methods, untaint, nil?, is_a? something has the following private methods: exit!, chomp!, initialize, fail, print, binding, split, Array, format, chop, iterator?, catch, readlines, trap, remove_instance_variable, getc, singleton_method_added, caller, putc, autoload?, proc, chomp, block_given?, throw, p, sub!, loop, syscall, trace_var, exec, Integer, callcc, puts, initialize_copy, load, singleton_method_removed, exit, srand, lambda, global_variables, gsub!, untrace_var, open, `, system, Float, method_missing, singleton_method_undefined, sub, abort, gets, require, rand, test, warn, eval, local_variables, chop!, scan, raise, printf, set_trace_func, private_method, fork, String, select, sleep, gsub, sprintf, autoload, readline, at_exit, __method__ something has the following protected methods: protected_method
You must have got pretty big output as shown above. Let’s now walk through the code. First we define a class called Someclass in which we have two attributes a and b. We have a private method called private_method, protected method called protected_method and public method called public_method.
After defining the class we create a variable called something of the type Someclass and give values to its attributes in the following lines:
something = Someclass.new
something.a = 'a'
something.b = 123Next we ask the ruby interpreter to print the class of variable something using the following statement puts "something belongs to #{something.class}" which it faithfully does, and so we get the following output:
something belongs to Someclass
Next we would like to know that if something which is an object of type Someclass has any instance variables. To know it we use the following code:
puts "something has the following instance variables:"
puts something.instance_variables.join(', ')for which we get the following output
something has the following instance variables: @a, @b
Next we would like to know what methods are there with something that can be used. To know that we can use the methods function, so we write the following code:
puts "something has the following methods:"
puts something.methods.join(', ')In the above code something.methods returns an array of methods, this must be converted to a string which is done by the join method. The elements of the array are joined by the String passed to the join method. Notice that there are more methods than we have defined, that’s because even Someclass is of type Object [31] which itself has many methods of its own. In Ruby everything is a Object.
The methods and public_methods of any Object returns the same result. So we will skip the discussion on these
puts "something has the following public methods:"
puts something.public_methods.join(', ')statements.
Next we want to know what are the private, public and protected methods are, that are in Someclass, since something belongs to Someclass, private methods can be got using private_methods function, thus by giving the following statements
puts "something has the following private methods:"
puts something.private_methods.join(', ')We are able to get private methods in some class.
Similarly, protected methods are got by using protected_methods function which I won’t discuss due to my laziness.
12.13. Encapsulation
You might have taken a capsule tablet in some point of time in your life. In it the medicine is packed inside a gelatin capsule. When you take it with water it slides to your stomach where water breaks out the gelatin layer releasing the medicine in it which cures your body of ailments. If you try to swallow the medicine without the capsule it will be a bitter experience.
In similar fashion modern programming language allows you to hide unwanted details and let your fellow programmer look only at the needed details. This technique is called encapsulation which when properly implemented will result in producing clean code and one that’s easy to use.
Another great example of encapsulation is your car. Under the hood your car has thousands of parts that turn this way and that way, yet all you need to do is to turn on the key and operate the steering wheel and pedals to get a driving experience. There is no need for you to bother what goes on inside the hood.
Let’s see a small example that will explain to us how encapsulation works. Type out the program encapsulation.rb in your text editor and execute it.
# encapsulation.rb
class Human
attr_reader :firstname, :lastname
def name=(name)
@firstname, @lastname = name.split
end
end
guy = Human.new
guy.name = "Ramanuja Iyengaar"
puts "First name: #{guy.firstname}"
puts "Last name: #{guy.lastname}"Output
First name: Ramanuja Last name: Iyengaar
So we get the first name of the person as Ramanuja and last name as Iyengar. These two lines are printed out due to the following statements
puts "First name: #{guy.firstname}"
puts "Last name: #{guy.lastname}"See the two lines before these statements. First we declare a new variable named guy of the type Human by writing guy = Human.new, next we set guy.name = "Ramanuja Iyengaar"` , but in the first puts statement we call guy.firstname and in the next one we call guy.lastname and we get the answers. This is because inside the program in the method called name, see this code
def name=(name)
@firstname, @lastname = name.split
endwe split it and assign the word before space as @firstname and word after space as @lastname using the following piece of code:
@firstname, @lastname = name.splitSo when we call guy.firstname and guy.lastname it gets printed faithfully. Note that outside the class we never set the @first_name and @last_name, it was totally encapsulated from us.
One might be wondering what the statement attr_reader :firstname, :lastname does? It declares two variables @first_name and @last_name. The attr_reader signifies that the two variables can only be read by program outside the class, in other words if we try to set guy.first_name = "Ramanuja" the Ruby interpreter will throw out an error.
12.14. Polymorphism
Poly means many, and morphis means forms. I think it’s either in Greek or Latin, who cares? In programming language you can use one thing to do many things, let’s see a few examples. Let’s take the humble plus sign. When we take “Hello ” and “World!” and put a plus sign in between, the output is “Hello World!”. In technical talk we call this concatenation (joining together). Here is the irb example:
>> "Hello " + "World!"
=> "Hello World!"Now lets use this plus sign on numbers. We now stick it between 134 and 97. When we do that we get the answer as 231 and not as 13497. Why? It’s because the plus sign is trained to do different things when it’s stuck in between different things.
>> 134 + 97
=> 231When you stick it in between String’s it joins them, when you stick it in between numbers it adds them. So the operator plus takes many forms or does different operations depending upon the situation.
In a similar way what will happen if we multiply a string by a number. Well when we do it as shown below
>> "Hello" * 5
=> "HelloHelloHelloHelloHello"we see that string is printed the number of times. So multiplying “Hello” by 5 prints “Hello” five times. In the next example we assign value six to a variable named hello and multiply it by five
>> hello = 6
=> 6
>> hello * 5
=> 30Since hello is a variable that carries a number, multiplying it with a number results in a number. So you see even a multiplication operator takes many forms or different functions depending on the situation. It’s like this, a policeman when at home is kind to his family, when he is made to take on a thug he behaves differently.
Similarly, the length operator / function, when you are finding out the length of a string, it tells the number of characters in it.
>> "some text".length
=> 9When you are finding the length of an array it tells the number of elements the array has.
>> [5, 7, "some text", Time.now].length
=> 4So we see that in Ruby, a thing can do different things, just like a real world object does [32].
12.15. Class Constants
Just like any other programming language, one can have a constant values in a class in Ruby. Lets jump into action, take a look at the following program class_constant.rb, its source code is like this
#!/usr/bin/ruby
# class_constant.rb
class Something
Const = 25
end
puts Something::ConstOutput
25
Note the pieces of code, in the class Something, you see the statement Const = 25. If you were reading this book well, you might realize that constant in Ruby starts with a capital letter. In the class Something, we have declared a constant names Const and assigned it to 25.
Note the statement puts Something::Const, puts is for printing almost anything thrown at it. Here we throw Something::Const and it faithfully prints out the constant value. So class constants can be access by <class_name>::<constant_name>, this is how you access constants of a class.
Let’s see how class instance can access a class constant. Type the program class_constant_1.rb
#!/usr/bin/ruby
# class_constant.rb
class Something
Const = 25
end
puts Something::Const
s = Something.new
puts s.ConstOutput
25 class_constant_1.rb:10: undefined method `Const' for #<Something:0xb745eb58> (NoMethodError)
So in this program (above) we have declared a variable s whose class is Something. In line puts s.Const, we try to access the constant value inside something via its instance variable s, and we get a No Method Error, or the Ruby interpreter thinks Const is a method since we use s.Const. To fix this issue, you can write a method called Const and call it as shown in class_constant_2.rb
#!/usr/bin/ruby
# class_constant_2.rb
class Something
Const = 25
def Const
Const
end
end
puts Something::Const
s = Something.new
puts s.ConstOutput
25 25
So defining a method [33] and returning Const from it solves the problem.
Some might think one can access class constant value using the instance variable by using double colon (::) instead of the dot operator as shown in class_constant_3.rb, well it won’t work as you can see from its output:
#!/usr/bin/ruby
# class_constant_3.rb
class Something
Const = 25
def Const
Const
end
end
puts Something::Const
s = Something.new
puts s::ConstOutput
25 class_constant_3.rb:14: #<Something:0xb74029fc> is not a class/module (TypeError)
12.16. Function alias
Sometimes you might have written a function, and you want you to rename it to something, what to do at that time? If you have used the function in many places, and if you had to rename it, then you must keep changing the name in many places. Thankfully ruby provides a keyword called alias which you can use to set another name to a function. Take a look at the program below, especially this line alias :shout :make_noise.
# function_alias.rb
class Something
def make_noise
puts "AAAAAAAAAAAAAAHHHHHHHHHHHHHH"
end
alias :shout :make_noise
end
Something.new.shoutOutput
AAAAAAAAAAAAAAHHHHHHHHHHHHHH
So as you see we call Something.new.shout , and since we have aliased make_noise to shout, make_noise is called.
12.17. Anonymous Class
Classes can have no name, these class are called anonymous classes. Look at the example below, type it and execute it:
# anonymous_class.rb
person = Class.new do
def say_hi
'Hi'
end
end.new
puts person.say_hi
puts person.classOutput
Hi #<Class:0x0000000002696840>
So let’s see how it works. First you have got a variable person which is the instance of a class, we assign it not to person = Person.new, but to Class.new as shown below. That is we are creating a new class on the fly without any name. Thus, it is anonymous.
person = Class.new do (1)
......
end.new (2)| 1 | Creating an anonymous class. |
| 2 | An anonymous class, after its end should have been initialized with new |
If you can see from the code above as soon as the definition of the anonymous class ends, it must be initialized at once using .new. This also makes a anonymous class stick to just one variable. Now we fill in what ever we want into the anonymous class as shown below:
person = Class.new do
def say_hi
'Hi'
end
end.newSo when we call person.say_hi, it returns 'Hi' which gets printed, but when we call person.class rather than printing class name it prints out something like this #<Class:0x0000000002696840> [34]. Since the class has no name, there is no name to print.
If you see the code I worked out in irb below, we can see when a.class is called it prints A, that is the class name, but in the case above we do not have a name.
>> class A; end
=> nil
>> a = A.new
>> a.class
=> AI think what 0x…. in the #<Class:0x0000000002696840> represents the address location where the class is stored in the memory.
13. Safe Navigation
Safe navigation is a way to write conditions that don’t throw unexpected errors. See the program below, type it and execute it:
# safe_navigation.rb
class Robot
attr_accessor :name
end
robot = Robot.new
robot.name = "Zigor"
puts "The robots name is #{robot.name}" if robot&.nameOutput
The robots name is Zigor
So the program executes perfectly without a glitch. Look at the code if robot&.name, we will understand the significance of it shortly.
Now let’s take a situation where the robot is not initialized. That is robot = Robot.new is not written, the program looks something as shown below
# safe_navigation_2.rb
robot = nil
puts "The robots name is #{robot.name}" if robot&.nameWhen we execute the program above it still does not throw an error!! Now look at the code if robot&.name, it does the trick, we will see how. Type the program below and execute it:
# not_safe_navigation.rb
robot = nil
puts "The robots name is #{robot.name}" if robot.nameOutput
not_safe_navigation.rb:4:in `<main>': undefined method `name' for nil:NilClass (NoMethodError)
So, this one throws an error. But here we have written the if condition as if robot.name, and we haven’t used the safe navigation. Now we know the scenario. First we must check if the variable robot exists, or it’s not nil, and if the robot.name too is not nil, then we must not print the thing. So to correct not_safe_navigation.rb we type in the following code.
# not_safe_navigation_2.rb
robot = nil
puts "The robots name is #{robot.name}" if robot and robot.nameLook how we need to provide long condition with an and operator here as shown:
if robot and robot.nameinstead we can simply write it as:
if robot&.nameas shown in safe_navigation.rb which is convenient.
14. Breaking large programs
It’s not that you will be writing professional programs that are all in a single file. You need to break them up into small chunks, put those chunks into separate files and include them in other programs as one needs. So lets see an example
# break_full.rb
class Square
attr_accessor :side_length
def perimeter
@side_length * 4
end
end
s = Square.new
s.side_length = 5
puts "The squares perimeter is #{s.perimeter}"Output
The squares perimeter is 20
So you see the above program named break_full.rb, that has a class definition and then a snippet of code that uses the definition to calculate perimeter of square of side 5 units.
Isn’t it logical that if the Square code can go into a separate file, so that it can be required where it needs to be, possibly in many other programs? If a program gets large we can divide them up into smaller files and name them logically so that its easy to read, reuse and debug.
So following this principle, I have broken this program into two, the first one is break_square.rb as shown below, this just has the Square class definition
# break_square.rb
class Square
attr_accessor :side_length
def perimeter
@side_length * 4
end
endNow see the program called break_main.rb below,
# break_main.rb
require "./break_square.rb"
s = Square.new
s.side_length = 5
puts "The squares perimeter is #{s.perimeter}"Output
The squares perimeter is 20
See the line require "./break_square.rb"`, now that does the trick, the ./break_square.rb represents the path where break_square.rb is located. The ./ means search in this very folder. So once the program gets the file break_square.rb, it simply kinda inserts the code in that position and works the same as break_full.rb, but this time the code is logically divide and possibly easy to maintain.
15. Struct and OpenStruct
Okay, in the previous chapters we have seen about classes, now let’s see something simple called struct [35]. Type the following program and execute it
# struct_start.rb
person = Struct.new :name, :age
p = person.new
p.name = "Karthik"
p.age = 30
puts "Hello, I am #{p.name}, age #{p.age}"Output
Hello, I am Karthik, age 30
Well, now let’s see how it works. First you are creating a new type of Struct using this statements
Struct.new :name, :ageNow you want to name it, so that you can use it, let’s name it as person
person = Struct.new :name, :ageOnce named, this variable person will act like a class, you can declare a new instance of it like this
p = person.newIn the above statement p is the instance of person.
Now we can assign :name and :age of p using the following statements
p.name = "Karthik"
p.age = 30Then you can print the data like shown below
puts "Hello, I am #{p.name}, age #{p.age}"That’s it. Without using a class, you have created a data structure and used it! Don’t you think it’s great?
It’s not that person in person = Struct.new :name, :age should be variable (i.e. start with lower case), but it could also be a constant like Person. That’s what exactly is going on in the next piece of code here
# struct_constant.rb
Person = Struct.new :name, :age
p = Person.new
p.name = "Karthik"
p.age = 30
puts "Hello, I am #{p.name}, age #{p.age}"Output
Hello, I am Karthik, age 30
So in these lines
Person = Struct.new :name, :age
p = Person.newwe have used Person with capital P and the code works!
If you are worried about the fact that you need to type a lot in the previous program you can shorten it as shown below. Just take a look at the code below.
# struct_one_line.rb
person = Struct.new :name, :age
p = person.new "Karthik", 30
puts "Hello, I am #{p.name}, age #{p.age}"Output
Hello, I am Karthik, age 30
We get the same output but in this one line
p = person.new "Karthik", 30We have managed to eliminate these two lines
p.name = "Karthik"
p.age = 30If you have noticed it right, doesn’t p = person.new "Karthik", 30 look like a constructor stuff in classes?
Its not that a Struct is just limited to its attribute data structure. You can have function that a Struct instance could call as shown in below program. Type it and execute it.
# struct_about_me.rb
person = Struct.new :name, :age do
def about_me
"Hello, I am #{self.name}, age #{self.age}"
end
end
p = person.new "Karthik", 30
puts p.about_meOutput
Hello, I am Karthik, age 30
As you can see, there is a function called about_me defined between the do end block of the Struct. We declare a person p in this line p = person.new "Karthik", 30 and call the about_me function on p like this puts p.about_me and the program works fine. You must also note that we can pass arguments to functions in struct, but I haven’t shown that example due to my laziness.
Now let’s see how to do structure in a wrong way. Type the program below and execute
# struct_wrong.rb
person = Struct.new :name, :age
p = person.new
p.name = "Karthik"
p.age = 30
p.profession = "Engineer"
puts "Hello, I am #{p.name}, age #{p.age}, and I am on a #{p.profession}"Output
struct_wrong.rb:7:in `<main>': undefined method `profession=' for #<struct name="Karthik", age=30> (NoMethodError)
If you get the kind of output as shown above, it means that you have typed the program rightly wrong. The problem is in the line p.profession = "Engineer", here we are assigning data to an attribute named profession which we haven’t declared in the struct person = Struct.new :name, :age. So it throws an error. To avoid these kinds of things, you can use a Open Struct as shown in program below
# open_struct.rb
require 'ostruct'
p = OpenStruct.new
p.name = "Karthik"
p.age = 30
puts "Hello, I am #{p.name}, age #{p.age}"Output
Hello, I am Karthik, age 30
Open Struct is like Struct, but its does not have its data structure or attributes predefined.
One may note that one can also create a struct from hash as shown:
# open_struct_from_hash.rb
require 'ostruct'
hash = {
name: "Karthik",
age: 39,
profession: "Engineer"
}
p = OpenStruct.new hash
puts "Hello, I am #{p.name}, age #{p.age}, and I am an #{p.profession}"Output
Hello, I am Karthik, age 39, and I am an EngineerAs tou can see from the above program, we have a Hash:
hash = {
name: "Karthik",
age: 39,
profession: "Engineer"
}And in this line p = OpenStruct.new hash we are creating a OpenStruct from that Hash. As you can see from this line:
puts "Hello, I am #{p.name}, age #{p.age}, and I am an #{p.profession}"We use p.name and p.age and p.profession to access the attributes of the OpenStruct p.
In the above program we have created an OpenStruct with a Hash that has Symbol as keys. The program below works exactly same as the above, but notice that we have a hash in which we use String as keys:
# open_struct_from_hash_2.rb
require 'ostruct'
hash = {
"name" => "Karthik",
"age" => 39,
"profession" => "Engineer"
}
p = OpenStruct.new hash
puts "Hello, I am #{p.name}, age #{p.age}, and I am an #{p.profession}"No matter Symbol or String, one can access the attributes of the OpenStruct p with dot operators like p.name and so on.
16. Rdoc
You are reading this book because you are looking for some kind of documentation to start programming in Ruby. Documentation is highly important in any kind of programming. Keeping a good documentation for the piece of code you write might distinguish you from a good programmer and make you the one who is sought after. This chapter tells you two things, first where are Ruby’s core documentation, and how to find it and read it. The second, it teaches you how to generate documentation so that others can better understand your programs.
16.1. Reading Ruby Documentation
Let’s say that you want to know about String class in Ruby. You want to know how to count number of character in ones name using Ruby, so how to do it? Visit this link http://ruby-doc.org/ , it’s the centralized place where ruby documentations are available. Now if you can go through it a bit you will find a thing / link like: 3.1.1 core - Core API docs for Ruby 3.1.1. Click on it and you will be directed to this link: http://ruby-doc.org/core-3.1.1/ , its here where core libraries for Ruby 3.1.1 are documented.
A question may arise, how to find out the version of Ruby you are using? In terminal type ruby -v it will throw out an output like this: ruby 3.1.1p18 (2022-02-18 revision 53f5fc4236) [x86_64-darwin21], look at the highlighted piece of code, this tells me that I am using ruby 1.9.3p194. Who the heck cares what p194 is? I know I am using ruby 1.9.3, so I am going to see its documentation!
OK, in http://ruby-doc.org/core-3.1.1/ you need to browse for String, if you do you will find this link: http://ruby-doc.org/core-3.1.1/String.html , this is where the String class documentation is. You can get to this documentation in this long way or by typing String in the top search bar in which case Rdoc will display valid search results.
The image below shows I am filtering the classes in Ruby by typing Sting into a text box labeled Classes. This will help me to filter the results / classes easily.

OK then, if you have got it right, click on the String to get you here http://ruby-doc.org/core-3.1.1/String.html and browse down, you will find something called #length which when clicked will scroll here http://ruby-doc.org/core-3.1.1/String.html#method-i-length, so it does say we have a thing / function / method called length and another function called size.
From an educated guess we must be able to know that this is what gives the length of a String, let’s try it out on irb
$ irb --simple-prompt
>> "Karthikeyan A K".length
=> 15
>> "Karthikeyan A K".size
=> 15So it works! The basic thing is to reach http://ruby-doc.org/ and break your head, that will get something going and will get you started knowing to read Ruby documentation.
16.2. Creating Documentation
So hopefully, or hopelessly you might or might not know read ruby’s documentation. Lets see how to create one. OK, type the code below in a document called rdoc_square.rb, or whatever name you prefer. For simplicity put it into a folder and make sure that no other file is present in that folder.
#rdoc_square.rb
# This class Square takes in side_length (of type float or fixnum)
# as argument
class Square
# The length of a square's side
attr_accessor :side_length
# Retuns the area of the square
def area
@side_length * @side_length
end
# Returns perimeter of the square
def perimeter
4 * @side_length
end
endNotice how I have added comments [36] before attributes and functions. Now navigate to that folder (using console / terminal) where rdoc_square.rb is located and type this command rdoc, that’s it, the magic happens. You will find a folder named doc created, just navigate into the folder and open file named index.html, you can then click on the Square link in Classes and Modules Index box to get a nice documentation as shown.
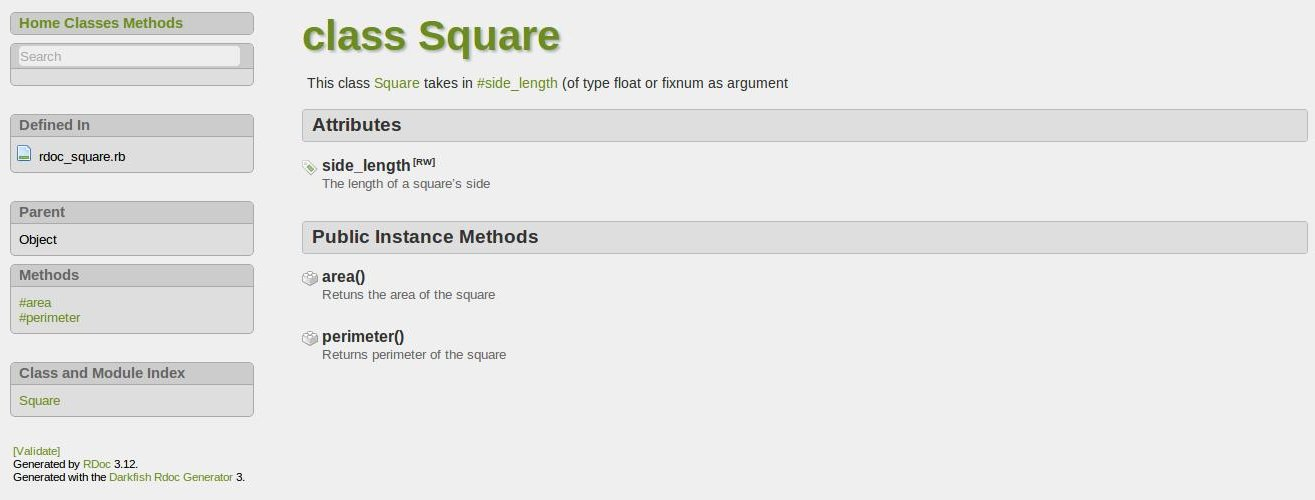
In the picture above, in the Attributes section you can see the documentation for side_length attribute, see just below that is the documentation for it that reads The length of a square’s side. Now check the code rdoc_example.rb check the two lines shown below
class Square
# The length of a square's side
attr_accessor :side_length
…....
endWe have just added a comment line before attr_accessor :side_length that appears on the documentation page. That’s how, rdoc determines what to put for documentation. It just checks what are the comments that occurs before the declaration of classes, variables and function definitions and puts it into the documentation, packs it neatly, puts a nice CSS (that is styling) and JavaScript (that’s for the dynamic effects [37]) and gives it to you ready to refer. You can distribute the code as well as the doc folder to other for reference so that people will have better time understanding your code without going through all the lines of ruby coding.
So these are the steps to generating a documentation
-
Put commented ruby files into folder
-
Navigate to the folder via terminal and type rdoc
-
You will see a folder called doc created, just go into the folder and launch the file index.html
17. Ruby Style Guides
So you have learned about basics of Ruby programming and may probably know how to look up Rdoc. This chapter will tell about Ruby style guides. Once every software company had a style of coding, One when inducted into a company had to follow a huge manual which defined the style of coding, that was hell.
As internet and collaboration flourished and evil Microsoft was beaten by free software [38], commonality developed, language started to have patterns that were defined more openly and in a democratic way than controlled by few corporations and their satellite companies. So Ruby too has its own style guides.
If you follow it, and if a fellow Rubyist sees your code, you could be a respected developer. You can get all about Ruby style guides here https://github.com/bbatsov/ruby-style-guide . Hope you people follow it to be a proud Rubyist.
18. Rubocop
In the last section you saw about Ruby style guides. You can read it, have it in your memory and try to code your Ruby programs so that they have a standard. By following style guides the difference in the way one writes a program from other is reduced and hence maintainability improves.
There is another way to implement style guides, and tits by using a gem called Rubocop. Install the gem using the following command in terminal
$ gem install rubocopNow let’s create a program that can be linted better
name = "Karthik"
puts "Hello #{name}"Now we save it and run Rubocop on it as shown:
$ rubocop rubocop_example.rbrubocop spits out some errors as shown:
Inspecting 1 file
C
Offenses:
rubocop_example.rb:1:1: C: [Correctable] Style/FrozenStringLiteralComment: Missing frozen string literal comment.
name = "Karthik"
^
rubocop_example.rb:1:8: C: [Correctable] Style/StringLiterals: Prefer single-quoted strings when you don't need string interpolation or special symbols.
name = "Karthik"
^^^^^^^^^
1 file inspected, 2 offenses detected, 2 offenses auto-correctableI duckduckgoed Style/FrozenStringLiteralComment rubocop and found out that it’s a better practice to include single quotes than using double quotes to enclose a string from here https://www.rubydoc.info/gems/rubocop/RuboCop/Cop/Style/StringLiterals
As you can see below, this was the page that duckduckgo took me to:
one could find entire Rubocop list of rules here https://www.rubydoc.info/gems/rubocop/
I also corrected another error Style/FrozenStringLiteralComment, and saved the code as shown below:
# frozen_string_literal: true
name = 'Karthik'
puts "Hello #{name}"Now when I ran Rubocop on the corrected code I got no linting suggestions as shown:
$ rubocop rubocop_example_corrected.rbOutput
Inspecting 1 file
.
1 file inspected, no offenses detectedOne could use rubocop -A <file-name> for Rubocop to automatically implement linting suggestions in a ruby file. If you are using a text editor or IDE to code, you may also explore how to integrate Rubocop into it, and let Rubocop automatically lint your file when ever you save it.
19. Modules and Mixins
When ever you think of modules, you think of a box or something. Just look at your printer. It’s a module. It can do something. It has things to do something. Similarly, modules in Ruby can contain Ruby code to do something. Modules are way to pack Ruby code into possible logic units. When ever you want to use the code in a module, you just include it in your Ruby program.
Let’s look at our first module program called module_function.rb. The program below has two modules namely Star and Dollar. Both these modules have the same function called line. Note that in the function line in module Star, we print a line of 20 star (*) characters. In similar fashion in function line in module Dollar we print a line of 20 dollar ($) characters. Type the program in your text editor and execute it.
# module_function.rb
module Star
def line
puts '*' * 20
end
end
module Dollar
def line
puts '$' * 20
end
end
include Star
line
include Dollar
lineOutput
******************** $$$$$$$$$$$$$$$$$$$$
Let’s look at the program that’s outside the module. We have the following code:
include Star
line
include Dollar
lineIn the line include Star, we include the code that’s in the Star module, then we call the function line, so we get output as a line of 20 stars. Look at the next line, we include the module Dollar. Dollar too has a function called line. Since this module is called after Star, the line function in Dollar module overwrites or in the right terms hides the line function in the Star module. Hence, calling line after include Dollar will execute code in the line function of Dollar module. Hence, we get a line of twenty dollar sign.
In the coming example module_function_0.rb we will see what happens when we call the line function without including any module. Type the program below and execute it
# module_function_0.rb
module Star
def line
puts '*' * 20
end
end
module Dollar
def line
puts '$' * 20
end
end
lineOutput
module_function_0.rb:15:in `<main>': undefined local variable or method `line' for main:Object (NameError)
As you can see that line is considered as undefined local variable or a method [39]. So we can say that the functions in module can be accessed only if the module is included in your program.
Let’s say that we write another module without any function but just code in it. I wrote the following program module.rb just because I want to see what happens. As it turns out, when module is coded in a Ruby file and executed, the code in module gets executed by default. This happens even if we don’t include the module.
# module.rb
module Something
puts "Something"
end
module Nothing
puts "Nothing"
endOutput
Something Nothing
The output of the above program module.rb prints out Something and Nothing. We have put two modules called Something which contains the code puts “Something” and another module Nothing which contains puts “Nothing”. Though I haven’t included these modules in my program using include statement, the code under them gets executed anyway.
19.1. Calling functions without include
In the program module_function.rb, we have seen how to include module and call the function(s) in it. We printed a line of stars and dollars. Let’s do the same differently. This time we won’t be using the include keyword.
Type the program module_function_1.rb and execute it.
# module_function_1.rb
module Star
def Star.line
puts '*' * 20
end
end
module Dollar
def Dollar.line
puts '$' * 20
end
end
Dollar::line
Star::line
Dollar::lineOutput
$$$$$$$$$$$$$$$$$$$$ ******************** $$$$$$$$$$$$$$$$$$$$
Take a look at the following code:
Dollar::line
Star::line
Dollar::lineWhen we call Dollar::line, the line function in Dollar module gets executed. When we call Star::line, the line function in the Star module gets executed. So when you want to call a function in module just use the following syntax <module-name>::<function-name>.
Note that in module Star, we have defined the function line as Star.line and not just line. Similarly, in module Dollar we have defined it as Dollar.line.
OK, we are getting to know about modules, now let’s get our hands really dirty. Type the code below (module_function_2.rb) and execute it.
# module_function_2.rb
module Star
def Star.line
puts '*' * 20
end
end
module Dollar
def Dollar.line
puts '$' * 20
end
end
module At
def line
puts '@' * 20
end
end
include At
Dollar::line
Star::line
Dollar::line
lineOutput
$$$$$$$$$$$$$$$$$$$$ ******************** $$$$$$$$$$$$$$$$$$$$ @@@@@@@@@@@@@@@@@@@@
OK you have got some output. Take a look at the following lines
include At
Dollar::line
Star::line
Dollar::line
lineNote that we have included the module At at first using the include At statement. While executing the Dollar::line statement, we get an output of twenty dollars which forms a line. While executing Star::line we get an output of twenty stars. Next we once again call Dollar::line, then comes the catch. We just call the function line. Since we have included At at first, when the statement line is encountered it calls the line method in At module gets called. This shows that though we have called Dollar::line and Star::line, it does not include [40] the module code in the program, instead it just executes the particular function in the module.
In link:code/module_function _1.rb[module_function _1.rb], we have seen how we can call a function in a module say Star::line, where Star is the module name and line is the function name. To do so in Star module we have defined the function line as follows
def Star.line
puts '*' * 20
endWhere instead of naming it just line, we have named it Star.line. Note that module_function_3.rb is similar to module_function_1.rb, but take a deep look into line function in Dollar module. It is not named Dollar.line, instead it’s named Star.line. What will happen if we mess up the code like this? Execute the program below and see.
# module_function_3.rb
module Star
def Star.line
puts '*' * 20
end
end
module Dollar
def Star.line
puts '$' * 20
end
end
module At
def line
puts '@' * 20
end
end
include At
Dollar::line
Star::line
Dollar::line
lineOutput
@@@@@@@@@@@@@@@@@@@@ $$$$$$$$$$$$$$$$$$$$ @@@@@@@@@@@@@@@@@@@@ @@@@@@@@@@@@@@@@@@@@
Notice that whenever we call Dollar::line, the line function in At module is called. It’s because since we have defined it as Star.line in Dollar module, Dollar::line does not exist and hence the function line in the At module is called. Note that we have included At module using the statement include At.
We now consider another scenario where (see program module_function_4.rb) in the Dollar module we just define the function line as line and not as Dollar.line. When we call it using Dollar::line in the program below, we see that the line function in the At module gets called. So the moral of the story is, if you are calling <module-name>::<function-name> in your program, make sure that the function is named <module-name>.<function-name> inside the module.
# module_function_4.rb
module Star
def Star.line
puts '*' * 20
end
end
module Dollar
def line
puts '$' * 20
end
end
module At
def line
puts '@' * 20
end
end
include At
Dollar::line
Star::line
Dollar::line
lineOutput
@@@@@@@@@@@@@@@@@@@@ ******************** @@@@@@@@@@@@@@@@@@@@ @@@@@@@@@@@@@@@@@@@@
19.2. Classes in modules
We have seen how the Ruby interpreter behaves to functions in modules. Let’s now see how it behaves to classes in modules. Type the program below module_class.rb and execute it.
# module_class.rb
module Instrument
class Ruler
def what_u_do?
puts "I take measurements"
end
end
end
module People
class Ruler
def what_u_do?
puts "I govern this land"
end
end
end
r1 = People::Ruler.new
r2 = Instrument::Ruler.new
r1.what_u_do?
r2.what_u_do?Output
I govern this land I take measurements
Let’s analyze the program. We have two modules. The first one is named Instrument, and the second one is named People. Both have a class named Ruler and both Ruler have method named what_u_do?. Fine, now let’s come to the program. We have a statement r1 = People::Ruler.new in which r1 becomes an instance variable of Ruler class in People module. Similarly, we have r2 = Instrument::Ruler.new in which r2 becomes instance variable of Ruler class in Instrument module.
This can be verified by executing the following code
r1.what_u_do?
r2.what_u_do?In which calling r1.what_u_do?` outputs I govern this land and calling r2.what_u_do? outputs I take measurements.
The moral of the story is you can have same class names in different modules, to call that class just use <module-name>::<class-name>. .
19.3. Mixins
Another use of modules is that you can mix code in modules as you wish. This one is called mixin. We have already seen about mixins, but I haven’t told you that it was mixin. For example lets say that you are writing some application in Ruby for Linux and Apple machine. You find that some code works only on Linux and other works only on Apple, then you can separate them as shown below. The Apple stuff goes into Apple module and Linux stuff goes into the Linux module.
Let’s say that your friend uses a Linux machine and wants to run your program. All you need to do is to include Linux in your code as shown below.
# mixin.rb
module Linux
# Code for linux goes here
def function
puts "This function contains code for Linux systems"
end
end
module Apple
# Code for apple goes here
def function
puts "This function contains code for Apple systems"
end
end
include Linux
functionOutput
This function contains code for Linux systems
When the method function is called, the method function in Linux module will be called. In short you have mixed in Linux code in your program and have kept out the Apple stuff.
Let’s see another example of mixin. Take a look at the code mixin_2.rb below. Let’s say that your client tells that he is badly need of a program that computes the area of circle and volume of sphere. So you develop two classes called Circle and Sphere and equip with code to find area and volume. So your client is happy. Since your client is in Milkyway galaxy, the constant Pi [41] is 22 divided by 7. So we have put the value of Pi in a module named Constants and have included in Circle and Sphere class using the statement include Constants. Type in the program below and execute it.
# mixin_2.rb
module Constants
Pi = 22.0/7
end
class Circle
include Constants
attr_accessor :radius
def area
Pi * radius * radius
end
end
class Sphere
include Constants
attr_accessor :radius
def volume
(4.0/3) * Pi * radius ** 3
end
end
c = Circle.new
c.radius = 7
s = Sphere.new
s.radius = 7
puts "Circle Area = #{c.area}"
puts "Sphere Volume = #{s.volume}"Output
Circle Area = 154.0 Sphere Volume = 1437.333333333333
So you get something as output. You might ask what’s so great in putting a constant in a module and mixing it in a class using include statement. Well the above program teaches you two morals
-
You can put constants in a module
-
If you have common code [42] that can be shared between classes, you can put it into module and share it.
If you have defined the value of Pi separately in each class and if you happened to get a client from Andromeda Galaxy where Pi is 57 divided by 18.1364, you can make change just in one place, that is in Constants module and see the change reflect in many classes (Circle and Sphere classes in our case).
Thus, moral is modules help us to cater customers who are beyond our own galaxy, and we can truly build a galactic empire [43].
20. Date and Time
Ruby has got ways by which we can extract time and date from our computer clock. All modern day personal computers have got a thing called RTC (real time clock) which is powered by a battery and would maintain the time even if the machine is turned off. Many programming languages let us access this clock and do manipulation with date and time. Let’s see how to work with Ruby. Let’s do this stuff in our irb rather than writing programs into a file.
The first thing we do is to find what’s the time now? For that just type Time.now in your irb, that’s it. You will get the current time.
>> Time.now
=> Thu Feb 25 16:54:45 +0530 2010Time.now is a synonym to Time.new which creates a new Time object. You can use Time.now or Time.new, both will give the same result.
>> Time.new
=> Thu Feb 25 16:54:48 +0530 2010In the following command, we create a new time object / instance and assign it to a variable t
>> t = Time.new
=> Thu Feb 25 16:55:02 +0530 2010Now having assigned, how to view the value of t? We will use the inspect method. So by typing t.inspect, we can inspect what’s in t.
>> t.inspect
=> "Thu Feb 25 16:55:02 +0530 2010"t.inspect converts the time object to a string and displays to us. The same thing can be done by to_s (to string) function as shown below
>> t.to_s
=> "Thu Feb 25 16:55:02 +0530 2010"t.year retrieves the year in time object
>> t.year
=> 2010t.month retrieves the month in time object
>> t.month
=> 2t.day retrieves the day (in that month) in time object
>> t.day
=> 25t.wday retrieves the day’s number. Here 0 means Sunday, 1 → Monday, 2 → Tuesday and so on till 6 means Saturday
>> t.wday
=> 4In above code snippet, the day was Thursday.
t.yday retrieves the day in that year. For example 1st of February is the 32nd day in the year.
>> t.yday
=> 56t.hour retrieves the hour in the time object. The hour is 24 hour format.
>> t.hour
=> 16t.min retrieves the minutes value in time object.
>> t.min
=> 55t.sec retrieves the seconds in time object.
>> t.sec
=> 2t.usec retrieves microseconds in the time object. This will be useful if you are commissioned to write a stopwatch application for Olympics.
>> t.usec
=> 357606t.zone retrieves the zone. I am in India, we follow Indian Standard Time here, its spelled IST for short.
>> t.zone
=> "IST"There is a thing called UTC or Universal Time Coordinate[44]. It’s the time that’s at longitude 0 degrees. The t.utc_offset displays the number of seconds your time is far away from the time at UTC.
>> t.utc_offset
=> 19800From the above example, I came to know that a person living at Greenwich will see sunrise after 19800 seconds after I have seen.
DST means daylight saving time[45]. I don’t know what it is. If your timezone has a daylight saving, this function returns true, else false.
>> t.isdst
=> falseIf your timezone is UTC, the t.utc returns true or returns false
>> t.utc?
=> falseIf you want to get the local time just call the localtime function as shown. We want t to hold local time value in this case
>> t.localtime
=> Thu Feb 25 16:55:02 +0530 2010In same way as local time, the gmtime function gets the Greenwich Meridian Time.
>> t.gmtime
=> Thu Feb 25 11:25:02 UTC 2010The getlocal function is the alias of local_time
>> t.getlocal
=> Thu Feb 25 16:55:02 +0530 2010The getutc function is alias of gmtime. Actually gmtime is alias of getutc
>> t.getutc
=> Thu Feb 25 11:25:02 UTC 2010The ctime function formats the time to somewhat human readable form.
>> t.ctime
=> "Thu Feb 25 11:25:02 2010"Let’s say we want to subtract some seconds from the time value t, we can do it as shown. Below we subtract 86400 seconds (1 day) from our time value
>> t - 86400
=> Wed Feb 24 11:25:02 UTC 201020.1. Days between two days
Let’s now write a code snippet that finds the number of days between February 25th 2010 to May 1st 2010, first we declare a variable a and assign it with the day February 25th 2010 as shown
>> a = Time.local 2010, 2, 25
=> Thu Feb 25 00:00:00 +0530 2010Notice we use a function called local in Time class, we can assign a date to it. As we could see in the output, we get to know that variable a now has the value of February 25th. In similar fashion we create a variable b and assign it with date 1st of May 2010
>> b = Time.local 2010, 5, 1
=> Sat May 01 00:00:00 +0530 2010All we do now is subtract a from b
>> b -a
=> 5616000.0This gives number of seconds between a and b. We divide the result by 86400 (that’s how many seconds that are in a day)
>> days = _ / 86400
=> 65.0We get a result as 65.
20.2. How many days have you lived?
Lets now see a program that takes on your birthday and prints out how many days have you lived. Type in the program in text editor and execute it
#!/usr/bin/ruby
# how_many_days.rb
print "Enter birthday (YYYY-MM-DD):"
bday = gets.chop
year, month, day = bday.split('-')
# puts " #{year}, #{month}, #{day}"
seconds = Time.now - Time.local(year, month, day)
days = (seconds / 86400).round
puts "You have lived for #{days} days"Here is the result
Enter birthday (YYYY-MM-DD):2000-5-23 You have lived for 3566 days
Well this may vary on when you execute this program. Lets now analyze it. In the first line
print "Enter birthday (YYYY-MM-DD):"We ask the user to enter his or her birthday, once done we perform a trick here. We asked the user to enter it in YYYY-MM-DD format, in the statement
bday = gets.chopWe get the date and store it in a variable called bday. The gets.chop gets the birthday and chops off the enter sign we enter with it. So bday now holds the string value of birthday you entered. In the next statement
year, month, day = bday.split('-')we have a multiple assignment in which I have three variables year, month and day. I am splitting the birthday string and assigning it. What really happens is this, if we enter a date like 1994-6-24 it gets split by – and becomes an array which is shown in code snippet below executed in irb
>> "1994-6-24".split '-'
=> ["1994", "6", "24"]Lets assign this array to variables a, b, c simultaneously as shown
>> a, b, c = _
=> ["1994", "6", "24"]If you remember _ (underscore) means the last obtained result in irb. So having assigned it we now check values of a, b and c which we get as shown….
>> a
=> "1994"
>> b
=> "6"
>> c
=> "24"In similar fashion in
year, month, day = bday.split('-')The year variable gets the year part, the month gets the month and day gets the day. OK having obtained the parameters of a particular day we can proceed. Examine the following statement
seconds = Time.now - Time.local(year, month, day)See the right-hand side of the equal to sign, first we have Time.now which gets the current time, from it, we are subtracting a time object that’s been created using Time.local. Time.local can be used to create a time object that’s fixed at any instance, the instance can be past, present or future. We pass the year, month and day to it to create a Time object. What happens when we subtract these both, we get the difference in seconds which gets stored in variable called seconds at the left-hand side of the equation.
All we need to do now is to convert the second to days which is done by the following statement
days = (seconds / 86400).roundHere we divide seconds by 86400 which converts them to days. We might be getting some value like 378.567 days, to get rid of the .567 we round it off using the round function, so (seconds / 86400).round returns a neat rounded value which can be read by humans quiet easily. We store the value in a variable called days. Finally, we print the fact that we have lived for so many long days using the following statement
puts "You have lived for #{days} days"Well, that’s it.
I would like to tell one thing I found out with Time.local function, its not that we must pass only numbers to it as shown
>> Time.local "2010", "5", "1"
=> Sat May 01 00:00:00 +0530 2010We can pass a bit human friendly values as shown below. Instead of putting 5 for month, we use May.
>>Time.local "2010", "may", "1"
=> Sat May 01 00:00:00 +0530 2010Sometimes Ruby language looks as easy as talking English.
21. Files
Until now, you have stored data in variables in your program. Variable data gets lost when the program stops executing or when the computer is switched off or the program is removed from memory. If you want a persistent storage you must store it in files. When you store data in files, it stays there even if the program is removed from memory, and you can get the data back when its run again. This very book if you are reading it on computer, kindle or electronic reader is a file that’s stored permanently on your computer or some other computer located on the internet. In this chapter we will see how we can create, manipulate and delete files using ruby program.
21.1. Storing output into files
Lets create a familiar Ruby program. Type the program below into a text editor
#!/usr/bin/ruby
# write_file.rb
puts "Hello World!"
puts "Ruby can write into files"While executing it, give command as shown
$ ruby write_file.rb > something.txt
Now goto the working directory in which the program was and you will see a file named something.txt. Open it and this is what you will see in it
Hello World! Ruby can write into files
Well, this time its somewhat like a cheat. We haven’t written into a file in our program, instead we have instructed the ruby interpreter to take the output that write_file.rb generates and put it in a file called something.txt. To do so we make use of > (greater than sign).
21.2. Taking file as input
In the last example we wrote our output to a file. Now let’s take a file as input and let’s process it. Write the code below in text editor and save it as line_count.rb.
#!/usr/bin/ruby
# line_count.rb
puts "The file has #{readlines.length} line(s)"To execute it, we will give command as shown
$ ruby line_count.rb < something.txt
If you have guessed it right, we have given something.txt as input to the program. We use the < (less than) sign to indicate to the program that we are giving a file as input.
The program when executed provides the following result
The file has 2 line(s)
Let’s analyze the program so we know what happens. See this code #{readlines.length} in the program above. The readlines command takes in the file and reads all the lines and stores it in an array, each element of the array has a line. All we have to do is to get the length of an array which we can get by using the length function. So readlines.length gives the length as output which we embed it into a string hence we finish it off by writing the following statement
puts "The file has #{readlines.length} line(s)"21.3. File copy – a kind of
Well, here is file copy program which might make some pundits argue whether if this program is a true file copy program or not. Type the program below into a text editor
#!/usr/bin/ruby
# file_copy.rb
puts readlines.joinAnd run it like this
$ ruby file_copy.rb < something.txt > everything.txt
Output
everthing.txt has got everything that something.txt has got. Just open it and see for yourself.
The trick is in the command line. Here we pass something.txt to the program file_copy.rb, now the program takes in something.txt and it reads the lines when it encounters the readlines command. The lines that are read from something.txt are stored in the form of an array. All we now have to do is to join the lines stored in array using join command, so we do it by adding .join to readlines, hence we get
readlines.joinNow we will print out the result, we do this by using a puts command, hence our program takes the following incarnation:
puts readlines.joinWhile running the program we tell it to take input from something.txt and write the generated result to everything.txt by giving the following command to Ruby interpreter:
$ ruby file_copy.rb < something.txt > everything.txt
So we get the effect of copying without really writing a program for file copy.
21.4. Displaying a file
Let’s now write a program that displays the content of a file. To do so we read all lines in a file, store it in an array. Next we take each and every element of an array and print it out. Type the program below and
#!/usr/bin/ruby
# display_file.rb
readlines.each do |line|
puts line
endExecute it by typing the following
$ ruby display_file.rb < something.txt
This is what you will get as output
Hello World! Ruby can write into files
So what we have done in this program.? Look at this code block:
readlines.each do |line|
puts line
endwhen ruby encounters readlines, it reads from the file passed to the program, extracts the lines and stores it in an array. With .each operator we extract a single line at a time and store it into a variable called line inside the do end block. We print out this line in the code block using puts. The end statement put an end to the code block says all is over.
Lets see another program. In this program we use a cleaner approach. Type the program into a text editor and execute it:
#!/usr/bin/ruby
# display_file_1.rb
puts File.open("something.txt").readlinesOutput
Hello World! Ruby can write into files
Look at the single line in the program. We have a puts statement, that prints almost what ever is thrown at it. Here is the new thing that’s been introduced. Look at the File.open("something.txt"), the File.open opens a file, but what file? We must give the name of the file to it. As a file name we pass something.txt in double quotes[46]. The File.open opens it, the .readlines attached to it reads lines and stores it in an array. We throw the array to puts which prints it out. That’s it!
21.5. Reading file line by line
Till the last section we have seen how to read a file in one go and pump its data out to the console. In this example we will see how to read a file line by line. Type in the example code given below and execute it
#!/usr/bin/ruby
# read_file_1.rb
File.open("something.txt").each { |line| puts line }Output
Hello World! Ruby can write into files
The output looks as shown above. Look at the code File.new("something.txt").each { |line| puts line }. In the code we open a file named something.txt using a File.open command which opens the file and stores the lines as array elements. All we need to do now is to extract each element in an array and print it out on our console which is accomplished by .each { |line| puts line }.
Instead of using File.open, one could use File.new to open a file. It will have the same result. A program using File.new has been written and is shown below, execute it, and you will get the same result.
#!/usr/bin/ruby
# read_file_2.rb
File.new("something.txt").each { |line| puts line }Output
Hello World! Ruby can write into files
21.6. Open and new – the difference
Seen from previous examples one might think that there isn’t much difference between File.open and File.new, in fact there is a difference. Consider the program below, type it and execute it.
#!/usr/bin/ruby
# file_open.rb
File.open("something.txt") do |f|
puts f.gets
endOutput
Hello World!
The program above prints out the content present in something.txt, the same thing is done by file_new.rb as shown below:
#!/usr/bin/ruby
# file_new.rb
f = File.new("something.txt", "r")
puts f.gets
f.closeOutput
Hello World!
OK so whats the difference? File.new returns a new file object or handle that can be stored in a variable. In the above program we store the file object into variable f. We can use this variable anywhere in the program to access and manipulate the file. Having done all needed with the file using the variable f, we finally close the file using f.close.
Let’s write a program named file_open_error.rb as shown below
#!/usr/bin/ruby
# file_new.rb
f = File.new("something.txt", "r")
puts f.gets
f.closeOutput
Hello World! Reading file after File.open block is closed: file_open_error.rb:8: undefined local variable or method `f' for main:Object (NameError)
See the highlighted code, we try to read the file content after we close the code block, and it throws an error, this is because File.open loads into file handle into variable f inside the do end code block, after the block is closed you have no way to access the file.
Though the difference is minor, there is still a difference.
21.7. Defining our own line endings
Till now reading line by line means that the Ruby program when given a file name searches for it, loads it, then it scans the file, when it encounters a line ending character '\n' [47] on the Linux system (its \r\n on Windows) it recognizes the line has ended and hence packs the characters before it into an array element. What if we want to define our own line ending character? In English language full stop is considered as a line ending character. Why can’t we say to the Ruby interpreter to mark end of the line at a full stop character? To do so let’s create a simple text file named line_endings.txt and put the following text in it:
This is first line. This is second line. This is the third. And fourth comes after third.
Lets write a Ruby program shown below in text editor, save it as line_endings.rb
#!/usr/bin/ruby
# line_endings.rb
File.open("line_endings.txt").each('.') do |line|
puts line
endWhen executed, the program prints out the following output
This is first line. This is second line. This is the third. And fourth comes after third.
See carefully line_endings.txt. This is first line : This is first line. and This is second line : This is second line.
Both are on the same line in line_endings.txt but it gets printed out as two different lines when the program is executed. This is because the statement File.open("line_endings.txt") loads the entire content of the file into the memory, the .each('.') splits the content at every dot or full stop character ('.'), and puts each chunk of split text into an array element. So the real hero here is the each function. Similarly, you can have any character that can define a line ending.
If you are writing a C compiler using Ruby, you might use the semicolon character ( ; ) as your line ending.
21.8. Reading byte by byte
Sometimes you want to read a file byte [48] by byte instead of reading plain English in it. Why on earth we read a file byte by byte? Well, not all files have text in it. Files such as music files, videos and so on have raw data which only some programs can understand. If you are writing a music or video player or image viewer, you need to read the raw data and do something with it. So to read and display bytes of data we use each_byte function. Take a look at the code below. Type it and execute it
#!/usr/bin/ruby
# byte_by_byte.rb
File.open("something.txt").each_byte { |byte| puts byte }When executed this is how the output will look like
72 101 108 108 111 32 87 111 . . some stuff is removed to save pages printed . . 105 108 101 115 10
In the above program we open the file named something.txt using File.open, all the contents gets loaded, now we access the content byte by byte using the each_byte function, we capture the bytes in variable called byte and print it out. Notice that in this program we have used curly brackets { and }, these can be used instead of do and end . I prefer do and end as they look more friendly.
21.9. Reading single character at a time
The program below reads character by character and prints it. We use a function called each_char. This each_char splits the input file character by character rather than line by line. This program and its output is given below.
#!/usr/bin/ruby
# char_by_char.rb
# To get this program to work, you must
# have ruby 1.9
File.open("something.txt").each_char { |a| puts a }Output
H e l l o W o r l d ! R u b y c a n w r i t e i n t o f i l e s
21.10. Renaming files
Renaming a file is extremely easy in Ruby, all you have to do is to call the rename function in File class. The first argument will be the name of the file that needs to be renamed, the second one will be the new name. Its so simple you can try it out on the irb. Take a look at the source code of program rename.rb given below. In it we rename a file called noname.txt to somename.txt. Before you run the program place a file called noname.txt on the working directory.
#!/usr/bin/ruby
# rename.rb
File.rename("noname.txt", "somename.txt")Output
The file noname.txt was renamed to somename.txt
21.11. Finding out position in a file
You might sometime need to find out your position within a file. To do so you can use the method pos. Let’s see an example that explains us how to find our position in a file. Type and execute fie_position.rb
#!/usr/bin/ruby
# file_position.rb
f = File.open "god.txt"
puts "At the beginning f.pos = #{f.pos}"
f.gets
puts "After reading first line f.pos = #{f.pos}"
f.gets
puts "After reading second line f.pos = #{f.pos}"Output
At the beginning f.pos = 0 After reading first line f.pos = 43 After reading second line f.pos = 69
Let’s now walk through the code and see how it works. First we open a file named god.txt in the line f = File.open "god.txt" next we checkout what’s the position using the statement puts "At the beginning f.pos = #{f.pos}", note the f.pos, the pos method is used to get the position that we are in while we read or write a file. Initially when we open a file the position will be at zero and so we get the following output
At the beginning f.pos = 0
In the next line we read the first line of file using f.gets, since we have read the file like the reading pointers position should have changed4, so when we print f.pos it must display some other number than zero. So the statement puts "After reading first line f.pos = #{f.pos}" produces the following result
After reading first line f.pos = 43
Just for the sake of educating more we read the second line using another f.gets now we print the new file position, now we find that the pointer points to position 69.
If you are wondering what god.txt has, here is it:
All things exists because it was created. Then the creator exists. Did man ever think how the creator exist? If such a mighty creator can exist without creation, then why can't this simple universe exist without a creator
In the coming example we will see how to change our position within a file. Type the example below (file_changing_position.rb) and execute it
#!/usr/bin/ruby
# file_changing_position.rb
f = File.open "god.txt"
puts "Reading file with f.pos = 0"
puts f.gets
puts "_"*40
f.pos = 12
puts "Reading file with f.pos = #{f.pos}"
puts f.gets
puts "Now f.pos = #{f.pos}"Output
Reading file with f.pos = 0 All things exists because it was created. ________________________________________ Reading file with f.pos = 12 xists because it was created. Now f.pos = 43
Read the program carefully and notice the output. First we open the file god.txt and the variable f has its handle.
Next in line
puts f.getsWe are reading with file with f.pos at zero, that is we are reading from the start of file. As you can see the output for the first puts f.gets we get the entire line All things exists because it was created. gets printed. Notice the next line carefully, we now change our position within file to position 12 using the statement f.pos = 12, this means that our pointer is 12 bytes from the start. Now in the second puts f.gets, we get the output as exists because it was created. This shows us that we are able to change our position within a file successfully.
Some minds could think that there could be a possibility of negative file position where say if you want to read the last 20 bytes of file you can assign f.pos = -20 and when giving f.gets it would get printed. Well, that’s not possible with Ruby. If you want try out the example (file_negative_position.rb) and see whether it gives a proper result.
#!/usr/bin/ruby
# file_negative_position.rb
# this example wont work
f = File.open "god.txt"
f.pos = -20
puts "Reading file with f.pos = #{f.pos}"
puts f.gets21.12. Writing into files
Till now, we have seen how to read from files, we will now see how to write content into files. To learn how to write into files type the below example (write_file_1.rb) into the text editor and execute it
#!/usr/bin/ruby
# write_file_1.rb
File.open "god.txt", "w" do |f|
some_txt = <<END_OF_TXT
All things exists because it was created.
Then the creator exists.
Did man ever think how the cretor exist?
If such a mighty creator can exist without creation,
then why can't this simple universe exist without
a creator.
END_OF_TXT
f.puts some_txt
endAfter execution open the file god.txt and this is what you will see in it
All things exists because it was created. Then the creator exists. Did man ever think how the creator exist? If such a mighty creator can exist without creation, then why can't this simple universe exist without a creator?
Let’s walk through the program and see how it works. First in the statement File.open "god.txt", "w", we open a file named god.txt for writing. We indicate that we are opening the file for writing by passing “w” as second argument. This second argument is called as a flag. Given below are list of flags that can be used for file operations.
| Flag | What it says |
|---|---|
r |
The file is opened in read only mode. The file pointer is placed at the start of file. |
r+ |
In r+ mode both reading and writing is allowed. The file pointer is placed at the start of the file |
w |
This means write only. If the file does not exist, a new file is created and data is written into it. If the file exists the previous content is replaced by new content |
w+ |
In this mode both reading and writing is allowed. If the file does not exist, a new file is created. If it exists the old content is lost and new one s written. |
a |
This flag opens the file in append mode. Append mode is a special form of write mode in which the new content added is placed the end of old content5, by this way previous information isn’t lost. |
a+ |
Both reading and writing is allowed (i.e append mode plus reading and writing). Any newly added data is placed at the end of the file. |
b |
Binary file mode. In this mode files that have data other than text is read. For example opening a music or video file. |
Having opened a file in write mode we now have opened a do end block within which we capture the file handle in variable f. All we need to do is to write a string to the file.
We create a string using the following code
some_txt = <<END_OF_TXT
All things exists because it was created.
Then the creator exists.
Did man ever think how the creator exist?
If such a mighty creator can exist without creation,
then why can't this simple universe exist without
a creator?
END_OF_TXTNow some_txt has got a string which we need to write it into the file. To write it into the file we use the following statement
f.puts some_txtgets gets the file content, puts writes something into the file, so as an argument to the puts function we pass some_txt, the content held in it gets written into the file. The program reaches the end, the file is closed and that’s it. When you open god.txt you can see what’s written in it.
21.13. Appending content into files
Till now we have seen how to read from files and write content in it. Now lets see how to append content in it. While appending content into files, the old content stays on the new content is added at the bottom of the page.
To understand how this works type the program file_append.rb and execute it.
#!/usr/bin/ruby
# file_append.rb
puts "Enter text to append into file: "
text = gets
f = File.new("log_file.txt", "a")
f.puts "\n"+Time.now.to_s+"\n"+textWhen the program prompts you to enter something, type something like It will be great if dinosaurs were still around and press enter. Run this program a few times, type something, after you got bored from few run’s open log_file.txt and see what it contains. When I opened mine, this is what I got:
Sat Mar 27 16:20:24 +0530 2010 This is my first log Sat Mar 27 16:21:10 +0530 2010 This is my second log Sat Mar 27 16:21:36 +0530 2010 This is my third log. Now I'm getting bored.
See how neatly your entries have been recorded along with time stamp. To understand how the program lets walk through it.
The first line puts "Enter text to append into file: " , prints out Enter text to append into file: and the control goes on to the next line text = gets at which stage the program waits for you to enter something and press enter. When you do press enter, what you entered gets stored in variable text.
The next line f = File.new("log_file.txt", "a") is the crucial one and highlight of our program. In this line we open a file called log_file.txt in append mode. Notice that we pass “a” as the second argument to File.new which tells that we are opening it in append mode. In this mode the content that was previously stored in the file is not erased and/or overwritten, instead what’s new being added is written at the end of the file.
Once having opened in append mode, all we need to do is to put content stored in variable text into the file. Since the file handle is stored in variable f, we could have completed the program by writing f.puts text, but I wished it would be better if we logged our data with time stamps, and I have left line breaks before and after each log so that it will be nice to read, so I have written the code f.puts "\n"+Time.now.to_s+"\n"+text.
That’s it, the content we have written at the program prompt and along with the time stamp gets stored into the file. At the end of the program it would have been nice if we had closed the file using f.close, I haven’t done it in this program, but it works.
21.14. Storing objects into files
Till now we have seen to read, write and append into files, whats we stored and read were pieces of text. Now we will see how to store objects or instance of classes into files.
21.14.1. Pstore
Pstore is a binary file format into which you can store almost anything. In the coming example we are going to store few objects that belongs to the square class. First we will be writing a class for square and put it into a file called square_class.rb. If you feel lazy copy the content and below and put it into the file, if you are a active guy/gal type it all by yourself, finally you will end up with the same thing.
# square_class.rb
class Square
attr_accessor :side_length
def initialize side_length = 0
@side_length = side_length
end
def area
@side_length * @side_length
end
def perimeter
4 * @side_length
end
endOnce the square class is ready, we will use it in two different places. The first one is coming right now. We create a program called pstore_write.rb, type the content given below in it
#!/usr/bin/ruby
# pstore_write.rb
require './square_class.rb'
s1 = Square.new
s1.side_length = 4
s2 = Square.new
s2.side_length = 7
require 'pstore'
store = PStore.new('my_squares')
store.transaction do
store[:square] ||= Array.new
store[:square] << s1
store[:square] << s2
endWe will walk through the program now. The first line require './square_class.rb' includes the code of the square class into the program, by doing so we can write code as though the square class code is typed into the same file, this reduces lot of typing and makes the code look neat.
In the next four lines shown below, we declare two squares s1 and s2, we assign s1 side length to be 4 units and that of s2 to be 7.
s1 = Square.new
s1.side_length = 4
s2 = Square.new
s2.side_length = 7In the next line require 'pstore' we include the code needed to read and write the pstore file format. We don’t need to write that code as it’s already written for us, all we need to do is to type require 'pstore' and that will include the code.
Next we create pstore file using the command store = Pstore.new('my_squares'). This creates a pstore file called my_squares and passes on the file handle to the variable named store, with this variable store we can read, manipulate the file my_squares. To start writing into the file we need to start a transaction which is accomplished by the following block of code
store.transaction do
endNow we can do transactions with the pstore file within the do end block. Within the block we add the code that’s highlighted below
store.transaction do
store[:square] ||= Array.new
store[:square] << s1
store[:square] << s2
endThe first line creates a array named store[:square], the ||= means that if already a variable named store[:square] exists then there is no need to create that variable as it’s already there. If such a variable doesn’t exist, then we need to create it. After creating an array we add square objects / instance variables s1 and s2 into them using the following lines
store[:square] << s1
store[:square] << s2Once done we close the transaction using the end command. Just view your working directory, you will be able to see a file named my_squares in it as shown in image below:
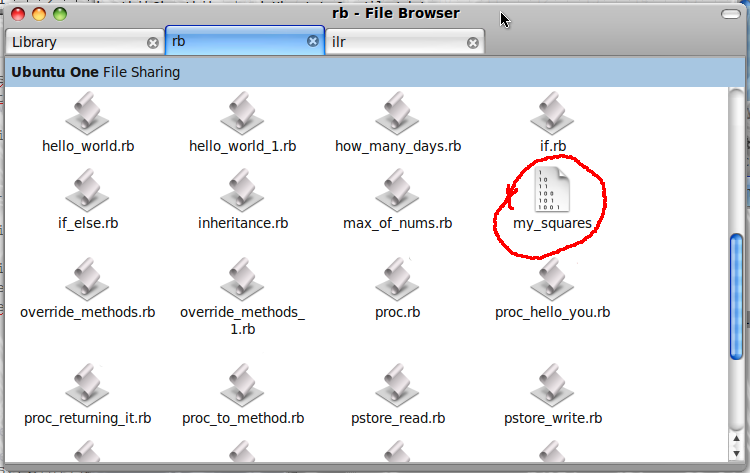
So now we have successfully written into the pstore file named my_square. All we need to do is read it and confirm what we have done is right. To read the data written into it we will write a program pstore_read.rb.
Create a file named pstore_read.rb and store the program written below in it, execute and watch the output.
#!/usr/bin/ruby
# pstore_read.rb
require './square_class.rb'
require 'pstore'
store = PStore.new('my_squares')
squares = []
store.transaction do
squares = store[:square]
end
squares.each do |square|
puts "Area = #{square.area}"
puts "Perimeter = #{square.perimeter}"
puts "==============================="
endOutput
Area = 16 Perimeter = 16 =============================== Area = 49 Perimeter = 28 ===============================
As you see the area and perimeter of the two squares are printed. If you feel I am tricking you check for our self with a calculator. Well to understand what happens in pstore_write.rb lets walkthru the code. In the first two lines
require 'square_class.rb'
require 'pstore'we include the code in square_class.rb and code for reading and writing pstore files into our program. Just like the previous example we open the pstore file my_squares and store the file handle into the variable named store in the following line
store = PStore.new('my_squares')Now we create a array named squares in the following line
squares = []With the store variable (which is the my_squares handle) we open a transaction as shown
store.transaction do
squares = store[:square]
endIn the transaction as shown in the code above we transfer the objects in variable store[:squares] to the declared variable squares using squares = store[:square], so by this time the variable square must contain the content of two square objects which we define in previous example pstore_write.rb
Once we have taken out the values we can close the transaction using the end key word.
In the following code
squares.each do |square|
puts "Area = #{square.area}"
puts "Perimeter = #{square.perimeter}"
puts "==============================="
endwe take each object in array squares and load it into variable called square and we print out the squares perimeter and area.
21.15. YAML
YAML stands for YAML ain’t XML. YAML is a markup language in which we can store something like data contained in Ruby objects. Let’s write a program in which we store the data of the square objects into YAML and retrieve it. Note that in this program we are not saving the output YAML data into a file, why so? Simply because I am lazy enough. Type the code yaml_write.rb into text editor and execute it.
#!/usr/bin/ruby
# yaml_write.rb
require 'yaml'
require './square_class.rb'
s = Square.new 17
s1 = Square.new 34
squares = [s, s1]
puts YAML::dump squaresWhen executed, the program will produce the following output
--- - !ruby/object:Square side_length: 17 - !ruby/object:Square side_length: 34
Lets now walk through the program. The first two lines:
require 'yaml'
require 'square_class'imports the code needed to read and write into YAML files. The next one loads the code in the square_calss.rb so that you can program with square objects.
In the following lines
s = Square.new 17
s1 = Square.new 34We declare two Square objects. One has edge or side length of 17 units and other has side length of 34 units. In the next line
squares = [s, s1]We pack the objects s and s1 into an Array called squares. In the following line:
puts YAML::dump squaresWe dump the formed array into YAML and print it onto the screen using puts statement.
Copy the stuff that comes in as output. It will be used to write the next program yaml_read.rb, type the code yaml_read.rb that’s shown below into the text editor and execute it.
#!/usr/bin/ruby
# yaml_read.rb
require 'yaml'
require './square_class'
yaml = <<END
---
- !ruby/object:Square
side_length: 17
- !ruby/object:Square
side_length: 34
END
squares = YAML::load(yaml)
squares.each do |square|
puts "Area = #{square.area}"
puts "Perimeter = #{square.perimeter}"
puts "==============================="
endLook at the output
Area = 289 Perimeter = 68 =============================== Area = 1156 Perimeter = 136 ===============================
The first set of area and perimeter that’s been displayed is of Square s and second set is of Square s1. Let’s walk through the code, understand what is happening. As usual these lines:
require 'yaml'
require './square_class'imports the code needed for YAML and second one imports code in square_class.rb which enables us to deal with Square objects. Next we have a multi line string yaml
yaml = <<END
---
- !ruby/object:Square
side_length: 17
- !ruby/object:Square
side_length: 34
ENDThe content of yaml is enclosed between <<END and END, note that the content of yaml is the output of the previous program. Concentrate on this line
squares = YAML::load(yaml)It’s here all magic happens. Here the Ruby magically finds out from the YAML file that we are loading data stored in an array, this array consists of two objects of class Square and first one has side length 17 units and another of 34 units. So the YAML::load phrases it into array of Square’s and stores it into variable squares.
In the following code:
squares.each do |square|
puts "Area = #{square.area}"
puts "Perimeter = #{square.perimeter}"
puts "==============================="
endWe load each element of array into a variable square and print its area and perimeter.
22. Proc, Lambdas and Blocks
If you have known some programming languages, you might have heard about closures. Proc and Blocks are similar kind of thing. You can take a piece of code, stick it in between a do end block, assign it to a variable. This variable contains the piece of code and can be manipulated like objects and passed around.
Proc is like a function, but it’s an object. Let’s see an example to know what a Proc is. Type in the program proc.rb into the text editor and execute it.
#!/usr/bin/ruby
# proc.rb
say_hello = Proc.new do
puts "Hello world!"
end
say_hello.call
say_hello.callThis is how the output will look like
Hello world! Hello world!
Lets now walkthru the code to understand it. Take a look at the following lines
say_hello = Proc.new do
puts "Hello world!"
endIn this case you are taking a single Ruby statement puts “Hello World!” and putting it between an do and end. You are making this code a Proc by appending Proc.new before the do (the start of the block). You are assigning the Proc object to a variable named say_hello. Now say_hello can be thought as something that contains a piece of program.
Now how to call or execute the code? When we need to call the piece of Proc named say_hello we write the following command
say_hello.callIn the proc.rb we call say_hello twice and hence we get two Hello World! as output.
22.1. Passing parameters
Like functions you can pass parameters to a Proc. To see how it works, type the program proc_hello_you.rb and execute it.
#!/usr/bin/ruby
# proc_hello_you.rb
hello_you = Proc.new do |name|
puts "Hello #{name}"
end
hello_you.call "Peter"
hello_you.call "Quater"When executed the program gives the following output.
Hello Peter Hello Quater
Take a look at this code
hello_you = Proc.new do |name|
puts "Hello #{name}"
endin above program. Notice that we are capturing something after the do keyword, by giving do |name|` we are putting something that’s been passed to the Proc block into the variable named name. This variable can now be used anywhere in the Proc block to do something.
In puts "Hello #{name}", we print Hello followed by the passed parameter name. So we have written a Proc that can accept something passed to it. How do we call and pass something to it? Well, notice the statements after the end, look at the first one, it says
hello_you.call "Peter"hello_you.call calls the Proc code to be executed. To the Proc we pass the string “Peter”, this string gets copied in to the variable name in the Proc and hence we get the output Hello Peter.
Similarly, when Ruby interpreter comes across hello_you.call "Quarter", it prints Hello Quater.
22.2. Passing Proc to methods
Just like any object, we can pass Proc to methods. Take a look at the code below (proc_to_method.rb). Study it, code it and execute it:
#!/usr/bin/ruby
# proc_to_method.rb
# An exampleof passing a proc to method
def execute_proc some_proc
some_proc.call
end
say_hello = Proc.new do
puts "Hello world!"
end
execute_proc say_helloThis is how the output will look like.
Hello world!
Let’s now analyze the code of execute_proc function, its code is as follows:
def execute_proc some_proc
some_proc.call
endWe take in one argument called some_proc which we assume it as Proc. We then execute it by using its own call method, i.e. in function we just call it using some_proc.call for the passed Proc to be executed. If you look at next few lines we create a Proc called say_hello
say_hello = Proc.new do
puts "Hello world!"
endAll we do in say_hello Proc is to print Hello world!. Now we call the method execute_proc and pass say_hello in the following piece of code
execute_proc say_helloHaving passed the Proc, it gets copied to some_proc argument and when some_proc is executed or called, it prints Hello world! faithfully.
22.3. Returning Proc from function
I had written earlier that Proc can be treated like object. In fact Proc is an object. We can pass it to functions, which we have seen in the previous section, now we can see an example in which Proc is returned from a function. Take a good look at code given below (proc_returning_it.rb).
#!/usr/bin/ruby
# proc_returning_it.rb
# Function that returns a proc
def return_proc
Proc.new do |name|
puts "The length of your name is #{name.length}"
end
end
name_length = return_proc
name_length.call "A.K.Karthikeyan"When executed, the program throws the following output
The length of your name is 15
Look at the function return_proc. In it, we create a new Proc which accepts a parameter called name. Assuming that name is a string, we simply print the length of it. Now consider the code that comes after this function which is as follows:
name_length = return_proc
name_length.call "A.K.Karthikeyan"In the first line name_length = return_proc, the name_length gets assigned with what ever the return_proc method returns. In this case since Proc.new is the last statement / block in the return_proc method, it returns a new Proc which gets assigned to name_proc. So now name_proc can accept a parameter. All we do now is to call name_proc followed by a name
name_length.call "A.K.Karthikeyan"Hence, name_length accepts name as parameter, calculates its length and prints it. Hence, this example shows that its possible to return a Proc from a function.
22.4. Proc and Arrays
Let’s now see how Proc can be used with Arrays to filter them. Take a look at the program proc_and_array.rb below. In it we have declared a Proc called get_proc which takes one argument num. In the Proc we return num if its even which is ensured by the following statement num unless num % 2 == 0. Run the program and note the output.
# proc_and_array.rb
get_odd = Proc.new do |num|
num unless num % 2 == 0
end
numbers = [1,2,3,4,5,6,7,8]
p numbers.collect(&get_odd)
p numbers.select(&get_odd)
p numbers.map(&get_odd)Output
[1, nil, 3, nil, 5, nil, 7, nil] [1, 3, 5, 7] [1, nil, 3, nil, 5, nil, 7, nil]
Now let’s consider the following three statements
p numbers.collect(&get_odd)
p numbers.select(&get_odd)
p numbers.map(&get_odd)In it, let’s just consider the first line p numbers.collect(&get_odd), so we are having a array of numbers stored in variable called numbers, we call collect on numbers, to it, we pass the argument &get_odd. That &<name_of_proc> will call the Proc for each and every element in the array, what ever that’s returned by Proc will be collected into a new array. The p ensures that the values get printed out for us to verify.
If you observe closely both p numbers.collect(&get_odd) and p numbers.map(&get_odd) returns arrays with nil values in them whereas select filters out the nil and returns what that remains.
22.4.1. Lambda
Lambdas are just like Procs. There is almost no difference except two. I will explain one of them here and the other one will be explained in The second difference section.
Okay lets see a small program now
# lambda.rb
print_hello = lambda do
puts "Hello World!"
end
print_hello.callOutput
Hello World!
To know how this program works, read Proc, Lambdas and Blocks.
22.5. Passing Argument to Lambda
Execute the program below.
# lambda_passing_argment.rb
odd_or_even = lambda do |num|
if num % 2 == 0
puts "#{num} is even"
else
puts "#{num} is odd"
end
end
odd_or_even.call 7
odd_or_even.call 8Output
7 is odd 8 is even
To know how it works checkout Passing parameters section in this chapter.
22.6. Proc and Lambdas with Functions
Okay, so what’s the difference between Proc and Lambda. There are two main differences between them, here is the first one. In the example below calling_proc_and_lambda_in_function.rb we have two functions namely calling_lambda and calling_proc, type and run this file on your machine
# calling_proc_and_lambda_in_function.rb
def calling_lambda
puts "Started calling_lambda"
some_lambda = lambda{ return "In Lambda" }
puts some_lambda.call
puts "Finished calling_lambda function"
end
def calling_proc
puts "Started calling_proc"
some_proc = Proc.new { return "In Proc" }
puts some_proc.call
puts "In calling_proc function"
end
calling_lambda
calling_procOutput
Started calling_lambda In Lambda Finished calling_lambda function Started calling_proc
You will see an output as shown above. So lets walk through its execution. When calling_lambda function is called first the program prints Started calling_lambda by executing puts "Started calling_lambda". Next we define a new lambda some_lambda and call it using these lines of code
some_lambda = lambda{ return "In Lambda" }
puts some_lambda.callSo when some_lambda is called, it returns "In Lambda” which gets printed in line puts some_lambda.call.
And then the final statement in the function puts "Finished calling_lambda function" is executed giving us the following output
Started calling_lambda In Lambda Finished calling_lambda function
when the function finishes.
Next we call the function calling_proc, we expect it to behave like call_lambda, but it does not! So what happens? All we know from the output is that puts "Started calling_proc" gets executed, after that?
Well see the next line some_proc = Proc.new { return "In Proc" }, notice that it has got a return statement. When a Proc is called in a function, and it has a return statement, it terminates that function and returns the value of the return as though the function itself is returning it! Whereas lambda does not do it.
Even if a lambda called in a function and the called lambda has a return statement, it passes the control to next line in the function after it gets called, in a proc call its not so, it simply exits out of the function returning its own value out (as tough the function had returned it).
22.7. The second difference
In the previous section, I have written about one difference between Proc and Lambda, lets see the second difference here. Look at the code below (executed in irb).
>> lambda = -> (x) { x.to_s }
=> #<Proc:0x00000001f65b70@(irb):1 (lambda)>
>> lambda.call
ArgumentError: wrong number of arguments (0 for 1)
from (irb):1:in `block in irb_binding'
from (irb):2:in `call'
from (irb):2
from /home//karthikeyan.ak/.rvm/rubies/ruby-2.1.3/bin/irb:11:in `<main>'I have used irb to demonstrate the example. In the code above we have defined a Lambda in the following statement lambda = -> (x) { x.to_s }, now we then call it using the following statement lambda.call , as you can see since we have a argument x, and we are not passing anything to it the lambda throws an exception and complains about it. Now lets try it for a Proc
>> proc = Proc.new { |x| x.to_s}
=> #<Proc:0x00000001a17470@(irb):3>
>> proc.call
=> ""So as you can see above if a argument should be passed to a Proc, and if its not passed, the Proc is called without giving a argument, the Proc does not complain, but treats it as nil.[49]
22.8. Lambda and Arrays
Execute the program below
# lambda_and_array.rb
get_odd = lambda do |num|
num unless num%2 == 0
end
numbers = [1,2,3,4,5,6,7,8]
p numbers.collect(&get_odd)
p numbers.select(&get_odd)
p numbers.map(&get_odd)Output
[1, nil, 3, nil, 5, nil, 7, nil] [1, 3, 5, 7] [1, nil, 3, nil, 5, nil, 7, nil]
To know how it works read Proc and Arrays section in this chapter.
22.8.1. Blocks and Functions
We have seen Procs and how to pass them to methods and functions. Let’s now see about Blocks and how to pass them to functions. Type the example blocks_in_methods.rb and execute it
# blocks_in_methods.rb
def some_method *args, &block
p args
block.call
end
some_method 1, 3, 5, 7 do
puts "boom thata"
endOutput
[1, 3, 5, 7] boom thata
So lets now see the code. In the code we have defined a method named some_method in the following line def some_method *args, &block. Notice that we are taking in all arguments in *args and we have something new called &block that will take in the block of code. You can replace &block with some other variable like &a or &something, or what ever you prefer.
Right now forget about whats there in the function body. Now let’s see the calling of the function, which is shown below
some_method 1, 3, 5, 7 do
puts "boom thata"
endSo we call some_method and pass on arguments 1, 3, 5, 7. This will be collected in *args [50] variable as an array. Now see that starts with do and ends with end and in between you can have as many statements as you want, in other words its a block of code. We just have a statement puts "boom thata", and that’s is. This block of code will go into the &block variable. Now note the following statement in some_method
def some_method *args, &block
p args
block.call
endWe call the block using just block.call and not &block.call, this is important. When we use call method on a block the block gets executed and we get the output “boom thata" printed out.
Now lets see another example where we can pass a variable to a blocks call. Type in the example below and execute it.
# blocks_in_methods_1.rb
def some_method *args, &block
p args
block.call 7
end
some_method 1, 3, 5, 7 do |number|
puts "boom thata\n" * number
endOutput
[1, 3, 5, 7] boom thata boom thata boom thata boom thata boom thata boom thata boom thata
Note that in the some_method definition, we have called the Block by using block.call 7 , where does the number 7 go? Well, see the following lines
some_method 1, 3, 5, 7 do |number|
puts "boom thata\n" * number
endAfter the do we capture the passed variable using |number|, so 7 gets stored in number. Inside the block we multiply "boom thata\n" by number and print it out.
23. Multi Threading
Usually a program is read line by line and is executed step by step by the computer. At any given point of time the computer executes only one instruction1. When technology became advanced it became possible to execute many instructions at once, this process of doing many things at the same time is called multiprocessing or parallel processing.
Imagine that you are tasked with eating 5 pizzas. It would take a long time for you to do it. If you could bring your friends too, then you people can share the load. If you can form a group of 20 people, eating 5 pizzas becomes as easy as having a simple snack. The time required to complete the assigned task gets reduced drastically.
In your Ruby programming you can make the interpreter execute code in a parallel fashion. The process of executing code parallel is called multi threading. To show how multithreading works type the program below in text editor and execute it.
#!/usr/bin/ruby
# multithreading.rb
a = Thread.new{
i = 1
while i<=10
sleep(1)
puts i
i += 1
end
}
puts "This code comes after thread"
a.joinHere is the programs output
This code comes after thread 1 2 3 4 5 6 7 8 9 10
Unlike other programs this program will take 10 seconds to execute. Take a look at the program and output. The puts "This code comes after thread" comes after
a = Thread.new{
i = 1;
while i<=10
sleep(1)
puts i
i += 1
end
}Yet it gets printed first. In the statements shown above we create a new thread named a in which we use a while loop to print from 1 to 10. Notice that we call a function called sleep(1) which makes the process sleep or remain idle for one second. A thread was created, while the thread is running, the Ruby interpreter checks the main thread and its comes across puts "This code comes after thread" and hence it prints out the string and in parallel as it executes the new thread a created by us, so 1 to 10 gets printed as we have inserted sleep(1) each loop takes about 1 second to execute. So after 10 seconds the thread a is finished.
The a.join tells the Ruby interpreter to wait till the thread finishes execution. Once the execution of thread a is over the statements after a.join (if any) gets executed. Since there is no statement after it the program terminates.
Here is another program that clearly explains about multithreading. Go through the program carefully, try to understand how it works, I will explain it in a moment
#!/usr/bin/ruby
# multithreading_1.rb
def func1
i=0
while i<=2
puts "func1 at: #{Time.now}"
sleep(2)
i=i+1
end
end
def func2
j=0
while j<=2
puts "func2 at: #{Time.now}"
sleep(1)
j=j+1
end
end
puts "Started At #{Time.now}"
t1 = Thread.new{func1()}
t2 = Thread.new{func2()}
t1.join
t2.join
puts "End at #{Time.now}"Look at the highlighted code, we have created two threads t1 and t2. Inside thread t1 we call the method func1() and in thread t2 we call the method func2(), by doing so we are executing both func1() and func2() in parallel. When executed this is how the output will look like [51]
Started At Sun Apr 25 09:37:51 +0530 2010 func1 at: Sun Apr 25 09:37:51 +0530 2010 func2 at: Sun Apr 25 09:37:51 +0530 2010 func2 at: Sun Apr 25 09:37:52 +0530 2010 func1 at: Sun Apr 25 09:37:53 +0530 2010 func2 at: Sun Apr 25 09:37:53 +0530 2010 func1 at: Sun Apr 25 09:37:55 +0530 2010 End at Sun Apr 25 09:37:57 +0530 2010
As you can see from the output, the outputs printed by func1 and func2 are interlaced which proves that they have been executed in parallel. Note that in func1 we have made the thread sleep for 2 seconds by giving sleep(2) and in func2 we have made the thread sleep for 1 second by giving sleep(1).
I have made small changes in multithreading_1.rb to produce multithreading_2.rb which gives almost the same result of multithreading_1.rb, so here is its code:
#!/usr/bin/ruby
# multithreading_2.rb
def func name, delay
i=0
while i<=2
puts "#{name} #{Time.now}"
sleep delay
i=i+1
end
end
puts "Started At #{Time.now}"
t1 = Thread.new{func "Thread 1:", 2}
t2 = Thread.new{func "Thread 2:", 3}
t1.join
t2.join
puts "End at #{Time.now}"Instead of using two functions func1 and func2, I have written a single function called func which accepts a name and time delay as input. A loop in it prints out the name passed and the time instant at which the statement gets executed. Notice these statements:
t1 = Thread.new{func "Thread 1:", 2}
t2 = Thread.new{func "Thread 2:", 3}In it, we create two threads t1 and t2. In thread t1 we call the function func and pass along the name Thread 1: and tell it to sleep for 2 seconds. In thread t2 we call the same func and pass name as Thread 2: and tell it to sleep for 3 seconds in each loop iteration. And when executed the program produces the following output
Started At Sun Apr 25 09:44:36 +0530 2010 Thread 1: Sun Apr 25 09:44:36 +0530 2010 Thread 2: Sun Apr 25 09:44:36 +0530 2010 Thread 1: Sun Apr 25 09:44:38 +0530 2010 Thread 2: Sun Apr 25 09:44:39 +0530 2010 Thread 1: Sun Apr 25 09:44:40 +0530 2010 Thread 2: Sun Apr 25 09:44:42 +0530 2010 End at Sun Apr 25 09:44:45 +0530 2010
Which is very similar to output produced by multithreading_1.rb.
23.1. Scope of thread variables
A thread can access variables that are in the main process take the following program (thread_variables.rb) as example
#!/usr/bin/ruby
# thread_variables.rb
variable = 0
puts "Before thread variable = #{variable}"
a = Thread.new{
variable = 5
}
a.join
puts "After thread variable = #{variable}"Output
Before thread variable = 0 After thread variable = 5
Type the program and run it. It will produce the result shown above. As you can see from the program we initialize a variable named variable to 0 before we create the thread. Inside the thread we change the value of the variable to 5. After the thread block we print variable’s value which is now 5. This program shows us that you can access and manipulate a variable that’s been declared in the main thread.
Let’s now see if a variable created inside a thread can be accessed outside the scope of it? Type in the following program (thread_variables_1.rb) and execute it:
#!/usr/bin/ruby
# thread_variables_1.rb
variable = 0
puts "Before thread variable = #{variable}"
a = Thread.new{
variable = 5
thread_variable = 72
puts "Inside thread thread_variable = #{thread_variable}"
}
a.join
puts "=================\nAfter thread\nvariable = #{variable}"
puts "thread_variable = #{thread_variable}"Output
Before thread variable = 0 Inside thread thread_variable = 72 ================= After thread variable = 5 thread_variables_1.rb:13: undefined local variable or method `thread_variable' for main:Object (NameError)
In the program above we see that we have created a variable named thread_variable in the thread a, now we try to access it in the following line:
puts "thread_variable = #{thread_variable}"As you can see the output that the program / Ruby interpreter spits an error as shown:
thread_variables_1.rb:13: undefined local variable or method `thread_variable' for main:Object (NameError)
It says there is an undefined local variable or method named thread_variable. This means that the statement in main thread is unable to access variable declared in the thread a. So from the previous two examples its clear that a thread can access a variable declared in the main thread whereas a variable declared in the thread’s scope cannot be accessed by statement in main scope.
23.2. Thread Exclusion
Let’s say that there are two threads that share a same resource, let the resource be a variable. Let’s say that the first thread modifies the variable, while it’s modifying the second thread tries to access the variable, what will happen? The answer is simple and straight forward, though the program appears to run without errors you may not get the desired result. This concept is difficult to grasp, let me try to explain it with an example. Type and execute thread_exclusion.rb
#!/usr/bin/ruby
# thread_exclusion.rb
x = y = 0
diff = 0
Thread.new {
loop do
x+=1
y+=1
end
}
Thread.new {
loop do
diff += (x-y).abs
end
}
sleep(1) # Here main thread is put to sleep
puts "difference = #{diff}"Output
difference = 127524
Read the program carefully. Before we start any thread, we have three variables x, y and diff that are assigned to value 0. Then in the first thread we start a loop in which we increment the value of x and y. In another thread we find the difference between x and y and save it in a variable called diff. In the first thread x and y are incremented simultaneously, hence the statement diff += (x-y).abs should add nothing to variable diff as x and y are always equal, and their difference should always be zero, hence the absolute value of their difference will also be zero all the time.
In this program we don’t wait for the threads to join (as they contain infinite loop), we make the main loop sleep for one second using the command sleep(1) and then we print the value of diff in the following statement
puts "difference = #{diff}"One would expect the value to be zero, but we got it as 127524, in your computer the value could be different as it depends on machine speed, what processor its running and other parameters. But the moral is diff that should be zero has some value, how come?
We see in the first loop that x is incremented and then y is incremented, let’s say that at an instant x value is 5 and y value is 4, that is x had just got incremented in the statement x += 1 and now the Ruby interpreter is about to read and execute y += 1 which will make y from 4 to 5. At this stage the second thread is executed by the computer. So in the statement:
diff += (x-y).absputting x as 5 and y as 4 will mean that diff will get incremented by 1. In similar fashion while the main loop sleeps for one second, the two thread we have created would have finished thousands of loop cycles, hence the value of diff would have increased significantly. That’s why we get the value of diff as a large number.
Well, we have seen how not to write the program in a wrong way, let’s now see how to write it in the right way. Our task now is to synchronize the two threads that we have created so that one thread does not access other threads resources when the other is in middle of some busy process. To do so we will be using a thing called Mutex which means Mutual Exclusion. Type the following program thread_exclusion_1.rb in text editor and execute it
#!/usr/bin/ruby
# thread_exclusion_1.rb
require 'thread'
mutex = Mutex.new
x = y = 0
diff = 0
Thread.new {
loop do
mutex.synchronize do
x+=1
y+=1
end
end
}
Thread.new {
loop do
mutex.synchronize do
diff += (x-y).abs
end
end
}
sleep(1) # Here main thread is put to sleep
puts "difference = #{diff}"Output
difference = 0
As you see above, we get output as difference = 0, which means that diff variable is zero. Something prevented the second thread from accessing x and y in the first thread while the first one was busy. Somehow the two threads have learned to share their resources properly. Study the code carefully, we see that we have included a thread package by typing
require 'thread'Next we have created a Mutex variable named mutex using the following command
mutex = Mutex.newWell then the code is as usual except inside the threads. Let’s look into the first thread
Thread.new {
loop do
mutex.synchronize do
x += 1
y += 1
end
end
}We see that the statements x += 1 and y += 1 are enclosed in mutex.synchronize block. In similar way, the code computing the difference of x and y is also enclosed in mutex.synchronize block as shown:
Thread.new {
loop do
mutex.synchronize do
diff += (x-y).abs
end
end
}By doing so that we tell the computer that there is a common resource is shared by these two threads and one thread can access the resource only if other releases it. By doing so, when ever the difference (diff) is calculated in diff += (x-y).abs, the value of x and y will always be equal, hence diff never gets incremented and stays at zero forever.
23.3. Deadlocks
Have you ever stood in a queue, or waited for something. One place we all wait is in airport for our luggage’s to be scanned and cleared. Let’s say that the luggage scanning machine gets out of order, and you are stuck in airport. You are expected to attend an important company meeting, and you have the key presentation and you must give an important talk. Since your baggage scanner failed the resource needed by you is not available to you, and you have the key knowledge to talk in the meeting and hence the meeting gets screwed up. One among the meeting might have promised to take his family to a movie, he might return late after the delayed meeting and hence all screw up.
Imagine that the baggage scanner, you, a person who must listen to your meeting are threads of a Ruby program. Since the baggage scanner won’t release a resource (your bag) your process gets delayed and since you are delayed many other processes that depend on you are delayed. This situation is called deadlock. It happens in Ruby programs too.
When ever situation like this arises people wait rather than to rush forward. You wait for your bag to be released, your company waits for your arrival and the mans family waits for him to take them to movie. Instead of waiting if people rush up it will result in chaos.
Ruby has a mechanism to avoid this chaos and to handle this deadlock. We use a thing called condition variable. Take a look at the program (thread_condition_variable.rb) below, type it and execute it.
#!/usr/bin/ruby
# thread_condition_variable.rb
require 'thread'
mutex = Mutex.new
c = ConditionVariable.new
a = Thread.new {
mutex.synchronize {
puts "Thread a now waits for signal from thread b"
c.wait(mutex)
puts "a now has the power to use the resource"
}
}
puts "(Now in thread b....)"
b = Thread.new {
mutex.synchronize {
puts "Thread b is using a resource needed by a, once its done it will signal to a"
sleep(4)
c.signal
puts "b Signaled to a to acquire resource"
}
}
a.join
b.joinOutput
Thread a now waits for signal from thread b (Now in thread b....) Thread b is using a resource needed by a, once its done it will signal to a b Signaled to a to acquire resource a now has the power to use the resource
Study the program and output carefully. Look at the output. First the statement in Thread a gets executed and it prints that Thread a is waiting for Thread b to signal it to continue. See in thread a we have written the code c.wait(mutex), where c is the Condition Variable declared in the code as follows:
c = ConditionVariable.newSo now thread a waits, now the execution focused on thread b when the following line is encountered in Thread b:
puts "Thread b is using a resource needed by a, once its done it will signal to a"it prints out that thread b is using some resource needed by a, next thread b sleeps for 4 seconds because we have given sleep(4) in it. This sleep statement can be avoided, I have given a sleep because while the reader executes the program it makes him wait and gives a feel that how really condition variable works.
Then after 4 seconds, Thread b signals to Thread a, its wait can end using the statement c.signal. Now Thread a receives the signal and can execute its rest of its statements, i.e. after c.signal, Thread a and Thread b can execute simultaneously.
23.4. Creating multiple threads
Let’s say that you have a situation where you have to create many threads, and it must be done in elegant way, say that a situation might arise you don’t even know how many threads could be created, but you must create them and the program should wait for them to join and then exit, so lets see how to code that.
So type the program below into your text editor and run it:
# many_threads.rb
def launch_thread string
thread = Thread.new do
3.times do
puts string
sleep rand(3)
end
end
return thread
end
threads = []
threads << launch_thread("Hi")
threads << launch_thread("Hello")
threads.each {|t| t.join}Output
Hi Hello Hello Hello Hi Hi
If you are not getting the exact output as above, do not worry as there is some randomness in the program. Let me explain the program so that it becomes clear to you.
First we declare an array that will hold the threads as shown below:
threads = []Next we will put an value into threads array using the function launch_thread as shown below:
threads << launch_thread("Hi")Lets analyze what goes on in the launch_thread function, first we have a function as shown below:
def launch_thread string
…....
endWe are returning a variable called thread from the function:
def launch_thread string
return thread
endWe assign a newly created thread to the variable thread:
def launch_thread string
thread = Thread.new do
end
return thread
endWe put some code inside the newly created thread:
def launch_thread string
thread = Thread.new do
3.times do
puts string
sleep rand(3)
end
end
return thread
endThat’s it. So in short we create the thread, run the code in it and return it which gets stored in threads array. The same stuff happens in this line too:
threads << launch_thread("Hello")Now we have to wait for each thread to join the main program (or the main thread). So we write the joining code as shown:
threads.each {|t| t.join}This will wait till all threads have completed and joins with the main code.
So we have written a program that can create as many threads as we want (in the above case two), and all the threads will be gathered into an array and the main program will wait till all threads have completed and joined with it and then would exit.
Now take look at many_threads_1.rb and many_threads_2.rb, execute them and explain to yourself how they work. Better write a good explanation for them and mail to me so that I can put it in this book.
# many_threads_1.rb
def launch_thread string
thread = Thread.new do
3.times do
puts string
sleep rand(3)
end
end
return thread
end
threads = []
4.times do |i|
threads << launch_thread("Thread #{i}")
end
threads.each {|t| t.join}# many_threads_2.rb
def launch_thread string
thread = Thread.new do
3.times do
puts string
sleep rand(3)
end
end
return thread
end
threads = []
puts "How many threads should run?"
count = gets.to_i
count.times do |i|
threads << launch_thread("Thread #{i}")
end
threads.each {|t| t.join}23.5. Thread Exception
When ever there is an exception when the program is running, and if the exception isn’t handled properly the program terminates. Let’s see what happens when there is a exception in a thread. Type the code thread_exception_true.rb in text editor and execute it.
#!/usr/bin/ruby
# thread_exception_true.rb
t = Thread.new do
i = 5
while i >= -1
sleep(1)
puts 25 / i
i -= 1
end
end
t.abort_on_exception = true
sleep(10)
puts "Program completed"Output
5 6 8 12 25 thread_exception_true.rb:8:in `/': divided by 0 (ZeroDivisionError) from thread_exception_true.rb:8 from thread_exception_true.rb:4:in `initialize' from thread_exception_true.rb:4:in `new' from thread_exception_true.rb:4
Notice in the program we create a thread named t, and if you are quite alert we haven’t got t.join in the program. Instead of waiting for the thread to join we wait long enough for the thread to complete. For the thread to complete we wait for 10 seconds by using the statement sleep(10).
Notice the line t.abort_on_exception = true where we set that if there raises an exception in the thread t, the program must abort. Let’s now analyze what’s in thread t. Thread t contains the following code
t = Thread.new do
i = 5
while i >= -1
sleep(1)
puts 25 / i
i -= 1
end
endNotice that we divide 25 by i and put out the result of the division. i is decremented by 1 in each loop iteration, so when i becomes zero and when 25 is divided by it, it will raise an exception. So at the sixth iteration of the loop, 25 is divided by zero, an exception is raised, and the program stops by spiting out the following
thread_exception_true.rb:8:in `/': divided by 0 (ZeroDivisionError) from thread_exception_true.rb:8 from thread_exception_true.rb:4:in `initialize' from thread_exception_true.rb:4:in `new' from thread_exception_true.rb:4
This happens because we have set t.abort_on_exception to true (see the highlighted code). What happens if we set it as false. Take a look at the program thread_exception_false.rb. In the program we have set t.abort_on_exception as false. Type the program in text editor and run it
#!/usr/bin/ruby
# thread_exception_false.rb
t = Thread.new do
i = 5
while i >= -1
sleep(1)
puts 25 / i
i -= 1
end
end
t.abort_on_exception = false
sleep(10)
puts "Program completed"Take a look at output
5 6 8 12 25 Program completed
As you can see from the output there is no trace of exception occurrence4. The code that comes after thread t gets executed, and we get output that says Program Completed. This is because we have set abort_on_exception to be false.
You can see from the last two programs that we haven’t used t.join , instead we have waited long enough for the thread to terminate. This is so because once we join thread (that causes) exception with the parent (in this case the main) thread, the exception that arises in the child thread gets propagated to the parent / waiting thread so abort_on_exception has no effect even it set to false. So when ever exception raises it gets reflected on our terminal.
23.6. Thread Class Methods
There are certain thread methods which you can use to manipulate the properties of the thread. Those are listed below. If you can’t understand a bit of it, never worry.
| Sno. | Method | What it does |
|---|---|---|
1. |
Thread.abort_on_exception |
Returns the status of the global abort on exception condition. The default is false. When set to true, will cause all threads to abort (the process will exit(0)) if an exception is raised in any thread. |
2. |
Thread.abort_on_exception= |
When set to true, all threads will abort if an exception is raised. Returns the new state. |
3. |
Thread.critical |
Returns the status of the global thread critical condition. |
4. |
Thread.critical= |
Sets the status of the global thread critical condition and returns it. When set to true, prohibits scheduling of any existing thread. Does not block new threads from being created and run. Certain thread operations (such as stopping or killing a thread, sleeping in the current thread, and raising an exception) may cause a thread to be scheduled even when in a critical section. |
5. |
Thread.current |
Returns the currently executing thread. |
6. |
Thread.exit |
Terminates the currently running thread and schedules another thread to be run. If this thread is already marked to be killed, exit returns the Thread. If this is the main thread, or the last thread, exit the process. |
7. |
Thread.fork { block } |
Synonym for Thread.new |
8. |
Thread.kill( aThread ) |
Causes the given aThread to exit |
9. |
Thread.list |
Returns an array of Thread objects for all threads that are either runnable or stopped. Thread. |
10. |
Thread.main |
Returns the main thread for the process. |
11. |
Thread.new( [ arg ]* ) {| args | block } |
Creates a new thread to execute the instructions given in block, and begins running it. Any arguments passed to Thread.new are passed into the block. |
12. |
Thread.pass |
Invokes the thread scheduler to pass execution to another thread. |
13. |
Thread.start( [ args ]* ) {| args | block } |
Basically the same as Thread.new . However, if class Thread is subclassed, then calling start in that subclass will not invoke the subclass’s initialize method. |
14. |
Thread.stop |
Stops execution of the current thread, putting it into a sleep state, and schedules execution of another thread. Resets the critical condition to false |
23.7. Thread Instance Methods
Since everything in Ruby is an object, ia thread too is an object. Like many objects, threads have functions or methods which can be called to access or set a property in thread. Some functions and their uses are listed below (thr is an instance variable of the Thread class):
| Sno. | Method | What it does |
|---|---|---|
1 |
thr.alive? |
This method returns true if the thread is alive or sleeping. If the thread has been terminated it returns false. |
2 |
thr.exit |
Kills or exits the thread |
3 |
thr.join |
This process waits for the thread to join with the process or thread that created the child thread. Once the child thread has finished execution, the main thread executes the statement after thr.join |
4 |
thr.kill |
Same ad thr.exit |
5 |
thr.priority |
Gets the priority of the thread. |
6 |
thr.priority= |
Sets the priority of the thread. Higher the priority, higher preference will be given to the thread having higher number. |
7 |
thr.raise( anException ) |
Raises an exception from thr. The caller does not have to be thr. |
8 |
thr.run |
Wakes up thr, making it eligible for scheduling. If not in a critical section, then invokes the scheduler. |
10 |
thr.wakeup |
Marks thr as eligible for scheduling, it may still remain blocked on I/O, however. |
11 |
thr.status |
Returns the status of thr: sleep if thr is sleeping or waiting on I/O, run if thr is executing, false if thr terminated normally, and nil if thr terminated with an exception. |
12 |
thr.stop? |
Waits for thr to complete via Thread.join and returns its value. |
13 |
thr[ aSymbol ] |
Attribute Reference - Returns the value of a thread-local variable, using either a symbol or a aSymbol name. If the specified variable does not exist, returns nil. |
14 |
thr[ aSymbol ] = |
Attribute Assignment - Sets or creates the value of a thread-local variable, using either a symbol or a string. |
15 |
thr.abort_on_exception |
Returns the status of the abort on exception condition for thr. The default is false. |
16 |
thr.abort_on_exception= |
When set to true, causes all threads (including the main program) to abort if an exception is raised in thr. The process will effectively exit(0). |
24. Exception Handling
In India, law does not apply to the rich and political class. They can do anything and get away from it. Though our laws says bribes are illegal, there is almost no Indian who hasn’t paid bribe. Free speech and bloggers are ruthlessly targeted. Everything is a exception here and law is mostly just ink on paper. We may not be able to do anything about the corrupt rich and politician, but at the least we can handle exceptions in Ruby! Let me explain to how to handle exceptions in Ruby programming in this section.
Lets write a program called code/division_exception.rb which will break due to division by zero. Open your text editor, type the given code below and run it
# division_exception.rb
puts 67 / 0Output
division_exception.rb:3:in `/': divided by 0 (ZeroDivisionError) from division_exception.rb:3:in `<main>'
As you see, you get a exception as output. See that the constant ZeroDivisionError. we will see the use of in just a few examples. So when the Ruby interpreter notices that it can’t handle something, it raises an exception.
It will not be great if we throw out the exception to our client who has paid millions for us to produce a piece of program. We would rather try to put out something that’s understandable to them. So in the example shown below code/rescue.rb we see how to handle this exception. Type the program below in a text editor and run it.
# rescue.rb
begin
puts 67 / 0
rescue
puts "We are unable to proceed due to unavoidable reasons :("
endOutput
We are unable to proceed due to unavoidable reasons :(
As you can see instead of the nasty ZeroDivisionError output, you see a friendly message that says it’s unable to proceed due to unavoidable reasons. The trick is, if you think some exception can occur in code surround it with begin and` end` blocks as shown below
begin
puts 67 / 0
endThen the code that needs to be handled when there is a exception is put after a key word called rescue as shown:
begin
puts 67 / 0
rescue
puts "We are unable to proceed due to unavoidable reasons :("
endWhen there is an exception, the code below rescue starts executing. That’s it! Well, you now how to deal with exceptions in a crude way.
Let now see a refined way to catch or rescue from an exception. See the code below rescue_1.rb, type it and execute it
# rescue_1.rb
begin
puts 67 / 0
rescue ZeroDivisionError
puts "Oh nooo! boom thata has cursed us!!!!!"
endOutput
Oh nooo! boom thata has cursed us!!!!!
You see the output that you are cursed by Boom Thata (God of Gods). Don’t worry much about that, Boom Thata is my friend and will talk to him to reverse it. Here we have put the code like this rescue ZeroDivisionError, in it we are telling it to rescue if and only zero division error occurs. If some other exception happens, since we are handling only ZeroDivisionError, you won’t be rescued for that.
To show what I mean type the program (rescue_2.rb) below and execute it
# rescue_2.rb
begin
"abc" * "def"
rescue ZeroDivisionError
puts "Oh nooo! boom thata has cursed us!!!!!"
endOutput
Traceback (most recent call last): 1: from rescue_2.rb:4:in `<main>' rescue_2.rb:4:in `*': no implicit conversion of String into Integer (TypeError)
Here we still get an error on the terminal because multiplying two strings produces a different error called TypeError as you see in the output and not ZeroDivisionError. And in the program we have rescued only for ZerodivisionError.
Let’s say that you want to print out an exception. Say for your debugging purpose or something. So how to do that. The following program shows you that. Type the program printing_exception.rb and run it
# printing_exception.rb
begin
puts 67 / 0
rescue => e
puts "The following exception has occured:"
p e
endOutput
The following exception has occured: #<ZeroDivisionError: divided by 0>
So as you can see, you can print an exception. Just note the line p e, its there where we are printing an exception. e is the exception object and p is kind of short form for puts. Wish you have noticed that this code rescue ⇒ e pushed the exception into a variable e. That’s how e holds the exception.
In the next example, we are going to see how to back trace an exception. That is exception that’s been thrown in real world programs could be buried under multiple levels. To find that out you better need to back trace it. Type the program below into text editor and run it.
# backtracing_exception.rb
begin
puts 67 / 0
rescue => e
p e.backtrace
endOutput
["backtracing_exception.rb:4:in `/'", "backtracing_exception.rb:4:in `<main>'"]
We are printing the back trace using p e.backtrace. If you can notice the output, it shows that exception has occurred in line 4, if you have line numbers displayed in your text editor you can identify the line immediately and debug it.
Next (the second piece of output) it says the exception has occurred in main. You may wonder what is main? Its the program in your text editor that is first run is called the main.
24.1. Exception and Threads
We have seen exception in ordinary programs that are single threaded, but Ruby is a multithreaded programming language. Let’s see how exceptions and threads mix and behave. Type the program thread_exception_true.rb and run it.
#!/usr/bin/ruby
# thread_exception_true.rb
t = Thread.new do
i = 5
while i >= -1
sleep(1)
puts 25 / i
i -= 1
end
end
t.abort_on_exception = true
sleep(10)
puts "Program completed"Output
5 6 8 12 25 thread_exception_true.rb:8:in `/': divided by 0 (ZeroDivisionError) from thread_exception_true.rb:8:in `block in <main>'
As you see the program throws out an ZeroDivisionError exception, this happens in while loop when the value of i becomes zero and 25 needs to be divided by it. Notice the line t.abort_on_exception = true, here we tell the program to abort or stop when there is an exception. This will stop all other threads if they are running in parallel. Let’s say that you have a multithreaded program where it is a must that all threads must run without an exception, and threads are kind of dependent on each other, then it’s better to write code in such a way that the program aborts when exception is raised in one of the threads.
Let’s say that a program we write is such that exception on a thread can be ignored, and other threads can run merrily then see the line t.abort_on_exception = false in program below thread_exception_false.rb. Here we specify t.abort_on_exception = false, so the program runs, when an exception occurs, the particular thread stops running, whereas other threads continue to run as though nothing happened.
#!/usr/bin/ruby
# thread_exception_false.rb
t = Thread.new do
i = 5
while i >= -1
sleep(1)
puts 25 / i
i -= 1
end
end
t.abort_on_exception = false
sleep(10)
puts "Program completed"Output
5 6 8 12 25 Program completed
24.2. Raising Exceptions
We have seen how to catch an exception and deal with it. But what if we want to raise our own exceptions? Type the program raise.rb in text editor and execute it.
# raise.rb
puts "Enter a number 1 - 10:"
num = gets.to_i
raise "You did not enter right num" unless (1..10).include? numOutput
Enter a number 1 - 10: 25 raise.rb:5:in `<main>': You did not enter right num (RuntimeError)
As you can see from the output the program raises exception if any number entered does not lie from 1 to 10. See the piece of code raise "You did not enter right num", that’s all it takes to raise an exception in Ruby. The key word raise followed by an object, in this case we put out a string, but it would be nice if we put out a constant which is the norm of raising exceptions. The program below raise_1.rb shows how to deal with your own exceptions which is no different from rescue programs you have written before.
# raise_1.rb
def number_thing(num)
raise "You did not enter right num" unless (1..10).include? num
puts "You entered #{num} :)"
end
puts "Enter a number 1 - 10:"
num = gets.to_i
begin
number_thing(num)
rescue
puts "You may have not entered number in valid range"
endOutput
Enter a number 1 - 10: 25 You may have not entered number in valid range
25. Regular Expressions
You are with your girlfriend in a jewel shop, she chooses one of the finest diamond rings and gives you THAT LOOK… Sure you know that you will fall into more credit card debt. You are in another day and having a talk with your boss to get more salary when he stares at you. THAT LOOK. You now know that what ever you say that you did good to the company, it will be ignored and would be futile. We all see for expressions in others face and we try to predict what’s next from it.
Let’s say that you are on chat with your friend, and he types :-) , you know he is happy, this :-( means he’s sad. So its quiet evident that we can see expressions even in textual data just as we see in each other face. Ruby’s regular expression provides you with a way to detect these patterns in a given text and extract them if you wish. This can be used for something useful. This chapter is about that. What Ruby does not do is to tell you how to impress your girl without getting into debt :-( . Report this as a bug and hope they will fix it in ruby’s next major release s;-)
Fire up your irb, let’s begin.
25.1. Creating an empty regexp
Okay we will try to create a empty regular expression. In your terminal type irb -–simple-prompt and in it type the following (without the >>, which is irb’s prompt)
>> //.class
=> RegexpYou see //.class is Regexp. In other words anything between those / and / is a regexp [52]. Regexp is not a string, but it denotes a pattern. Any string can match or may not match the pattern.
25.2. Detecting Patterns
Let’s now see how to detect patterns in a regular expression. Let’s say that you want to see whether abc is in a given string. Just punch the code below
>> /abc/.match "This string contains abc"
=> #<MatchData "abc">abc is present in the given string hence you get a match. In the code snippet below, there is no abc in the string and hence it returns nil.
>> /abc/.match "This string contains cba"
=> nilYou can use the match function on a regexp as shown above, or you can use it on a string, as shown below. Both gives you the same result.
>> "This string contains abc".match(/abc/)
=> #<MatchData "abc">Another way of matching is shown below. You can use the =~ operator.
>> "This string contains abc" =~ /abc/
=> 21
>> /abc/ =~ "This string doesn't have abc"
=> 25The =~ tells you the location where the first occurrence of the match occurs.
If you would like something much simple, that is if you just want to know if a match is present or not, then you can use match?` Which returns true or false as shown below
>> /abc/.match? "This string contains abc"
=> true
>> /abc/.match? "This string contains def"
=> false25.2.1. Things to remember
There are some things you need to remember, or at least refer from time to time. Those are mentioned in table below [53].
Thing |
What it means |
. |
Any single character |
\w |
Any word character (letter, number, underscore) |
\W |
Any non-word character |
\d |
Any digit |
\D |
Any non-digit |
\s |
Any whitespace character |
\S |
Any non-whitespace character |
\b |
Any word boundary character |
^ |
Start of line |
$ |
End of line |
\A |
Start of string |
\z |
End of string |
[abc] |
A single character of |
a, b or c |
[^abc] |
Any single character except |
a, b, or c |
[a-z] |
Any single character in the range a-z |
[a-zA-Z] |
Any single character in the range a-z or A-Z |
(…) |
Capture everything enclosed |
(a|b) |
a or b |
a? |
Zero or one of a |
a* |
Zero or more of a |
a+ |
One or more of a |
a{3} |
Exactly 3 of a |
a{3,} |
3 or more of a |
a{3,6} |
Between 3 and 6 of a |
i |
case insensitive |
m |
make dot match newlines |
x |
ignore whitespace in regex |
o |
perform #{…} substitutions only once |
Don’t panic if you don’t understand it, you will catch up.
25.3. The dot
The dot in a regular expression matches anything. To illustrate it lets try some examples in our irb:
>> /.at/.match "There is rat in my house"
=> #<MatchData "rat">In the above code snippet, we try to match /.at/ with a string, and it matches. The reason, the string contains a word called rat. Take a look at another two examples below, the /.at/ matches cat and bat without any fuss.
>> /.at/.match "There is cat in my house"
=> #<MatchData "cat">
>> /.at/.match "There is bat in my house"
=> #<MatchData "bat">It’s not a rule that the dot should be at the start of the word or something, it can be anywhere. A regexp /f.y/ could comfortably match fry and fly. Ah! I wish I have a chicken fry now. Any way chickens do fly.
25.4. Character classes
Let’s say that we want to find that whether there is a bat or a rat or a cat is present in a given string. If it’s there we will print that there is an animal in the house, else we won’t print a thing. You might be thinking that we need to have three regexp like /bat/, /cat/ and /rat/, but that’s not the case. We know from those three regexp that only the first character varies. So what about /.at/ like the previous one. Well that won’t work either, because it will match words like eat, mat, fat and so on.
So this time strictly we want to match only bat, rat and cat, so we come up with a regexp like this: /[bcr]at/, this will only match those three animal words and nothing else. Punch in the following example and run it in your computer
#!/usr/bin/ruby
# regexp_character_classes.rb
puts "There is a animal in your house" if /[bcr]at/.match "There is bat in my house"
puts "There is a animal in your house" if /[bcr]at/.match "There is rat in my house"
puts "There is a animal in your house" if /[bcr]at/.match "There is cat in my house"
puts "There is a animal in your house" if /[bcr]at/.match "There is mat in my house"Output
There is a animal in your house There is a animal in your house There is a animal in your house
As you can see from the output above, the string "There is a animal in your house" gets printed thrice and not the fourth time when the match fails for "There is mat in my house".
Character classes can also accept ranges. Punch in the code below and run it.
#!/usr/bin/ruby
# regexp_character_classes_1.rb
print "Enter a short string: "
string = gets.chop
puts "The string contains character(s) from a to z" if /[a-z]/.match string
puts "The string contains character(s) from A to Z" if /[A-Z]/.match string
puts "The string contains number(s) from 0 to 9" if /[0-9]/.match string
puts "The string contains vowels" if /[aeiou]/.match string
puts "The string contains character(s) other than a to z" if /[^a-z]/.match string
puts "The string contains character(s) other than A to Z" if /[^A-Z]/.match string
puts "The string contains number(s) other than 0 to 9" if /[^0-9]/.match string
puts "The string contains characters other than vowels" if /[^aeiou]/.match stringOutput
Enter a short string: fly The string contains character(s) from a to z The string contains character(s) other than A to Z The string contains number(s) other than 0 to 9 The string contains characters other than vowels
Output 1
Enter a short string: Burgundy 32 The string contains character(s) from a to z The string contains character(s) from A to Z The string contains number(s) from 0 to 9 The string contains vowels The string contains character(s) other than a to z The string contains character(s) other than A to Z The string contains number(s) other than 0 to 9 The string contains characters other than vowels
OK, what you infer from the output? When you give fly these regexp’s match:
-
/[a-z]/ since it contains a character from a to z
-
/[^A-Z]/ since it contains a character that does not belong anywhere from A to Z, hence you come to know ^ inside a capture means negation. There are other uses for ^ which if I am not lazy you will be writing about it.
-
/[^0-9]/ since it does not contain any numbers from 0 to 9
-
/[^aeiou]/ since it does not contain a vowel (a or e or i or o or u)
According to that the messages in the puts statements gets printed.
Now look at the Output 1, I have given the program a string Burgundy 27, check if your assumptions / logic tally with it.
25.5. Scanning
I love this scan method in String Class. It lets us search a huge array of string for something. Just like needle in a haystack, since computers are getting faster and faster you can scan more and more. They are good for searching. They are quite unlike the police in India who would only conduct a search only if the person who has been burgled gives bribe.
So punch in the program below. It scans for words in a string.
#!/usr/bin/ruby
# regexp_scan.rb
string = """ There are some words in this string and this program will
scan those words and tell their word count """
words = string.scan(/\w+/)
puts "The words are:"
p words
puts # prints a empty line
puts "there are #{words.count} words in the string"
puts "there are #{words.uniq.count} unique words in string"Output
The words are: ["There", "are", "some", "words", "in", "this", "string", "and", "this", "program", "will", "scan", "those", "words", "and", "tell", "their", "word", "count"] there are 19 words in the string there are 16 unique words in string
Note the /\w+/, what does it mean? Refer this table Things to remember. You can see that \w means any character like letter, number, underscore and + mean one or many. In other words I have assumed that words consists of any letter, number and underscore combinations and a word contains at-least one letter or more. So the statement string.scan(/\w+/) will scan all words and put into a variable called words which we use in this program.
The statement p words prints out the array, and in the following line:
puts "there are #{words.count} words in the string"we are counting the number of elements in the array words using the command word.count and embedding in a string using #{words.count} and printing it out to the user.
In the next statement
puts "there are #{words.uniq.count} unique words in string"we are finding how many unique words are there in the given string using words.uniq.count and printing that too to the user. For example if you scan a large book of two authors and feed it to this program, the person who has more number of unique words can be assumed to have better vocabulary.
Let’s now see another program. For example take a tweet you will do on Twitter, and you want to find out if the tweet contains Twitter usernames. So now let’s analyze construct of a Twitter username, it first contains an @ symbol followed by a word. In other words it must match the regexp /@\w+/. In the following program we scan all the users mentioned in a tweet
#!/usr/bin/ruby
# regexp_scan_twitter_users.rb
string = """ There is a person @karthik_ak who wrote ilr. Its about a
language called @ruby invented by @yukihiro_matz """
users = string.scan(/@\w+/)
puts "The users are:"
p usersOutput
The users are: ["@karthik_ak", "@ruby", "@yukihiro_matz"]
Notice the string.scan(/@\w+/) in the program above. It scans all words that is starting with an @ symbol, collects them and returns them as an array, finally we display that array using p users.
25.6. Captures
We have seen how useful regular expressions could be. Now lets say we found a match with a regular expression, and we just want to capture a small part of it, say a username in an email, or a month in some ones date of birth, how to do that?
We use round brackets for that, and we call them captures. Below is a program that asks birthday of a person and extracts the month out of it.
#!/usr/bin/ruby
# regexp_capture.rb
print "Enter Birthday (YYYY-MM-DD) :"
date = gets.chop
/\d{4}-(\d{2})-\d{2}/.match date
puts "You were born on month: #{$1}"Output
Enter Birthday (YYYY-MM-DD) :1982-11-22 You were born on month: 11
Notice this line /\d{4}-(\d{2})-\d{2}/.match date, here we check if the date matches the following: That is, it must have four digits /\d{4}/, then it must be followed by a hyphen /\d{4}-/ then it must be followed by two digits /\d{4}-\d(2}/ and it must be followed a hyphen and another two digits /\d{4}-\d{2}-\d{2}/.
Now we need to capture just the month that’s in the middle. Hence, we put braces around it like shown /\d{4}-(\d{2})-\d{2}/, we stick this regexp in the program above, in this line:
/\d{4}-(\d{2})-\d{2}/.match dateNow where this capture (\d{2}) gets stored? It gets stored in a global variable $1, if there is another capture, it gets stored in another variable $2, $3 and so on….. So we now know $1 has the month, and we use it in the following line to print out the result:
puts "You were born on month: #{$1}"In the coming example regexp_capture_1.rb, we try three captures where we want to capture Year, Month and Date in one go. Hence, we use the following regexp /(\d{4})-(\d{2})-(\d{2})/. Type the program below and execute it.
#!/usr/bin/ruby
# regexp_capture_1.rb
print "Enter Birthday (YYYY-MM-DD) :"
date = gets.chop
/(\d{4})-(\d{2})-(\d{2})/.match date
puts "Year: #{$1} \n Month: #{$2} \n Date: #{$3}"Output
Enter Birthday (YYYY-DD-MM) :1997-12-67 Year: 1997 Month: 12 Date: 67
Here the first capture starting from left is stored in $1, the second is stored in $2 and the third in $3 and so on (if we had given more). If you are wondering what $0 is, why don’t you give a puts $0 statement at the end of the program and see what happens?
In the next program, we have designed it to tolerate some errors in user input. The user may not always give 1990-04-17, he might give it as 1990 - 04- 17 or something like that that might have spaces around numbers. Type int the program and execute it:
#!/usr/bin/ruby
# regexp_capture_2.rb
print "Enter Birthday (YYYY-MM-DD) :"
date = gets.chop
/\s*(\d{4})\s*-\s*(\d{2})\s*-\s*(\d{2})\s*/.match date
puts "Year: #{$1} \n Month: #{$2} \n Date: #{$3}"Output
Enter Birthday (YYYY-MM-DD) :1947- 07 - 14 Year: 1947 Month: 07 Date: 14
As you can see, the program finds month, date and year! If you note the regexp we are using /\s*(\d{4})\s*-\s*(\d{2})\s*-\s*(\d{2})\s*/ we have padded digits with \s*, now what’s that? Once again refer the regexp table Things to remember. \s means space and means zero or more, so say \s\d{4} means match in such a way that the regexp has 4 digits and is prepended with zero or more spaces and \s*\d{4}\s* match a 4-digit number which is prepended and followed by zero or more spaces. Hence, no matter how much padding you give with space, it finds out the dates.
25.7. Nested Capture
Nested captures are capture within a capture. Type the code below and execute it in irb:
>> /(a(c(b)))/.match "This sting contains acb so it has match"
=> #<MatchData "acb" 1:"acb" 2:"cb" 3:"b">
>> $1
=> "acb"
>> $2
=> "cb"
>> $3
=> "b"See the regexp /(a(c(b)))/, does it make any sense to you? Well then how to read it? First remove all brackets and read it like /acb/. acb is present in the string and hence it matched, so we get the part of the output as shown below:
=> #<MatchData "acb"....Now apply the outermost bracket from left, and we get a capture as shown /(acb)/, this matches and captures acb which appears as 1:"acb" part in output as shown below:
=> #<MatchData "acb" 1:"acb" 2:"cb" 3:"b">
This capture s stored in $1 global variable. Now forget the outer bracket and move from left to the second pair of brackets, and you get the following regexp /a(cb)/, this matches acb and captures cb in the string, this is caught in variable $2 and is also shown in 2:"cb" part of the matched data below:
=> #<MatchData "acb" 1:"acb" 2:"cb" 3:"b">
In similar way the inner most bracket pair, forms this regexp /ac(b)/ and it’s captured in variable $3 is showed in matched output 3:"b" below
=> #<MatchData "acb" 1:"acb" 2:"cb" 3:"b">
25.8. MatchData class
So you have matched stuff and captured it. Well, if you have noticed in the irb, when ever you match a thing, a object gets returned. Everything is an object in Ruby, but this is not String type object, but a new type called MatchData. So lets play with it and see what it can do. So see the example below where we match a regexp /abc/ with a string, and we store it in a variable m
>> m = /abc/.match "This stuff has abc and something after it"
=> #<MatchData "abc">To see what was matched, we give the command m.match and its throws an error as shown below!
>> m.match
NoMethodError: undefined method 'match' for #<MatchData "abc">
from (irb):2
from /home/webtoday/.rvm/rubies/ruby-1.9.3-p194/bin/irb:16:in '<main>'So how to get the match? Well, it looks like the MatchData is an array where the first element is the matched piece of text so type m[0] to get the matched data as shown below:
>> m[0]
=> "abc"Sometimes you might be interested what comes before and after a match. The pre_match function gets the piece of text that is prior to the match as shown below:
>> m.pre_match
=> "This stuff has "Like pre_match, post_match does the opposite, it gets the piece of text that comes after the match.
>> m.post_match
=> " and something after it"If you want to see whether you have any captures, you can call the captures function as shown.
>> m.captures
=> []Of course you have no captures this time, hence the captures function returns an empty array.
Well, talking about captures in MatchData object, take a look at the piece of code below. We have given a regexp with capture like /((ab)c)/. This regexp in the string "This stuff has abc and something after it" will match abc and will capture abc and ab (if you have understood what capture is in the previous sections). Well, how to get captures in MatchData object, first let us match the regexp with string and store it variable m as shown below:
>> m = /((ab)c)/.match "This stuff has abc and something after it"
=> #<MatchData "abc" 1:"abc" 2:"ab">Now to see captures, use the capture function on MatchData object as shown below
>> m.captures
=> ["abc", "ab"]So you get captures as Array which can be treated as an Array object. You can get the captures directly from MatchData too as shown below, the second element onward in the MatchData array stores the captures which can be accessed by m[1], m[2] …… m[n] as shown below
>> m[1]
=> "abc"
>> m[2]
=> "ab"Well, I have told that m belongs to MatchData class, and haven’t offered proof yet. Here is it
>> m.class
=> MatchData25.9. Anchors and Assertions
25.9.1. Anchors
Anchors are reference points in Ruby. Let’s say that we want to check if a line immediately begins with a =begin [54], then I can check it with a regexp like this /^=begin/, where the ^ sign is a anchor that represents beginning of the line:
/^=begin/.match "=begin"
=> #<MatchData "=begin">Let’s say like we have multiple line string, and we want to extract a line (the first one). So the content of the first line could be anything, so we get a regexp as /.+/, now it must be between beginning of line ^ and end of line $, so we get a regexp as shown /^.+$/, this regexp will match anything that’s between line anchors. An example is shown below.
>> /^.+$/.match "Boom \n Thata"
=> #<MatchData "Boom ">In the above example, note that \n splits the string into two lines as \n stands for newline character. So the regexp faithfully matches the first line content, that is "Boom ".
The next type of Anchors we have are \A that stands for start of a string and \z that stands for end of a string. In the example below, we check if the string starts with something by using the following regexp /\ASomething/
>> /\ASomething/.match "Something is better than nothing"
=> #<MatchData "Something">And we get a match. In the example below we get a nil match because the string does not start with Something.
>> /\ASomething/.match "Everybody says Something is better than nothing"
=> nilNow lets check if nothing is followed by end of string, hence we form a regexp as shown /nothing\z/
>> /nothing\z/.match "Everybody says Something is better than nothing"
=> #<MatchData "nothing">As expected we get a match for nothing. One should note that anchors will not be reflected in match data, anchor is not a character, but a symbolic representation of position. So if you are expecting a match for nothing\z, forget it.
>> /nothing\z/.match "Everybody says Something is better than nothing\n"
=> nilLook at the example above, the \z matches a string without a line ending(\n) character. If you want to check for line endings, you must use capital Z like the example shown below:
>> /nothing\Z/.match "Everybody says Something is better than nothing\n"
=> #<MatchData "nothing">So it matches!
In the example below, we match all the stuff that’s in a string with \n as its ending.
>> /\A.+\Z/.match "Everybody says Something is better than nothing\n"
=> #<MatchData "Everybody says Something is better than nothing">25.9.2. Assertions
Lets say that you are searching for this man David Copperfield. You have a huge directory of names and you want to match his name. We can do those kind of matches using assertions [55]. So lets say you want to search something that comes before Copperfield, for that we use look ahead assertions. Take the example below
>> /\w+\s+(?=Copperfield)/.match "David Copperfield"
=> #<MatchData "David ">Look at the (?=Copperfield), that is its looking forward for something, this time its Copperfield. Want to become rich soon? Then search for (?=Goldfield) and want some good music, search for (?=Oldfield)[56].
Here is the thing, what ever you give between (?= and ) will be look forward and if there is something before it, it will get matched. So there is David before Copperfield, hence it was matched. Note that I had given \w+\s+ which means that I want to match a regexp of one or more letters, followed by one or more spaced that precedes before Copperfield. So here we have another example, that gives a positive match:
>> /\w+\s+(?=Copperfield)/.match "Joan Copperfield"
=> #<MatchData "Joan ">Lets say that we want to match all those names which does not end with Copperfield, we will use look ahead, negative assertion. For this we put Copperfield in between (?! and ), so in the following example it will return a negative match
>> /\w+\s+(?!Copperfield)/.match "Joan Copperfield"
=> nilBut in the next example it will return a positive match, because Joan is not before Copperfield
>> /\w+\s+(?!Copperfield)/.match "Joan Kansamy"
=> #<MatchData "Joan ">We have seen look forward assertion. Now lets look at look backward assertion. Lets say that we want to match last name of person who’s first name is David. Then we can look backwards from last name and see if its David. Checkout the code below
>> /(?<=David)\s+\w+/.match "Joan Kansamy"
=> nilSee the code above. We have put David between (?⇐ and ), so that’s how you specify look back assertion. The above code returns nil because we have no David in it.
>> /(?<=David)\s+\w+/.match "David Munsamy"
=> #<MatchData " Munsamy">The above example matches “ Munsamy”`[57] because we have David before the pattern `\s+\w+
Same way like we had negative look forward, why can’t we have it in look backwards? Just replace = with a ! and you will get a negative look backward assertion. So the example below will not match because you have David in front of Munsamy.
>> /(?<!David)\s+\w+/.match "David Munsamy"
=> nilNow take this example below, we will get a match because there is no David in front of the first \s+\w+, that is in the example below it is a space followed by “in”.
>> /(?<!David)\s+\w+/.match "All in all Munsamy"
=> #<MatchData " in">25.10. Ignoring Cases
Okay, let’s say what the difference between these emails mindaslab@protonmail.com and MINDASLAB@PROTONMAIL.COM, nothing, both address delivers mail to me, so if at all we are scanning a string for a particular email, we would like to ignore cases. So consider the example below
>> /abc/i.match "There is ABC in string"
=> #<MatchData "ABC">In the above example we have a regexp /abc/ but it matches ABC in the given string. If you have noticed, you may see that I have put an i after the regexp, that i stands for ignore case. Well see the example below, the i ruthlessly matches anything and does not care about cases.
>> /abc/i.match "There is AbC in string"
=> #<MatchData "AbC">25.11. Ignore Spaces
x just like i should be use at the rear of regexp. It ignores white spaces in regexp and matches the string. See example below:
>> /ab c/x.match "There is abc in string"
=> #<MatchData "abc">But this does not mean that it ignores white spaces in matched string, in the example below we have a regexp /ab c/ (ab space c) but it does not match ab c (ab space c) in the string! That could be surprising. Which means when x is appended, it means it removes all spaces from regexp.
>> /ab c/x.match "There is ab c in string"
=> nil25.12. Dynamic Regexp
We may need to create Regexp dynamically, say I want to create a search query from the user data I obtained. Take a look at the program below, type it in a text editor and run it:
# regexp_dynamic.rb
Friends = [
"Bharath - Looks like alien",
"Nithya - The MBA. Oh NOOOOOO",
"Tat - The eskimo from Antartica",
"Kannan - Eats lot of bondas",
"Karthik - Loves briyani"
]
print "Enter search term: "
term = gets.chop
regexp = Regexp.new term
searched_friends = Friends.collect{|f| f if f.match regexp}.compact
puts searched_friends.join "\n"Output
Enter search term: The Nithya - The MBA. Oh NOOOOOO Tat - The eskimo from Antartica
In the code we first declare an array called Friends ,that contains data about our friends as shown:
Friends = [
"Bharath - Looks like alien",
"Nithya - The MBA. Oh NOOOOOO",
"Tat - The eskimo from Antartica",
"Kannan - Eats lot of bondas",
"Karthik - Loves briyani"
]So let’s analyze the code. In the next two lines (shown below), I am getting search term and assigning it to a variable term:
print "Enter search term: "
term = gets.chopNext look at the following line carefully
regexp = Regexp.new termLook at the part Regexp.new term, here is where all miracle happens. Now open irb and type the following:
>> Regexp.new "something"
=> /something/So as you see when you give a string to Regexp.new it converts it to Regexp. You can do pretty advanced stuff as shown below:
>> r = Regexp.new "(\\d+)\\s+oranges"
=> /(\d+)\s+oranges/So in Regexp.new term , we are converting the term to regular expression. Now all we need to do is to use this regular expression and pick up the strings that match it in the following code searched_friends = Friends.collect{|f| f if f.match regexp}.compact
We print the array in the following code:
puts searched_friends.join "\n"Take a look at the simple calculator program I have written here https://raw.githubusercontent.com/mindaslab/ilrx/master/x/calculator.rb, it might be complex for newbies, so don’t worry if you can’t understand it.
26. Gems
Gem is a package management stuff for ruby. For example, you might want to do a stuff in ruby like say comparing two hashes, rather than writing a code by yourself you can search ruby gems repository located at http://rubygems.org
26.1. Searching a gem
So let’s compare two hashes. There is a gem called hash_compare for comparing hashes. Now, you can goto http://rubygems.org and search for “hash compare” without the double quotes of course

You will be getting a page as shown below, click on the hash compare link and you will be directed to this page https://rubygems.org/gems/hash_compare
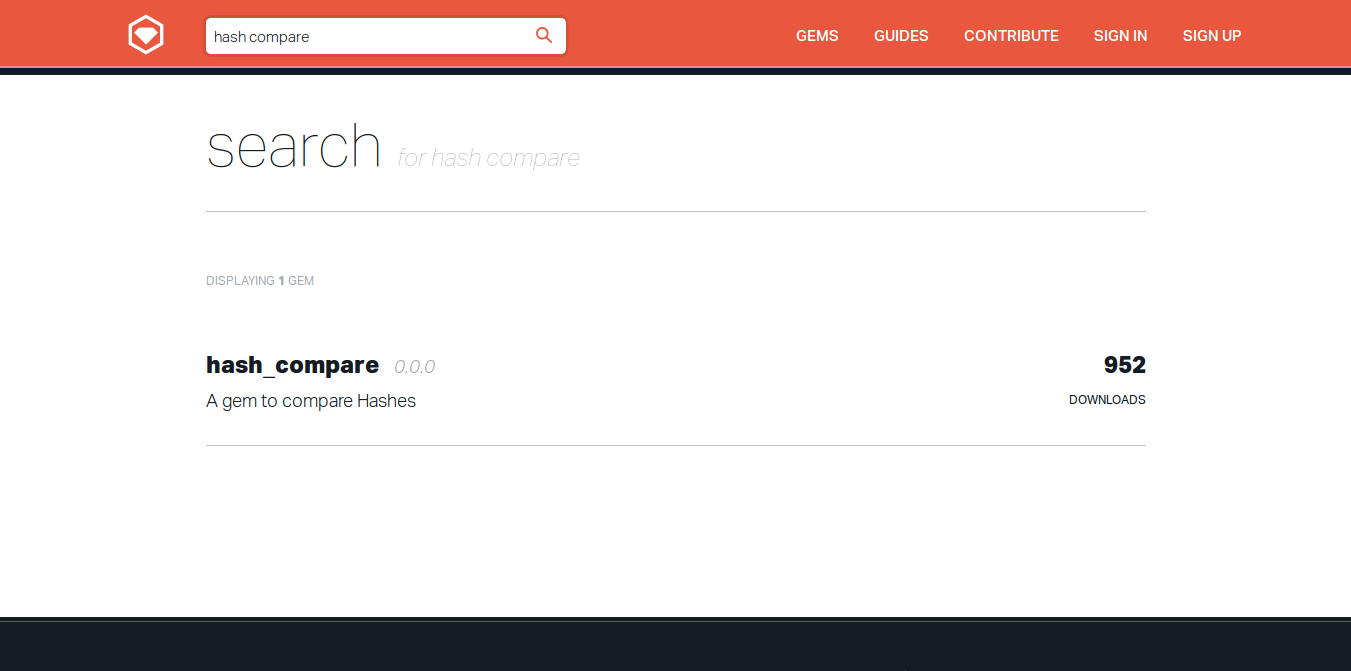
So that’s how you search for a gem. On the contrary, if you search for exact gem name hash_compare, http://rubygems.org has become smart now, and will take you straight to the gem page.
26.2. Installing gem
Now that you have found out the gem, how to install it? If you are in the gems page, https://rubygems.org/gems/hash_compare in this case you will get the instruction to install it on your computer. You can install hash_compare gem by typing the following
$ gem install hash_compare
This will spit out the following stuff indicating that it has installed
Fetching: hash_compare-0.0.0.gem (100%) Successfully installed hash_compare-0.0.0 1 gem installed Installing ri documentation for hash_compare-0.0.0... Installing RDoc documentation for hash_compare-0.0.0...
That is typing gem install gem_name in terminal should install most of the gems without trouble.
26.3. Viewing Documentation
So you have installed a gem successfully, now you must know how to use it, where else is a great place to learn about a piece of ruby code than its documentation. If you are not sure about rdoc or ruby documentation, read the chapter Rdoc. To see documentation for installed gem, you need to start a thing called gem server, which can be achieved by typing the following command in terminal
$ gem server Server started at http://0.0.0.0:8808
The above command will spit a output saying that the server has been started. To know about hash compare gem goto this address http://0.0.0.0:8808 in your browser and search for hash_compare, else if you need to have a shorter way click this link http://0.0.0.0:8808/#hash_compare , when you click on hash_compare you will be directed here http://0.0.0.0:8808/doc_root/hash_compare-0.0.0/rdoc/index.html, this is the documentation page for hash_compare gem.
There in that page, you will have sufficient (possibly) details about hash_compare gem.
26.4. Using gem
OK, to use the gem [58] we in our terminal log in into irb using the following command:
$ irb --simple-prompt
Next we will require hash compare command using the following command
>> require 'hash_compare'
=> trueAnd since the gem has been installed it says true. Now let’s build two hashes a and be as shown below
>> a = { a: 1, b: 2}
=> {:a=>1, :b=>2}
>> b = { a: 1, b: 3, c: 2}
=> {:a=>1, :b=>3, :c=>2}Now we add these to hash_compare object
>> h = HashCompare.new a, bAnd find what’s newly added using the newly_added function as shown below
>> h.newly_added
=> {:c=>2}Well, that’s it. You have learned how to use a gem.
26.5. The Gemfile
You must have heard of Ruby gems, you will be creating it and publishing it on http://rubygems.org soon. Now let’s see what’s the use of Gemfile.
Checkout these files:
The first one is called requester.rb
# requester.rb
require 'rubygems'
require 'bundler/setup'
Bundler.require(:default)
resource = RestClient::Resource.new 'http://nothing.com'
p resource.getThe second one is the Gemfile which has the following content
source 'https://rubygems.org'
gem 'rest-client'Put both in the same folder. If you look at requester.rb, it sends a request to http://nothing.com using the following lines resource = RestClient::Resource.new 'http://nothing.com'
p resource.getAnd prints it. For this to take place we need to install a gem called rest-client using the command
$ gem install rest-clientand we need to require it requester.rb using the following line
require 'rest-client'In other words the code must look as shown
require 'rest-client'
resource = RestClient::Resource.new 'http://nothing.com'
p resource.getSo why we have these three lines
require 'rubygems'
require 'bundler/setup'
Bundler.require(:default)Instead of one? Well let me explain. First this one is a simple project, which requires just one gem, in reality we might need tens of them in real life project. Before running the project if we do not have those gems in our system we need to manually check if each and every gem exists and install it. This might be simple for few gems, but the truth is if we have lots of gems we are going to hate it.
Welcome to the Ruby way, here is where the Gemfile comes as saviour. Let’s analyze it. Open up the Gemfile, the first line is
source 'https://rubygems.org'This tells the bundler (the thing that fetches and install gems) from where the gems must be fetched. Almost all ruby gems end up in http://rubygems.org. there are some bad guys however who like to have proprietary code and don’t release it to public. Those suckers keep it for themselves, for them, it will be something different.
Next we just list the gems needed in this format gem "<gem-name>" one by one. In this case we just have only one gem, and so we list it as:
gem 'rest-client'Next in the ruby program that needs those gems we put this piece of code at the top
require 'rubygems'
require 'bundler/setup'
Bundler.require(:default)I do not know what it does exactly, but this loads all gems specified in the Gemfile and thus making available readily all gems we need to run the program. Possibly if I learn more in the future I will update this section or most possibly not. All you have to do to fetch and install all the gems into the system is type this in the terminal :
$ bundle install
or in short
$ bundle
That’s it. All the gems in its latest version will get installed in your system and will be available for the program that needs it [59]. Enjoy life!
26.5.1. Gemfile.lock
If you look at your Gemfile, all you have given is gem 'rest-client', but take a look at Gemfile.lock shown below. It contains a lot of stuff. What is this Gemfile.lock.
Well, its simple rest-client is not a stand alone Ruby package aka gem, it depends upon other gems. Gemfile.lock catalogs all the gems that were installed when we gave the bundle command. Let’s analyze the Gemfile.lock that’s shown below
1
2
3
4
5
6
7
8
9
10
11
12
13
14
15
16
17
18
19
20
21
22
23
24
25
26
27
GEM
remote: https://rubygems.org/
specs:
domain_name (0.5.20180417)
unf (>= 0.0.5, < 1.0.0)
http-cookie (1.0.3)
domain_name (~> 0.5)
mime-types (3.2.2)
mime-types-data (~> 3.2015)
mime-types-data (3.2018.0812)
netrc (0.11.0)
rest-client (2.0.2)
http-cookie (>= 1.0.2, < 2.0)
mime-types (>= 1.16, < 4.0)
netrc (~> 0.8)
unf (0.1.4)
unf_ext
unf_ext (0.0.7.5)
PLATFORMS
ruby
DEPENDENCIES
rest-client
BUNDLED WITH
1.16.2
So it starts with the keyword GEM, under which all the installed gems are listed. Check out line 2, it says remote: https://rubygems.org/, if you remember in the Gemfile you would have given source 'https://rubygems.org', this is been recorded as remote repository in the lock file.
Checkout these lines (20 & 21)
PLATFORMS ruby
Here the platform is defined. What this book focuses upon is YARV [60], its the default ruby interpreter, but it’s not the only one. There are other interpreters like JRuby that runs of Java. This information is logged under this PLATFORM.
The bundler’s version is recorded too in these lines (26 & 27)
BUNDLED WITH 1.16.2
You may check your bundler’s version by typing the following commands in the terminal
$ bundle -v Bundler version 1.16.2
Lets comeback to the GEM section. In the Gemfile we just needed rest-client and that’s it. In the lock file on line 12 we see rest-client (2.0.2), that is rest client of version 2.0.2 was installed, but in the following lines we see this too
rest-client (2.0.2) http-cookie (>= 1.0.2, < 2.0) mime-types (>= 1.16, < 4.0) netrc (~> 0.8)
Which means that rest-client depends on other gems namely http-cookie, mime-types and netrc. Lets take http-cookie (>= 1.0.2, < 2.0), this means that rest-client of version 2.0.2 depends on http-cookie whose version must be greater than or equal to 1.0.2 and less than 2.0. If you are wondering how gems are versioned and possibly want to version your software right, you may check out Semantic Versioning here https://semver.org/.
Now let’s see about http-cookie, look at lines 6 and 7, you see this
http-cookie (1.0.3) domain_name (~> 0.5)
Its means that http-cookie of version 1.0.3 has been installed and it depends on domain_name gem that’s equal to 0.5 or greater. If you are confused about >, >=, ~>, this is what they mean
-
= Equal To "=1.0"
-
!= Not Equal To "!=1.0"
-
> Greater Than ">1.0"
-
< Less Than "<1.0"
-
>= Greater Than or Equal To ">=1.0"
-
⇐ Less Than or Equal To "⇐1.0"
-
~> Pessimistically Greater Than or Equal To "~>1.0"
So next you can trace what domain_name (~> 0.5) depends on and so on. The lock file builds a dependency tree and records the exact versions of gems that had been installed so that even if the software is bundled few years from now, it can install exact versions of gems from the lock file, thus guaranteeing it that it would work.
26.6. Creating a gem
Let’s see how to create a very simple Gem. Let’s create a Gem named hello_gem that just wishes Hello and welcome to the wonderful world of Ruby Gems. and does nothing more.
If you have downloaded this book, in folder named code/making_gem, you will see a folder named hello_gem. It has the following folder structure.
hello_gem/
hello_gem.gemspec
lib/
hello_gem.rb
To practice, launch your terminal and navigate to the directory hello+gem/.If you look at the file lib/hello_gem.rb, it has the following code
puts "Hello and welcome to the wonderful world of Ruby Gems."If you look at the code, it just contains a line a that prints out Hello and welcome to the wonderful world of Ruby Gems., that’s it. Now let’s come to the file that makes this program a gem. Look into the file hello_gem.gemspec
Gem::Specification.new do |s|
s.name = 'hello_gem'
s.homepage = "https://i-love-ruby.gitlab.io"
s.version = '0.0.0'
s.date = '2018-12-02'
s.summary = "A gem that wishes you hello"
s.description = "A gem that wishes you hello. Written for I Love Ruby book."
s.authors = ["Karthikeyan A K"]
s.email = 'mindaslab@protonmail.com'
s.files = ["lib/hello_gem.rb"]
endNow let’s examine it. In it, we have described about the gem in ruby way. Some of the things we have defined are its name given by s.name; it’s homepage i.e. mostly the place where its source code could be found or where the help and usage of this gem could be found, it’s given by s.homepage; the version number of the gem given by s.version; the date of release for this version given by s.date; a brief summary of the gem given by s.summary; you can give a long description using s.description ; the names of authors can be given as a array as shown s.authors = ["Karthikeyan A K"]; email address for communication about the gem, given by s.email; and most important, all the program files this gem needs to run is given as a array like this s.files = ["lib/hello_gem.rb"]. In our case over here, we just need one file and its in lib directory.
We give s.attrribute_name because we have created a gem specification object using Gem::Specification.new and we have captured it in variable s as shown
Gem::Specification.new do |s|
# the specs goes here
endNow all we need to do is to build the gemspec file to get our gem which we do it using the following command
$ gem build hello_gem.gemspec
You may see some warning messages as shown below, just ignore them, they are not so serious.
WARNING: licenses is empty, but is recommended. Use a license identifier from http://spdx.org/licenses or 'Nonstandard' for a nonstandard license. WARNING: See http://guides.rubygems.org/specification-reference/ for help Successfully built RubyGem Name: hello_gem Version: 0.0.0 File: hello_gem-0.0.0.gem
If you notice, in the same folder you will see a file named hello_gem-0.0.0.gem, the hello_gem part of the file name comes from s.name specified in the Gemfile, and the 0.0.0 comes from s.version specified in the Gemfile.
Now let’s install gem using the command below
$ gem install hello_gem-0.0.0.gem
When installing you will get the output shown below
Successfully installed hello_gem-0.0.0 Parsing documentation for hello_gem-0.0.0 Installing ri documentation for hello_gem-0.0.0 Done installing documentation for hello_gem after 0 seconds 1 gem installed
Let’s launch irb to test the gem
$ irb --simple-prompt
Now in irb let’s require the gem as shown below
>> require "hello_gem" Hello and welcome to the wonderful world of Ruby Gems. => true
Now you can see a output Hello and welcome to the wonderful world of Ruby Gems. Congratulations, we have built our own gem. We can now distribute it to the entire world.
26.7. Publishing your gem
So we have created our gem. Now lets see how to publish one. As a first step you must goto https://rubygems.org/sign_up and create an account. Remember your user name and password. To make your gem unique lets name the gem <user name>_hello. My username is mindaslab, and hence my gem name is mindaslab_hello.
This gem is very similar to the previous hello_gem gem. It has the following folder structure. Naviate to mindaslab_hello/ folder
mindaslab_hello/
mindaslab_hello.gemspec
lib/
mindaslab_hello.rb
You may like to go through mindaslab_hello.gemspec and mindaslab_hello.rb. Its better you modify the gemspec file so that your name and email appears rather than mine.
Now to build the gem type in the following command
$ gem build mindaslab_hello.gemspec
You should be seeing a file named mindaslab_hello-0.0.0.gem generated in the same folder. The build command will throw an output shown below in the terminal.
WARNING: licenses is empty, but is recommended. Use a license identifier from http://spdx.org/licenses or 'Nonstandard' for a nonstandard license. WARNING: no homepage specified WARNING: See http://guides.rubygems.org/specification-reference/ for help Successfully built RubyGem Name: mindaslab_hello Version: 0.0.0 File: mindaslab_hello-0.0.0.gem
Now let’s push the gem to ruby gems website. All you need to do is give the command gem push <generated gem name> in the terminal as shown.
$ gem push mindaslab_hello-0.0.0.gem
You will be prompted for Rubygems username and password, provide them, and you will be seeing a output as shown below.
Pushing gem to https://rubygems.org... Successfully registered gem: mindaslab_hello (0.0.0)
You can go to https://rubygems.org and type in your gem name to search

You will be taken to your gem page as shown

Now since the gem is globally available on the internet, you can install your gem with gem install <gemfile name> as shown below
$ gem install mindaslab_hello
It should throw output something as shown below
Successfully installed mindaslab_hello-0.0.0 Parsing documentation for mindaslab_hello-0.0.0 Installing ri documentation for mindaslab_hello-0.0.0 Done installing documentation for mindaslab_hello after 0 seconds 1 gem installed
To test your gem launch your irb.
$ irb --simple-prompt
Then require your gem
>> require "mindaslab_hello"
If you see an output as shown below, drop me an email :) We did it. Hi five!!
Hello from Karthikeyan A K. I am from Chennai, India. => true >>
26.8. More complex gems
In reality, you will be needing more than 1 ruby file to package in your gem. One way to package is to list all the files in gemspec file, or is there a better way? To find out lets write a gem called shapes.
We will be writing three classes named Circle, Rectangle, Square in files called circle.rb, rectangle.rb and square.rb, these files we put it in a folder called models/ and require them in a file called shapes.rb, you can see the folder structure as shown below.
shapes/
shapes.gemspec
lib/
shapes.rb
models/
circle.rb
rectangle.rb
square.rb
Now all ruby files in the lib/ folder and the files in lib/models/ folder must be included in the gemspec file. Look at the gemspec file below
Gem::Specification.new do |s|
s.name = 'shapes'
s.version = '0.0.0'
s.date = '2018-12-02'
s.summary = "A gem to calculate area and perimeter of shapes."
s.authors = ["Karthikeyan A K"]
s.email = 'mindaslab@protonmail.com'
s.files = Dir["*/*.rb", "*/*/*.rb"]
endLook at the line s.files = Dir["/.rb", "//*.rb"], here we do not write very verbose list of files. Instead we use a the `Dir`[61] library in Ruby to do the task.
To see how the Dir works, launch your irb in your shapes/ directory and type the following
>> Dir["*/*.rb", "*/*/*.rb"]
You would see that it neatly gives out the list of ruby files in primary and secondary sub folders.
=> ["lib/shapes.rb", "lib/models/square.rb", "lib/models/rectangle.rb", "lib/models/circle.rb"]
Thus we can use such tricks to include a lot of files in our gem. Let’s now build our gemspec file using the following command
$ gem build shapes.gemspec
As shown below we get a good build
WARNING: licenses is empty, but is recommended. Use a license identifier from http://spdx.org/licenses or 'Nonstandard' for a nonstandard license. WARNING: no homepage specified WARNING: See http://guides.rubygems.org/specification-reference/ for help Successfully built RubyGem Name: shapes Version: 0.0.0 File: shapes-0.0.0.gem
Let’s install our gemfile ash shown below
$ gem install shapes-0.0.0.gem
As you see it get successfully installed
Successfully installed shapes-0.0.0 Parsing documentation for shapes-0.0.0 Installing ri documentation for shapes-0.0.0 Done installing documentation for shapes after 0 seconds 1 gem installed
Let’s test out gem by writing a program called testing_shapes.rb as shown below
require "shapes"
square = Square.new
square.side = 7
puts "Area of square = #{square.area}"
circle = Circle.new
circle.radius = 7
puts "Area of circle = #{circle.area}"Now let’s run it
$ ruby testing_shapes.rb
We get output as shown below.
Area of square = 49 Area of circle = 153.93804002589985
So we have seen how to build a bit more complex gem with more files in it.
26.9. Uninstalling a Gem
Finally to uninstall a gem just type gem uninstall <gemname>, so by typing
$ gem uninstall shapes
You will get a output as shown
Successfully uninstalled shapes-0.0.0
Which indicates the gem has been uninstalled successfully.
27. Meta Programming
Meta Programming is an art of making programs write programs. That is in run time a program can modify itself depending on the situation. Lets see about it in this chapter.
27.1. Send
Ruby has got a powerful method called send. That is if an object p has got a method name, in ruby we can call it using p.name or there is another way to call it too. We call it using p.send(:name) or p.send("name"). Well what’s the use of that? The use is this, you can determine what function to call from the user input or some other input you receive.
Let’s see a basic example. Type the program send.rb below into a text editor and run it.
class Person
attr_accessor :name
def speak
"Hello I am #{@name}"
end
end
p = Person.new
p.name = "Karthik"
puts p.send(:speak)Output
Hello I am Karthik
Well, as you see in the part of the code highlighted p.send(:speak), we are calling the speak function of instance p of class Person using the send method. That’s it for now about send. Get excited!!! Tweet that you are learning Metaprogramming and start bragging to your colleagues.
Well, hope you have bragged enough. Now lets look at a bit more practical example for this send function. Type in the example send_1.rb and execute it
# send_1.rb
class Student
attr_accessor :name, :math, :science, :other
end
s = Student.new
s.name = "Zigor"
s.math = 100
s.science = 100
s.other = 0
print "Enter the subject who's mark you want to know: "
subject = gets.chop
puts "The mark in #{subject} is #{s.send(subject)}"Output
Enter the subject who's mark you want to know: math The mark in math is 100
So in the program, we have a class called Student and we create a student whose marks in math, science and other subjects are 100, 100 and zero. We ask the user to enter the subject whose mark needs to be known and get it into a variable named subject in these following statements:
print "Enter the subject who's mark you want to know: "
subject = gets.chopnow see this line:
puts "The mark in #{subject} is #{s.send(subject)}"Just notice the part s.send(subject), we over here instead of using case or other if or conditions to check what the subject is and then call the suitable method according, we simply pass the user input to s.send and it calls the appropriate method and returns the value.
Don’t you see a magic here?
27.2. Method Missing
Let’s say that you have a class that has only certain methods, and if the programmer calls some other crazy method, and you want to capture it and see if it can still be served, you can use the method_missing method to capture the method and other stuff.
Let’s see a program about method missing. Type in the program method_missing.rb in your text editor and execute it
# method_missing.rb
class Something
def method_missing method, *args, &block
puts "You called: #{method}"
p args
block.call 7
end
end
s = Something.new
s.call_method "boo", 5 do |x|
x.times{ puts "in block" }
endOutput
You called: call_method ["boo", 5] in block in block in block in block in block in block in block
Let’s see how this program works, in the line s = Something.new we create a new instance variable s of Something class. Then in the next line we do this s.call_method "boo", 5, in this line we call a method called call_method on s, if you look at class Something, you will notice that there is no method or function called call_method, in it, but the program does not throw out error, or exception or whatever.
Well, what happened? If you notice Something class, you would have seen a method named method_missing, it has been implemented as shown
def method_missing method, *args, &block
puts "You called: #{method}"
p args
block.call 7
endThis method takes in three arguments, in our code we have named these arguments as method, *args and &block. The method takes in the method name which is the name of the method being called on object s, the *args takes attributes that are passed to the method, in our case it’s the call_method and attributes passed are “boo” and 5. The &block takes in any block that is being passed. If you see, we call call_method on s below:
s.call_method "boo", 5 do |x|
x.times{ puts "in block" }
endWe are passing a block to the call_method function which is enclosed by do and end. Inside the block we take a variable x and do some operation with it. This entire block is captured by &block.
Finally, we are printing the arguments passed using the statement p args (note that we are not using *args here) and we are calling the block with block.call 7 (note that we use block and not &block here) in the method_missing definition. The value 7 gets passed to variable x in the block.
Now let’s see how method missing could be used. Let say that we have a class called Person which has two attributes named name and age, see the code below and execute it:
# method_missing_in_action.rb
class Person
attr_accessor :name, :age
def initialize name, age
@name, @age = name, age
end
def method_missing method_name
method_name.to_s.match(/get_(\w+)/)
eval("self.#{$1}")
end
end
person = Person.new "Zigor", "67893"
puts "#{person.get_name} is #{person.get_age} years old"Output
Zigor is 67893 years old
In the code above see the highlighted line puts "#{person.get_name} is #{person.get_age} years old" we call the attributes not like person.name and person.age, instead we use person.get_name and person.get_age. Now there are no get_name and get_age methods in Person class, instead the code ends up here
def method_missing method_name
method_name.to_s.match(/get_(\w+)/)
eval("self.#{$1}")
endIn the method missing method. Look at the code, in this line method_name.to_s.match(/get_(\w+)/) we extract any method that is prepend with get_, then we call the extracted term in this statement eval("self.#{$1}"). If you can’t understand these things, probably you must read Regular Expressions chapter.
Now how to make it useful practically, for example you can have a get_db_<method name> where you can get values from a database, or say store_db_<method name>(values….), where you can capture it and store in the database.
27.3. Define Method
This section we are going to see how to define methods inside a class. Type the program below and execute it
# define_method.rb
class Square
define_method :area do |side|
side * side
end
end
s = Square.new
puts s.area 5Output
25
Okay, so you got 25 as the output. If you notice the program define_method.rb you would have noticed that in the lines above we are defining method named area using this awkward looking statements as shown below
define_method :area do |side|
side * side
endYou may think why not we do it like this:
def area side
side * side
endWell, ya, but let’s take a situation where we can dynamically define method.
# define_method_dynamic.rb
Book_hash = {author: "Zigor", title: "I Love Ruby", page: 95}
class Book
Book_hash.each do |key, value|
define_method key do
value
end
end
end
b = Book.new
puts "#{b.author} has written a book named #{b.title}"Output
Zigor has written a book named I Love Ruby
So in the above program we have two highlighted parts the first one is Book_hash = {author: "Zigor", title: "I Love Ruby", page: 95}, over here it’s a constant assigned to a hash value. In real world it could be a variable loading some hash dynamically from a file. And inside the class book you see these lines:
Book_hash.each do |key, value|
define_method key do
value
end
endWhere we take in each hash value, and we define a method using its key and the method returns the value. So when we say b = Book.new, we now have already functions named author, title and page which returns “Zigor”, “I Love Ruby” and 95 respectively.
For this statement, the puts "#{b.author} has written a book named #{b.title}", explains it.
27.4. Class Eval
Let’s say that you have an instance object, you want to add something to its class, you can use a method called class_eval, let’s see with an example. Type the program below in a text editor and execute it.
# class_eval.rb
class Animal
end
dog = Animal.new
dog.class.class_eval do
def say_something
"I am a dog"
end
end
pig = Animal.new
puts pig.say_somethingOutput
I am a dog
Look at the code shown below. So you have the variable dog which is instance of Animal. Let’s say all of a sudden in the program we decided to add a method called say_something to class of dog i.e. to Animal, all we need to do is to write that method inside class_eval block as shown highlighted below:
dog.class.class_eval do
def say_something
"I am a dog"
end
endIn the above program we get class of dog using dog.class, and to it we call class_eval, which is followed by do end block inside which we define the code to be appended to class of the dog. Inside it we define the method say_something.
Now let’s say we have another variable named pig that’s instance of Animal and we call pig.say_something it responds too! So we have modified the class Animal.
27.5. Instance Eval
In class_eval we saw that we can add methods to a class that can be accessed by its instance. instance_eval is kind of opposite. No we won’t be removing methods 😀, but this adds class methods to the calling class. Let’s see an example:
# instance_eval.rb
class Square
end
Square.instance_eval do
def who_am_i
puts "I am Square class"
end
end
Square.who_am_iOutput
I am Square class
In the above example, look at the following piece of code:
Square.instance_eval do
def who_am_i
puts "I am Square class"
end
endAll we need to do is to call instance_eval on a class and inside a block we need to write the code that will become class method. We have defined a function who_am_i, its quiet equal like typing this
class Square
def self.who_am_i
puts "I am Square class"
end
endAnd when we call Square.who_am_i, the method faithfully responds.
28. Benchmark
Benchmark is a measure. You measure how long it takes for your code to run. So, why that’s important? As you become more serious coder, you are finishing a piece of work won’t matter much. What matters is how well you write the code and how the code performs in real time environments. You must know to write code that runs fast. To check if one snippet of your code is faster than other you can use benchmark.
Take the example below, type it and run it
# benchmark.rb
require 'benchmark'
Benchmark.bm do|b|
b.report("+= ") do
a = ""
1_000_000.times { a += "." }
end
b.report("<< ") do
a = ""
1_000_000.times { a << "." }
end
endOutput
user system total real += 55.030000 7.320000 62.350000 ( 62.303848) << 0.160000 0.000000 0.160000 ( 0.168452)
So let me walk through the code, take the line require 'benchmark', the benchmark library is included as part of Ruby standard distribution, so you can require this code without much fuss in your file.
Now lets look at this block
Benchmark.bm do|b|
………….
endWhat does it do? First we call function called bm in Benchmark class and pass a block between do and end. Now let’s see what’s in that block
Benchmark.bm do|b|
b.report("+= ") do
a = ""
1_000_000.times { a += "." }
end
b.report("<< ") do
a = ""
1_000_000.times { a << "." }
end
endSee the code above. We are preparing a report with b.report("+= "), to the report function we can pass any string that will be printed in the output. If you look at the output’s second line its += 55.030000 7.320000 62.350000 ( 62.303848), the += is printed because “+=” was passed to b.report().
The b.report()` opens a block of code to which you can pass anything that needs to be bench-marked. Here we pass a snippet of code shown below
b.report("+= ") do
a = ""
1_000_000.times { a += "." }
endSo we are assigning an empty string to a, and we are adding something to it a million times using += operator. And we get this
user system total real += 55.030000 7.320000 62.350000 ( 62.303848)
as output shows it takes total of 62.35 seconds, which is quiet huge. Now let’s take a look at the second block
b.report("<< ") do
a = ""
1_000_000.times { a << "." }
endHere we do the same stuff as the first, but we use << operator rather than +=, this generates the following output as highlighted below:
user system total real
+= 55.030000 7.320000 62.350000 ( 62.303848)
<< 0.160000 0.000000 0.160000 ( 0.168452)So, it takes only 0.1685 seconds to do it with <<, so << is far better than += when it comes to string concatenation.
Now lets see some other stuff. You all know that computer has memory. When a program runs, it needs to remember things and it uses up some memory, occasionally when the available memory becomes less, the Ruby interpreter will clean up memory. This is called Garbage Collection [62]. Its just like your city or municipality collecting garbage so that the city running is normal. Now think what will happen if the garbage is not collected, and you encounter garbage that flows onto your streets, the entire city falters, things get really slow. Similarly, if a program had run sufficiently long enough it’s better to collect garbage, otherwise the new code that’s been run might be slow and if you are bench-marking it, it might show a wrong result.
Now type the program below in text editor and run it.
# benchmark_2.rb
require 'benchmark'
puts "Testing without cleaning up"
Benchmark.bm do|b|
b.report("+=") do
a = ""
100_000.times { a += "." }
end
b.report("<<") do
a = ""
1_000_000.times { a << "." }
end
end
GC.start
puts
puts "Testing with cleaning up"
Benchmark.bmbm do|b|
b.report("+=") do
a = ""
100_000.times { a += "." }
end
b.report("<<") do
a = ""
100_000.times { a << "." }
end
endOutput
Testing without cleaning up
user system total real
+= 0.550000 0.220000 0.770000 ( 0.773730)
<< 0.150000 0.010000 0.160000 ( 0.159381)
Testing with cleaning up
Rehearsal --------------------------------------
+= 0.520000 0.180000 0.700000 ( 0.687914)
<< 0.010000 0.010000 0.020000 ( 0.018958)
----------------------------- total: 0.720000sec
user system total real
+= 0.530000 0.120000 0.650000 ( 0.650013)
<< 0.010000 0.000000 0.010000 ( 0.015668)
If you see the first benchmarks, which are produced by this code
puts "Testing without cleaning up"
Benchmark.bm do|b|
b.report("+=") do
a = ""
100_000.times { a += "." }
end
b.report("<<") do
a = ""
1_000_000.times { a << "." }
end
endIn this we use Benchmark.bm and run it as usual, it generates the following output:
Testing without cleaning up
user system total real
+= 0.550000 0.220000 0.770000 ( 0.773730)
<< 0.150000 0.010000 0.160000 ( 0.159381)
The benchmark totals 0.77 and 0.16 seconds respectively. After this block we have these lines
GC.start
putsIn these lines, we are collecting the garbage or freeing up the memory that this program had used. Now we run another benchmark which is defined by this code block
puts "Testing with cleaning up"
Benchmark.bmbm do|b|
b.report("+=") do
a = ""
100_000.times { a += "." }
end
b.report("<<") do
a = ""
100_000.times { a << "." }
end
endSo what does the Benchmark.bmbm do? Till this time we were using Benchmark.bm! Well in the above code we have two benchmarks being run. The bmbm makes sure that after the first benchmark is done, there is a garbage collection and freeing up of memory so that the next stuff runs in garbage collected environment so that it has better accurate result. Here is the output generated by second this code
Testing with cleaning up Rehearsal -------------------------------------- += 0.520000 0.180000 0.700000 ( 0.687914) << 0.010000 0.010000 0.020000 ( 0.018958) ----------------------------- total: 0.720000sec
If you can compare the outputs of 100_000.times { a << "." } without GC and with GC its 0.16 seconds, 0.02 seconds respectively. Now I think you would appreciate the need of garbage collection, be it in a city or in programming.
29. Test Driven Development
Imagine you are in circus, a beautiful girl is performing in trapeze, she misses the grip and falls down, would you expect a safety net to be there and catch her? You must be insane for you to say no. Similarly, let’s say that you are developing a software, you make a blunder that would cost a lot to people using it, wouldn’t it be a good thing to have checks and balances so that the blunder is known even before the software is shipped?
Welcome to Test Driven Development. In this methodology we write tests firsts, and then we write just enough code to satisfy the test. By following this methodology, I am able to code with supreme confidence, and am able to change the code and make it better (aka refactoring) knowing that there is a safety net to catch me in case I have done something wrong.
Let’s take an imaginary scenario. You are tasked with coding a chatbot, the initial requirements as shown
-
There must be a chatbot
-
One must be able to set its age and name
-
Its greeting must say "Hello I am <name> and my age is <age>. Nice to meet you!"
Usually the requirements won’t be as precise as the one shown above, but as a programmer, one should be able to think it out. Now we rather than writing code to solve the task, we start to write a test file, let’s name it as test_chat_bot.rb and put the requirements in it as shown below:
# test_chat_bot.rb
# There must be a chat bot
# One must be able to set its age
# One must be able to set its name
# Its greeting must say "Hello I am <name> and my age is <age>.
# Nice to meet you!"Now the requirements are put as words in our program, we need to translate it into Ruby. Almost all programming languages have a test framework built into them, Ruby too has one and it’s called Minitest [63]. We will be using it here. To include Minitest we add the line shown highlighted below
# test_chat_bot.rb
require "minitest/autorun"
# There must be a chat bot
# One must be able to set its age
# One must be able to set its name
# Its greeting must say "Hello I am <name> and my age is <age>.
# Nice to meet you!"Now we have included Minitest, let’s now write a test class as shown below
# test_chat_bot.rb
require "minitest/autorun"
class TestChatBot < Minitest::Test
# There must be a chat bot
# One must be able to set its age
# One must be able to set its name
# Its greeting must say "Hello I am <name> and my age is <age>.
# Nice to meet you!"
endHaving done what’s shown above, let’s now code for the first test case, take a look at the code below
class TestChatBot < Minitest::Test
# There must be a chat bot
def test_there_must_be_a_chat_bot
assert_kind_of ChatBot, ChatBot.new
end
# One must be able to set its age
# One must be able to set its name
# Its greeting must say "Hello I am <name> and my age is <age>.
# Nice to meet you!"
endThere is a lot going on in the above code, first we have written a test function by writing
def test_there_must_be_a_chat_bot
endNote how this function starts with a test_, this is essential for it to be identified as a test. Next we must test something in this function. We can use the instance of an ChatBot class only if the ChatBot class exists, so we try creating a new ChatBot instance and check if its class is ChatBot, in the following piece of highlighted code
def test_there_must_be_a_chat_bot
assert_kind_of ChatBot, ChatBot.new
endLook at this thing assert_kind_of, if you are wondering what these are let me explain. These are called assertions. You can see what assertions are there here http://ruby-doc.org/stdlib-2.0.0/libdoc/minitest/rdoc/MiniTest/Assertions.html#method-i-assert_respond_to.
Assertions are functions that verify whether something expected is happening, if that happens, it means that test has passed, else it has failed.
Now lets run the test file test_chat_bot.rb
$ ruby test_chat_bot.rb
Run options: --seed 53866
# Running:
E
Finished in 0.000875s, 1142.2906 runs/s, 0.0000 assertions/s.
1) Error:
TestChatBot#test_there_must_be_a_chat_bot:
NameError: uninitialized constant TestChatBot::ChatBot
test_chat_bot.rb:9:in `test_there_must_be_a_chat_bot'
1 runs, 0 assertions, 0 failures, 1 errors, 0 skips
So we get the above output that says that no constant called ChatBot exists. Very well, we haven’t defined what ChatBot is, and so we will define it. In the test_chatbot.rb, we add the line require_relative "chat_bot.rb" as shown below
# test_chat_bot.rb
require "minitest/autorun"
require_relative "chat_bot.rb"
class TestChatBot < Minitest::Test
# There must be a chat bot
def test_there_must_be_a_chat_bot
assert_kind_of ChatBot, ChatBot.new
end
# One must be able to set its age
# One must be able to set its name
# Its greeting must say "Hello I am <name> and my age is <age>.
# Nice to meet you!"
endAnd we create a new file called chat_bot.rb with the following content
# chat_bot.rb
class ChatBot
endNow let’s run the test.
$ ruby test_chat_bot.rb Run options: --seed 19585 # Running: . Finished in 0.000720s, 1388.5244 runs/s, 1388.5244 assertions/s. 1 runs, 1 assertions, 0 failures, 0 errors, 0 skips
What have we done? We had a requirement, we wrote test that covered the requirement, we ran the test, it failed, to pass it we wrote just enough code to make it pass. Now imagine a scenario, you are in a project with 10 developers, one of them accidentally makes a mistake that will rename this ChatBot class, and your tests would catch it. In short if you write enough tests, you can make bugs popping up found early. It does not guarantee bug free code, but makes bugs popping up a lot more difficult. These tests will also make you confident to refactor code. Say you make a change, there is no need to fear that your change might cause an havoc, just run the tests once, and you will get a report of what fails and passes.
Let’s write another test, one should be able to give chat bot an age. So let’s write a test where we can set its age and read it back. Look at the code in function test_one_must_be_able_to_set_its_age below
# test_chat_bot.rb
require "minitest/autorun"
require_relative "chat_bot.rb"
class TestChatBot < Minitest::Test
# There must be a chat bot
def test_there_must_be_a_chat_bot
assert_kind_of ChatBot, ChatBot.new
end
# One must be able to set its age
def test_one_must_be_able_to_set_its_age
age = 21
chat_bot = ChatBot.new
chat_bot.age = age
assert_equal age, chat_bot.age
end
# One must be able to set its name
# Its greeting must say "Hello I am <name> and my age is <age>.
# Nice to meet you!"
endLook at the code above, look at this line assert_equal age, chat_bot.age, here we assert whether the chat_bot returns the set age.
$ ruby test_chat_bot.rb
Run options: --seed 59168
# Running:
.E
Finished in 0.000855s, 2338.4784 runs/s, 1169.2392 assertions/s.
1) Error:
TestChatBot#test_one_must_be_able_to_set_its_age:
NoMethodError: undefined method `age=' for #<ChatBot:0x0000558b89da5380>
test_chat_bot.rb:16:in `test_one_must_be_able_to_set_its_age'
2 runs, 1 assertions, 0 failures, 1 errors, 0 skips
If you see above test result, it says no method error, and says the function age= is missing, so lets fix it
# chat_bot.rb
class ChatBot
attr_accessor :age
endSo we add above attr_accessor :age line, and now run the test, and it passes as shown below:
$ ruby test_chat_bot.rb Run options: --seed 42767 # Running: .. Finished in 0.000774s, 2583.4820 runs/s, 2583.4820 assertions/s. 2 runs, 2 assertions, 0 failures, 0 errors, 0 skips
Let’s now do the same for name too, I won’t explain it as it’s the same for age, and I have skipped its explanation in this book. Let me talk about the final test. It must greet someone. For that we write a test as shown in function test_greeting_message below:
# test_chat_bot.rb
require "minitest/autorun"
require_relative "chat_bot.rb"
class TestChatBot < Minitest::Test
# There must be a chat bot
def test_there_must_be_a_chat_bot
assert_kind_of ChatBot, ChatBot.new
end
# One must be able to set its age
def test_one_must_be_able_to_set_its_age
age = 21
chat_bot = ChatBot.new
chat_bot.age = age
assert_equal age, chat_bot.age
end
# One must be able to set its name
def test_one_must_be_able_to_set_its_name
name = "Zigor"
chat_bot = ChatBot.new
chat_bot.name = name
assert_equal name, chat_bot.name
end
# Its greeting must say "Hello I am <name> and my age is <age>.
# Nice to meet you!"
def test_greeting_message
name = "Zigor"
age = 21
expected_message = "Hello I am #{name} and my age is #{age}. Nice to meet you!"
chat_bot = ChatBot.new
chat_bot.name = name
chat_bot.age = age
assert_equal expected_message, chat_bot.greeting_message
end
endNow we run it as you see it naturally fails as shown
$ ruby test_chat_bot.rb
Run options: --seed 8752
# Running:
.E..
Finished in 0.001075s, 3720.5045 runs/s, 2790.3784 assertions/s.
1) Error:
TestChatBot#test_greeting_message:
NoMethodError: undefined method `greeting_message' for #<ChatBot:0x000055b4ae5a8620 @name="Zigor", @age=21>
test_chat_bot.rb:39:in `test_greeting_message'
4 runs, 3 assertions, 0 failures, 1 errors, 0 skips
so we modify the file chat_bot.rb as shown
# chat_bot.rb
class ChatBot
attr_accessor :age, :name
def greeting_message
"Hello I am #{name} and my age is #{age}. Nice to meet you!"
end
endnow we run the tests, and it passes as shown:
$ ruby test_chat_bot.rb Run options: --seed 16324 # Running: .... Finished in 0.001149s, 3480.2007 runs/s, 3480.2007 assertions/s. 4 runs, 4 assertions, 0 failures, 0 errors, 0 skips
So now we have got an application and a safety net around it, hence its more bug proof.
Design Patterns
Need for Design Patterns
When software began, it was small, computers were low powered and were used for very menial tasks compared to what it’s been used for now, people were happy with small programs which a single person or a closely knit group could maintain. But as computers became more powerful and computers became more complex and projects became vast, structuring of code became an important issue. That’s when design patterns came to light.
Most people reading this book would be a Ruby beginner or an intermediate, but you may need to work in real projects. Even if you have chosen Ruby for your personal project, it better to structure your code well, hence the need for design pattern becomes essential.
30. Observer Pattern
Object-Oriented Programming is modeled after real world. Here objects need to communicate with one another, and other objects need to react when ones object state changes. Let’s say that you have a situation where a object’s state change needs to be propagated to n-number of other objects, those other objects are called observers. How to write a neat and tidy code to notify observers when something changes? Welcome to Observer Pattern.
Take a look at observer.rb, the code listing is shown below
1
2
3
4
5
6
7
8
9
10
11
12
13
14
15
16
17
18
19
20
21
22
23
24
25
26
27
28
29
30
31
# observer.rb
class Person
attr_accessor :name, :status, :observers
def initialize name
@name = name
@observers =[]
end
def set_status status
@status = status
notify_observers
end
def notify_observers
for observer in observers
observer.notify self
end
end
def notify person
puts "#{person.name}: #{person.status} - notified to #{@name}"
end
end
vel = Person.new "Vel"
vel.observers << Person.new("Murugan")
vel.observers << Person.new("Swami")
vel.set_status "Hello All!"
In the code above take a look at these lines
vel = Person.new "Vel"
vel.observers << Person.new("Murugan")
vel.observers << Person.new("Swami")So from the code above we know that there is a person called Vel who is observed by Murugan and Swami. Just imagine a social network where Vel is followed by Murugan and Swami. So we have an attribute called observers in Person, which is nothing but an array that can take in as many observers as possible.
If you look at observer.rb, you will notice that it has been accomplished in these lines
class Person
attr_accessor :name, :status, :observers
def initialize name
@name = name
@observers =[]
end
...
endNext look at this line
vel.set_status "Hello All!"In it we set the status of Vel. When we run the program we get the following output:
Vel: Hello All! - notified to Murugan
Vel: Hello All! - notified to SwamiSo as you can see that the observers have been notified about Vel’s new status. How this was accomplished? If you look at observer.rb, in the method set_status we would have called the method notify_observers, in it the magic happens.
Take a look at notify_observers method
class Person
...
def notify_observers
for observer in observers(1)
observer.notify self(2)
end
end
...
endIn it the following happens
| 1 | We iterate through each observer. |
| 2 | We call notify method in the observer and pass the changed object. |
Since the observers are all the type Person, we have written the notify method in the same class as, take a look at the code below. In it
class Person
...
def notify person(1)
puts "#{person.name}: #{person.status} - notified to #{@name}"(2)
end
end| 1 | notify receives the changed object, in this case as person. |
| 2 | It does something with the changed object. |
So this is how observer pattern works. We have way to store observers, we have a method to notify observers which is called when notification needs to be made, and finally we have a method is observer to receive the changed object. The observer can do what it may wish with the changed object.
| Actually when you are using Ruby, observer pattern is baked right into its standard library. Check this out https://ruby-doc.org/stdlib-2.7.0/libdoc/observer/rdoc/Observable.html |
31. Template Pattern
In template pattern, a class provides a base template, this base template is used by other classes for their intended purpose.
Let’s see an example, look at the code shown below. We have a class called News, this news can be delivered via various mechanisms like text (say SMS), via the web in HTML format, or using json, or using XML.
So to deliver, the class News implements a basic template. It has method called print which prints output of three methods namely header, body and footer. That is, it defines a template saying that when news is to be delivered it must have a header, followed by the body of the news, then followed by the news footer.
Now type and run the program template.rb below.
1
2
3
4
5
6
7
8
9
10
11
12
13
14
15
16
17
18
19
20
21
22
23
24
25
26
27
28
29
30
31
32
33
34
35
36
37
38
39
40
41
42
43
44
45
46
47
48
49
50
51
52
53
54
55
56
57
58
59
60
# template.rb
class News
attr_accessor :title, :content
def initialize title, content
@title = title
@content = content
end
def header
raise "Not Implemented"
end
def body
raise "Not Implemented"
end
def footer
raise "Not Implemented"
end
def print
puts header
puts body
puts footer
end
end
class PlainText < News
def header
"""
*************************
* TODAYS NEWS *
*************************
"""
end
def footer
"""
*************************
* GOODBYE! *
*************************
"""
end
def body
"""
#{title}
=========================
#{content}
"""
end
end
PlainText.new(
"Good Morning!",
"Nice weather today"
).print
Output
*************************
* TODAYS NEWS *
*************************
Good Morning!
=========================
Nice weather today
*************************
* GOODBYE! *
*************************
Now look at the class PlainText, it inherits from News, thus it must implement the pattern defined by News. So all it (PlainText) needs to do is to define the three methods namely header, body and footer. And so it does.
Now to print news in plain text format all we need to do is to initialize an instance of PlainText class, and call print on it. It’s done by the following piece of code
PlainText.new(
"Good Morning!",
"Nice weather today"
).printSo if you see, the template pattern defines a base template or structure, thus bringing about clarity and structure to class that wants to extend it. This may also reduce the coding needed to be done in the derived class.
31.1. Exercise
Why don’t you modify the template pattern code so that we get out an HTML formatted text like this
<html>
<head>
<title>Today's News</title>
</head>
<body>
<h1>Good Morning!</h1>
<p>Nice weather today</p>
</body>
</html>32. Factory Pattern
Imagine a restaurant, it’s actually a food factory. If you need dosa [64] you ask the waiter for it, if you need idiyappam [65] you ask the waiter for it. In essence the restaurant or the food factory has created a common interface called the waiter for you to order anything. You just ask him, he deliverers, and you need not care about how dosa is made or how idiyappam is made.
In programming, you can do the same thing, you can implement a factory class that hides the difficulties of manufacturing an object and provides you with a common interface to make objects. Take a look at the code factory.rb below. Type and run it.
1
2
3
4
5
6
7
8
9
10
11
12
13
14
15
16
17
18
19
20
21
22
23
24
25
26
27
28
29
# factory.rb
class Shape
def draw
puts "In instance of #{self.class}"
end
end
class Square < Shape
end
class Circle < Shape
end
class ShapeFactory
def get_shape type
case type
when :square then Square.new
when :circle then Circle.new
end
end
end
shape_factory = ShapeFactory.new
square = shape_factory.get_shape :square
circle = shape_factory.get_shape :circle
square.draw
circle.draw
Output:
In instance of Square
In instance of CircleLet’s see how it works. In the code the highlight is this one:
class ShapeFactory
def get_shape type
case type
when :square then Square.new
when :circle then Circle.new
end
end
endWe have a class named ShapeFactory which provides a common interface to make objects via the function get_shape. To this get_shape we pass what type of object we want it to create, and it creates it. Since this is just an example, the factory pattern here looks like its making the code complicated than simpler to the programmer, but in real life creation of an object could be very complex, and if factory classes can hide the complexity, then the life of programmer using it to build his software will become simple.
32.1. Exercise
Imagine you are writing a software for a game and you need to create enemy objects like tank, helicopter, missile launcher, infantry and so on. Write a factory pattern where when you call Enemy.random returns a random enemy object.
33. Decorator Pattern
Decorator pattern allows an object to be extended on the fly. For this section we would like the reader to read about SimpleDelegator here https://docs.ruby-lang.org/en/2.7.0/SimpleDelegator.html. In fact, we have taken the example in this book right from the Ruby documentation.
Take a look at the program below, type it and execute it.
# decorator.rb
class User
def born_on
Time.new(1989, 9, 10)
end
end
class UserDecorator < SimpleDelegator
def birth_year
born_on.year
end
end
decorated_user = UserDecorator.new(User.new)
puts decorated_user.birth_year
puts decorated_user.__getobj__
puts decorated_user.classOutput
1989 #<User:0x00005592d8d63470> UserDecorator
Now let’s see how it works. First we have a class called User and it has a function called born_on which returns a Time object of when the user is born. Let’s say that we just want to add a feature that just returns the birth year, we could go and modify the original class User and add a function birth_year that just returns the year of birth, or we can use a decorator to extend the capabilities of User.
Take a look at this piece of code
class UserDecorator < SimpleDelegator
def birth_year
born_on.year
end
endHere we create a class named UserDecorator that inherits from SimpleDelegator which is a built-in Ruby features that helps us to build decorators. In it, we write a function called birth_year that returns just the year of birth.
Now all we need to do to extend User with UserDecorator using this statement
decorated_user = UserDecorator.new(User.new)In this statement the decorated_user is a instance of UserDecorator, but it has got all methods of User as well as UserDecorator. So calling decorated_user.birth_year works fine. In theory, we have extended the capability of User class without messing up with it.
34. Adapter Pattern
Adapter pattern is one in which a class can be made to adapt for various needs. Let’s say that we have a class called Animal, and depending on the way it must adapt, if it needs to behave like a dog, then it needs to say "woof!"; if it needs to behave like a cat, it must say "meow!" and so on. Then we can write a code as shown below:
# without_adapter.rb
class Animal
def speak(kind)
puts case kind
when :dog then "woof!"
when :cat then "meow!"
when :owl then "hoo!"
end
end
end
Animal.new.speak(:dog)Output
woof!
But thinking deep, is that code good? Each time I need to make this animal behave like a new one, I need to change the Animal class. What if I had written the Animal class in such a way that it can be made to change its behavior without changing its origin l code? Welcome to the Adapter pattern.
Now look at the code animal.rb below. Let me not explain it now, but lets skip to its implementation
# animal.rb
class Animal
module Adapter
module Dog
def self.speak
puts "woof!"
end
end
module Cat
def self.speak
puts "meow!"
end
end
end
def speak
self.adapter.speak
end
def adapter
return @adapter if @adapter
self.adapter = :dog
@adapter
end
def adapter=(adapter)
@adapter = Animal::Adapter.const_get(adapter.to_s.capitalize)
end
endSo in the below program adapter.rb, we have used the class Anaimal that was written in animal.rb
# adapter.rb
require_relative "animal.rb"
animal = Animal.new
animal.speak
animal.adapter = :cat
animal.speakOutput
woof! meow!
Here we first call animal.speak to which it prints woof!, next we tell it to adapt like a cat by commanding animal.adapter = :cat and we call animal.speak once again, and it prints meow. Well how this works.
Now let’s analyze the code in animal.rb. Here we have a class called Animal and in it, we have got a function to set the adapter as shown
def adapter=(adapter)
@adapter = Animal::Adapter.const_get(adapter.to_s.capitalize)
endWhen we pass the name of the adapter as a Symbol, notice the code adapter.to_s.capitalize, say if we pass it as :cat, it gets converted to Cat, which is nothing but name of a module in Animal::Adapter. This gets loaded into the @adapter as we get the constant in Animal::Adapter.const_get(….)`[66] statement. So we have set the `@adapter.
Now let’s see how this Animal class calls the corresponding speak method depending on what ever adapter we have set. Let’s assume that @adapter is loaded with the constant Animal::Adapter::Cat, now in function
def adapter
return @adapter if @adapter
self.adapter = :dog
@adapter
endIn return @adapter if @adapter the constant gets returned. So in statement animal.speak that follows after animal.adapter = :cat, it will load the speak function in Animal::Adapter::Cat. Hence, when its called, it returns meow!.
Now the advantage of coding class Animal in such way is we can extend it to different animals without modifying the original class. In other words it can be made to adapt to new situations. See the code below in adapter_2.rb. We have put a new module named Owl in Animal::Adapter, and when we set the adapter as owl using animal.adapter = :cat and call animal.speak, we get the response as hoo!
# adapter_2.rb
require_relative "animal.rb"
class Animal
module Adapter
module Owl
def self.speak
puts "hoo!"
end
end
end
end
animal = Animal.new
animal.adapter = :owl
animal.speakOutput
hoo!
35. Singleton Pattern
Imagine that you have a party in your house and you are expecting about 20 guests, each guest must enter your house and hence a door is needed for each of them, so you start bashing your walls and start making space for 20 doors. Doesn’t it sound crazy? Don’t you think just one door would serve this purpose?
Let’s say that you want to have access to database in your Ruby program. You can write a class to connect to it and return the result. Let’s say that your program is making 10 simultaneous connections to the database, then do you think it’s logical to replicate database username, password and the querying program to be present in 10 places on your computer RAM? or do you think its efficient to have it in just one place, and it can be used by all?
Welcome to Singleton pattern, in it no matter what, a singleton object when created even a million times, it is stored in just one place in your computer RAM, thus saving computer space.
Let’s look at a very simple example. Below we have a program called multiton.rb. Type it and execute it.
# multiton.rb
class Multiton
end
puts Multiton.new.object_id
puts Multiton.new.object_idOutput
47002601799540 47002601799360
In the above program we are creating two instances of the class Multiton and we are querying for its object_id. If the both the instances occupy the same location in RAM, then we would have got the same object id both the time, but we see its different, so they occupy two different spaces in the RAM.
Take a look at the program singleton_example.rb. Type it and execute it.
# singleton_example.rb
require 'singleton'
class SingletonExample
include Singleton
end
puts SingletonExample.instance.object_id
puts SingletonExample.instance.object_idOutput
47257803517040 47257803517040
In the above program, we have a class called SingletonExample and in it, we call this statement include Singleton, this makes the class a Singleton. (For this note that in the start of the program we have written require 'singleton', yes Ruby has got its baked in singleton library.) That is, it does not create copies of itself in the computer RAM even if its initialized many times. In fact, we cannot call any new method on this class. To prove that it just occupies one slot in RAM, we call it twice and print the object id using this statement puts SingletonExample.instance.object_id, here we create two instances of the singleton class, and it returns the same object id, proving it does not replicate itself in various location in RAM and hence a singleton.
36. Composite Pattern
Take a look at the code boiling_egg.rb below. Type and execute it
1
2
3
4
5
6
7
8
9
10
11
12
13
14
15
16
17
18
19
20
21
22
23
24
25
26
27
28
29
30
31
32
33
34
35
36
37
38
39
40
41
42
43
44
45
46
47
48
49
50
51
52
53
54
55
56
57
58
59
60
require_relative "node.rb"
class BuyEggs < Node
attr_accessor :time_in_minutes
def initialize
@time_in_minutes = 15
super "Buy eggs"
end
end
class BoilEggs < Node
attr_accessor :time_in_minutes
def initialize
@time_in_minutes = 10
super "Boil eggs"
end
end
class PeelEggs < Node
attr_accessor :time_in_minutes
def initialize
@time_in_minutes = 3
super "Peel eggs"
end
end
class ServeEggs < Node
attr_accessor :time_in_minutes
def initialize
@time_in_minutes = 2
super "Serve eggs"
end
end
class BoiledEggs < Node
def initialize
super "Boiled eggs"
add_child BuyEggs.new
add_child BoilEggs.new
add_child PeelEggs.new
add_child ServeEggs.new
end
def total_time_in_minutes
total = 0
for child in self.children
total += child.time_in_minutes
end
total
end
end
boiled_eggs = BoiledEggs.new
puts "Time (in minutes) to make boiled eggs is #{boiled_eggs.total_time_in_minutes}."
Output
Time (in minutes) to make boiled eggs is 30.
In Composite Pattern, we divide a Class into many Classes. Say if boiling eggs need to represented in a Object Oriented way, we may write BoiledEggs as a class as shown below.
class BoiledEggs < Node
def initialize
super "Boiled eggs"
add_child BuyEggs.new
add_child BoilEggs.new
add_child PeelEggs.new
add_child ServeEggs.new
end
def total_time_in_minutes
total = 0
for child in self.children
total += child.time_in_minutes
end
total
end
endBoiledEggs inherits a class called Node which helps is to build a tree structure. Le’ts see about the Node class later. Let’s now concentrate on composite pattern. As you can see in the initialize method, in this class BoiledEggs is partitioned into many class classes namely BuyEggs to ServeEggs, and they have been added as child nodes to BoiledEggs.
If you can see the class BuyEggs its like this:
class BuyEggs < Node
attr_accessor :time_in_minutes
def initialize
@time_in_minutes = 15
super "Buy eggs"
end
endIf you see the class ServeEggs, it’s like this:
class ServeEggs < Node
attr_accessor :time_in_minutes
def initialize
@time_in_minutes = 2
super "Serve eggs"
end
endIn fact, it looks very similar to BuyEggs, and hence these classes can be treated similarly. So it’s like this BoiledEggs composes of different objects which can be treated similarly.
Now each class in BoiledEggs have a time_in_minutes attribute. Hence, if we need to can calculate total time in minutes for making boiled eggs, all we need to do is to write a function total_time_in_minutes as shown
class BoiledEggs < Node
...
def total_time_in_minutes
total = 0
for child in self.children
total += child.time_in_minutes
end
total
end
endSo Composite pattern can be employed in places where there is a complex object, whose functionality can be broken into smaller objects, these smaller objects can be treated in very similar fashion, and these smaller objects are placed in a tree structure.
Talking about tree structure, we have built a class called Node which can be found in file node.rb. You can see it below.
1
2
3
4
5
6
7
8
9
10
11
12
13
14
15
16
17
18
class Node
attr_accessor :name, :parent, :children
def initialize name = "node"
@name = name
@parent = nil
@children = []
end
def to_s
"<Node: #{@name}, id: #{self.object_id}>"
end
def add_child node
children << node
node.parent = self
end
end
It has a function called add_child with which we can add child elements. You can get parent of a node with parent function. To see how this node class works, take a look at the code composite.rb below:
1
2
3
4
5
6
7
8
9
10
11
12
13
14
15
16
17
18
# composite.rb
require_relative "node.rb"
n1 = Node.new "n1"
n2 = Node.new "n2"
n3 = Node.new "n3"
n1.add_child n2
n1.add_child n3
puts "children of #{n1} are:"
for node in n1.children
puts node
end
puts
puts "Parent of #{n3} is #{n3.parent}"
Output
children of <Node: n1, id: 47253445808700> are: <Node: n2, id: 47253445808560> <Node: n3, id: 47253445808360> Parent of <Node: n3, id: 47253445808360> is <Node: n1, id: 47253445808700>
37. Builder Pattern
Let’s say that you are writing a piece of software for a computer maker whose website offers very high degree of customization. A computer can have lots of parts that can be varied, so there are a lot of combinations. So rather than put all these code in just one single huge computer class, we create a class called builder, in this case we create a class called ComputerBuilder, which takes on the task of creating a customized computer and possibly eases the creation or build process too.
Let’s say that we need different types of CPU’s to build a computer, for that we write three types of CPU classes as shown below in cpus.rb.
1
2
3
4
5
6
7
8
9
10
11
class CPU
# cpu stuff...
end
class BasicCPU < CPU
# basic cpu stuff...
end
class TurboCPU < CPU
# trubo fast cpu stuff...
end
Computers may need drives, we write a class for it too, if you see the code drive.rb below, for the drive, we have provided a class, along with an initializer which we can use to customize it to a degree.
1
2
3
4
5
6
7
8
9
class Drive
attr_reader :type, :size, :writable
def initialize(type, size, writable)
@type = type
@size = size
@writable = writable
end
end
Similarly, below we have coded for the mother board in motherboard.rb.
1
2
3
4
5
6
7
8
class Motherboard
attr_accessor :cpu, :memory_size
def initialize(cpu = BasicCPU.new, memory_size = 1000)
@cpu = cpu
@memory_size = memory_size
end
end
Now lets look at the Computer class (in computer.rb), this is very similar to class Drive and Motherboard. Our aim is to understand the builder pattern, so lets move on.
1
2
3
4
5
6
7
8
9
class Computer
attr_accessor :display, :motherboard, :drives
def initialize(display = :crt, motherboard = Motherboard.new, drives = [])
@display = display
@motherboard = motherboard
@drives = drives
end
end
Let’s now analyze the hero of this section, the ComputerBuilder class. Go through the code below, we will talk about it soon.
1
2
3
4
5
6
7
8
9
10
11
12
13
14
15
16
17
18
19
20
21
22
23
24
25
26
27
28
29
30
31
32
33
34
35
36
37
38
39
40
41
42
43
44
45
46
47
48
49
class ComputerBuilder
attr_reader :computer
def initialize
@computer = Computer.new
end
def turbo(_has_turbo_cpu = true)
@computer.motherboard.cpu = TurboCPU.new
end
def display(display)
@computer.display = display
end
def memory_size(size_in_mb)
@computer.motherboard.memory_size = size_in_mb
end
def add_cd(writable = false)
@computer.drives << Drive.new(:cd, 760, writable)
end
def add_dvd(writable = false)
@computer.drives << Drive.new(:dvd, 4700, writable)
end
def add_hard_disk(size_in_mb)
@computer.drives << Drive.new(:hard_disk, size_in_mb, true)
end
def method_missing(name, *args)
words = name.to_s.split('_')
return super(name, *args) unless words.shift == 'add'
words.each do |word|
next if word == 'and'
add_cd if word == 'cd'
add_dvd if word == 'dvd'
add_hard_disk(100_000) if word == 'harddisk'
turbo if word == 'turbo'
end
end
def computer
raise 'Not enough memory.' if @computer.motherboard.memory_size < 250
raise 'Too many drives.' if @computer.drives.size > 4
@computer
end
end
In the program above we do have initialize method in line 4, but if you look at line 44, in method computer is where the Computer instance is returned. In that very same function if you see we have code to raise exceptions if there aren’t enough memory, or if too many disks are added to computer. So this is another advantage of the Builder Pattern where you can prevent a complex object getting built if it does not satisfy certain criteria.
In the builder you have methods like display, memory_size, and a function called turbo to set parameters for display, memory and the type of CPU. We also have functions like add_cd, add_dvd and add_hard_disk, to add these things to the computer we are building it.
Now lets look at the program that brings all together. Take a look at the program main.rb below, type it or copy-paste and execute it.
1
2
3
4
5
6
7
8
9
10
11
12
13
14
15
16
17
18
19
20
21
22
23
24
25
26
27
28
29
30
31
32
33
34
35
36
37
38
39
40
41
42
43
44
45
46
47
require_relative 'cpus'
require_relative 'drive'
require_relative 'motherboard'
require_relative 'computer'
require_relative 'computer_builder'
builder = ComputerBuilder.new
builder.turbo
builder.display(:lcd)
builder.add_cd
builder.add_dvd(true)
builder.add_hard_disk(100_000)
# manufacture 10 computers using the builder
computers = []
10.times { computers << builder.computer.clone }
computers.each { |computer| puts computer }
# computer must have at least 250 MB of memory
builder = ComputerBuilder.new
builder.memory_size(249)
begin
builder.computer
rescue Exception => e
puts e.message
end
# computer must have at most 4 drives
builder = ComputerBuilder.new
builder.add_cd
builder.add_dvd
builder.add_hard_disk(1000)
builder.add_cd
builder.add_dvd
begin
builder.computer
rescue Exception => e
puts e.message
end
# use magic method to rapidly build a computer
puts 'Computer built with magic method builder'
builder = ComputerBuilder.new
builder.add_cd_and_dvd_and_harddisk_and_turbo
computer = builder.computer
puts "CPU: #{computer.motherboard.cpu.class}"
computer.drives.each { |drive| puts "Drive: #{drive.type}" }
Output
#<Computer:0x0000564155728610> #<Computer:0x0000564155728598> #<Computer:0x0000564155728570> #<Computer:0x0000564155728548> #<Computer:0x0000564155728520> #<Computer:0x00005641557284f8> #<Computer:0x00005641557284d0> #<Computer:0x00005641557284a8> #<Computer:0x0000564155728430> #<Computer:0x0000564155728408> Not enough memory. Too many drives. Computer built with magic method builder CPU: TurboCPU Drive: cd Drive: dvd Drive: hard_disk
Now lets see how it works. From lines 1-5:
require_relative 'cpus'
require_relative 'drive'
require_relative 'motherboard'
require_relative 'computer'
require_relative 'computer_builder'We require the necessary files for this program to work. In the following lines shown below we create a ComputerBuilder instance called builder which has a turbo CPU, LCD, has one CD player, has a writable DVD and a hard disk of 100,000 megabytes:
builder = ComputerBuilder.new
builder.turbo
builder.display(:lcd)
builder.add_cd
builder.add_dvd(true)
builder.add_hard_disk(100_000)Now using this builder, we can clone[67] it to create any number of computers. In the code below we create 10 computer clones and print them
# manufacture 10 computers using the builder
computers = []
10.times { computers << builder.computer.clone }
computers.each { |computer| puts computer }| Imagine you are writing a game, and you need to create tens of objects, this pattern will be handy. |
Now lets test the code that will raise exception if the memory is low. Look at the code below
# computer must have at least 250 MB of memory
builder = ComputerBuilder.new
builder.memory_size(249)
begin
builder.computer
rescue Exception => e
puts e.message
endIn the code above we create a computer builder in builder = ComputerBuilder.new, next we deliberately assign low memory in this line builder.memory_size(249), in the begin end block we try to create a Computer instance from the builder using builder.computer and it sure raises an exception which is caught and printed out by this puts e.message statement under rescue. In the output we would have got this message:
Not enough memory.
Similarly, we try to build a computer having five drives, that is 2 CD’s, 2 DVD’s and 1 Hard Disk. We have limited maximum number of drives to 4, in ComputerBuilder class, so the code snippet below will raise an error:
# computer must have at most 4 drives
builder = ComputerBuilder.new
builder.add_cd
builder.add_dvd
builder.add_hard_disk(1000)
builder.add_cd
builder.add_dvd
begin
builder.computer
rescue Exception => e
puts e.message
endThis error is caught and printed and hence we get the following output:
Too many drives.
37.1. Exercise
You now know about builder patter. If you like to explore further, take a look at the code below
# use magic method to rapidly build a computer
puts 'Computer built with magic method builder'
builder = ComputerBuilder.new
builder.add_cd_and_dvd_and_harddisk_and_turbo
computer = builder.computer
puts "CPU: #{computer.motherboard.cpu.class}"
computer.drives.each { |drive| puts "Drive: #{drive.type}" }This code produces the following output
Computer built with magic method builder CPU: TurboCPU Drive: cd Drive: dvd Drive: hard_disk
Now in ComputerBuilder class take a look at the method_missing method, and try to explain how this builder.add_cd_and_dvd_and_harddisk_and_turbo statement works.
38. Strategy Pattern
Whether you realize or not you are a good strategist. When you wake up in the morning, you look up for a drink of coffee, when coffee powder is not available you might settle for a tea or hot chocolate or milk. You drive to work or school, if a way is blocked you take the other way. At your work you need to think the way you need to present to your boss, whether your boss is in a good mood or not so that you can speak about fact or mask it up. Strategy is everywhere, you just don’t notice it. You keep adopting new strategy every time depending on the environment [68].
In the world of computing if we can tell a piece of code to run different algorithms on the fly depending on the flag / parameters passed, then this type of coding is called strategy pattern. Let’s take a look at the example strategy_pattern.rb below:
1
2
3
4
5
6
7
8
9
10
11
12
13
14
15
16
17
18
19
20
21
22
23
24
25
26
27
28
29
30
31
32
33
34
35
36
37
38
39
40
41
42
43
44
45
# strategy_pattern.rb
module NewsFormatter
class Text
def self.format(data)
seperator = "\n* "
seperator + data.join(seperator)
end
end
class HTML
def self.format(data)
html = []
html << "<ul>"
data.each { |datum| html << "<li>#{datum}</li>" }
html << "</ul>"
html.join "\n"
end
end
end
class NewsGenerator
def self.generate(data, formatter)
formatter.format(data)
end
end
news = [
"You are reading I Love Ruby.",
"There is water down below in the oceans.",
"There is air up above our heads.",
"Even people in space report their is air up above their heads.",
"Even bald people have air up above their heads."
]
puts "News As HTML:"
puts "\n"
puts NewsGenerator.generate(news, NewsFormatter::HTML)
puts "\n\n"
puts "News As Text:"
puts "\n"
puts NewsGenerator.generate(news, NewsFormatter::Text)
puts "\n\n"
Type it and execute it:
Output
News As HTML: <ul> <li>You are reading I Love Ruby.</li> <li>There is water down below in the oceans.</li> <li>There is air up above our heads.</li> <li>Even people in space report their is air up above their heads.</li> <li>Even bald people have air up above their heads.</li> </ul> News As Text: * You are reading I Love Ruby. * There is water down below in the oceans. * There is air up above our heads. * Even people in space report their is air up above their heads. * Even bald people have air up above their heads.
Lets now analyze the code. Look at these lines (29-35):
news = [
"You are reading I Love Ruby.",
"There is water down below in the oceans.",
"There is air up above our heads.",
"Even people in space report their is air up above their heads.",
"Even bald people have air up above their heads."
]Here we declare an array called news, and fill it with news items.
Then in line 39, we have this statement puts NewsGenerator.generate(news, NewsFormatter::HTML), which prints out this:
<ul> <li>You are reading I Love Ruby.</li> <li>There is water down below in the oceans.</li> <li>There is air up above our heads.</li> <li>Even people in space report their is air up above their heads.</li> <li>Even bald people have air up above their heads.</li> </ul>
Notice that to the generate method in NewsGenerator class, we gives two arguments as input, the first one is the data, in this case the data is the news array which contains list of news. Next argument is NewsFormatter::HTML which is the strategy that is to be followed for printing.
Now look at generate method in line 24, it looks like this:
def self.generate(data, formatter)
formatter.format(data)
endHere we receive the formatter as the second argument, that is in this case its NewsFormatter::HTML, and we call format method on it passing data into it as argument. So the program control goes to line 12, that is inside module NewsFormatter and into the method self.format in class HTML, tou can see the piece of code here
module NewsFormatter
....
class HTML
def self.format(data)
html = []
html << "<ul>"
data.each { |datum| html << "<li>#{datum}</li>" }
html << "</ul>"
html.join "\n"
end
end
endIn that function we magically transform it into HTML unordered list [69], and return it out.
The same stuff happens when we call puts NewsGenerator.generate(news, NewsFormatter::Text), but since we passed different strategy NewsFormatter::Text, this piece of code gets executed:
module NewsFormatter
class Text
def self.format(data)
seperator = "\n* "
seperator + data.join(seperator)
end
end
....
endThat is function self.format in class Text in module NewsFormatter gets called, this one produces a plain text output like bullet points, and hence you see this output:
* You are reading I Love Ruby. * There is water down below in the oceans. * There is air up above our heads. * Even people in space report their is air up above their heads. * Even bald people have air up above their heads.